 Sprout
TABLE OF CONTENTS
- Overview of email notifications
- Configure agent notifications
- Configure requester notifications
- Configure CC notifications
- Configure templates
- Disable email notifications
- Using email notifications with automation
Email notifications keep your agents and customers informed about ticket activity. This article explains how to access, configure, and customize the different email notification types available in Freshdesk.
Prerequisites:
Before configuring email notifications, make sure you have the following permissions and requirements:
- Administrator access to your Freshdesk account.
- Set up a verified support email address.
- Pro or Enterprise plan for multi-language notifications.
Overview of email notifications
In Freshdesk, you can send automatic email notifications to agents and requesters when specific ticket events occur. These notifications ensure that everyone associated with the ticket is informed without any manual follow-up.
For example, you can notify customers when agents add comments or public notes to their tickets and also include a link to the ticket.
Tip: Email notifications are triggered automatically based on ticket events. However, to perform more advanced actions, such as updating fields, assigning tickets, or sending conditional emails, use automations.
Access email notifications
To access and configure different types of email notifications, follow these steps:
- Go to Admin > Workflows > Email Notifications.
- The different categories of email notification templates are:
- Agent notifications: Notifies agents about new tickets, replies, assignments, and SLA breaches. For configuration steps, see Configure agent notifications.
- Requester notifications: Notifies customers about status changes and agent responses. For configuration steps, see Configure requester notifications.
- CC notifications: Notify CC'd users when an agent creates a ticket or adds a public note. For configuration steps, see Configure CC notifications.
Note: Additionally, you can configure the default content that pre-populates the agent's reply editor whenever an agent responds to or forwards a ticket. For details, see Configure templates.
Common settings for all notification types
For each notification type, you can configure the following settings:
- Turn the notification on or off using the toggle.
- Edit the subject line and message body in the rich text editor, or select </> to switch to raw HTML for advanced formatting.
- Configure templates in multiple languages. When editing translations, the ⚠️ icon indicates that a translated version may be outdated and should be reviewed.
For more details on setting up multi-language notifications, see Configure multi-language email notifications. - Select Reset to last saved content to discard unsaved changes and restore the last saved version.
- Select Preview to see how the email will appear to the recipient before you save it.
Note: If your account has multiple support email addresses, all notifications are sent from the primary email address. Also, failure notifications related to email configuration are sent to the account administrator.
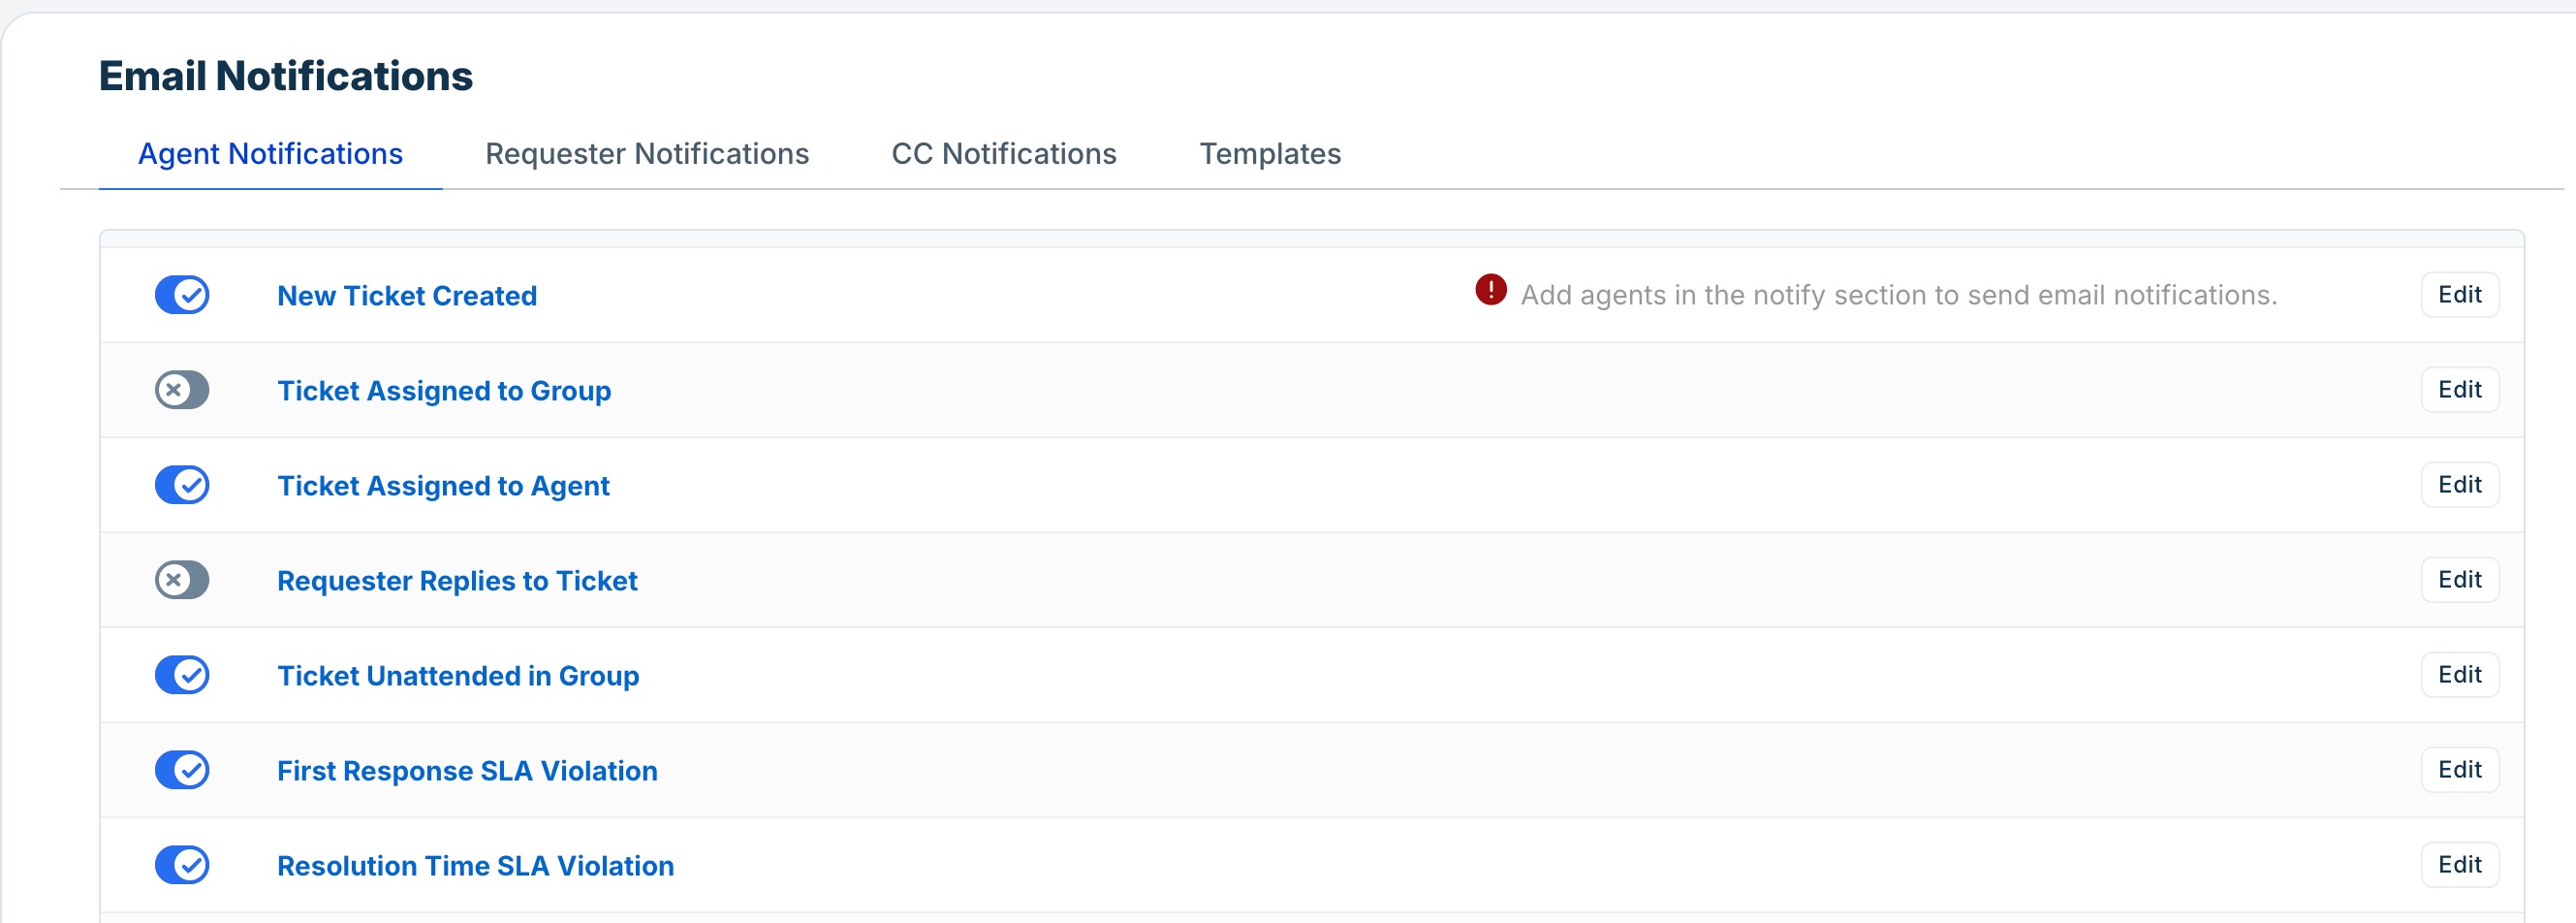
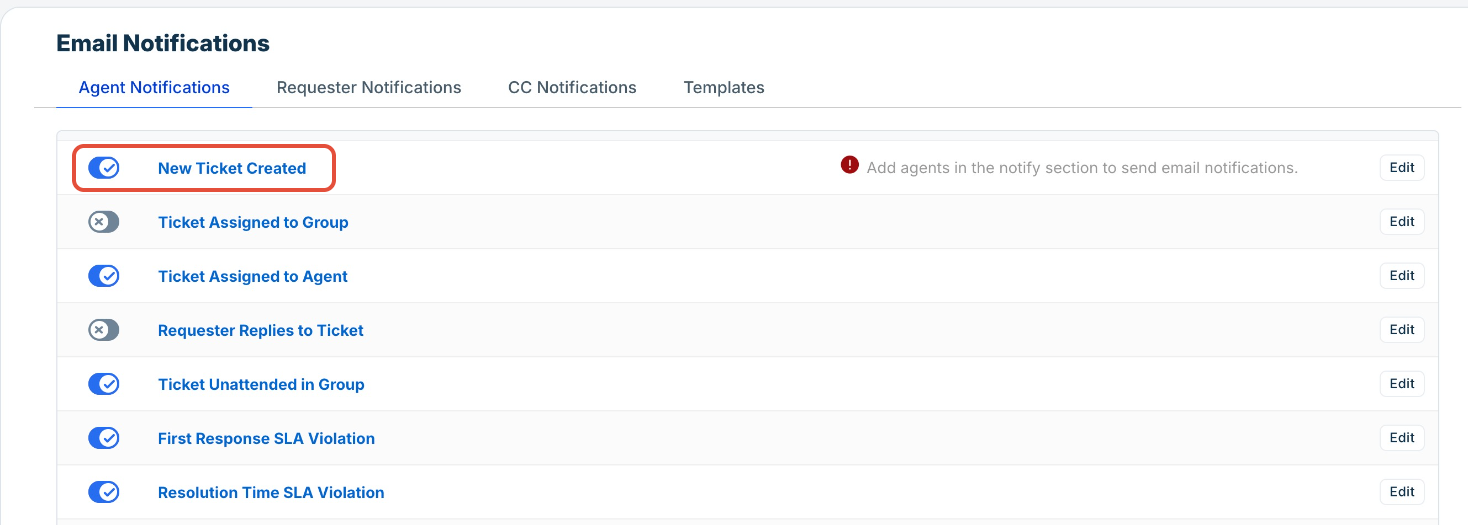
Configure agent notifications
Agent notifications inform agents about ticket events in their account. You can turn each notification type on or off and customize the email templates.
Note: Notification settings apply to all agents and cannot be configured for individual users. The New ticket created notification is an exception, as you can specify recipients using the Notify agents field. You can also use automation rules to send notifications to specific agents based on your business requirements.
To configure agent notifications, follow these steps:
- Go to Admin > Workflows > Email Notifications.
- Click Agent Notifications.
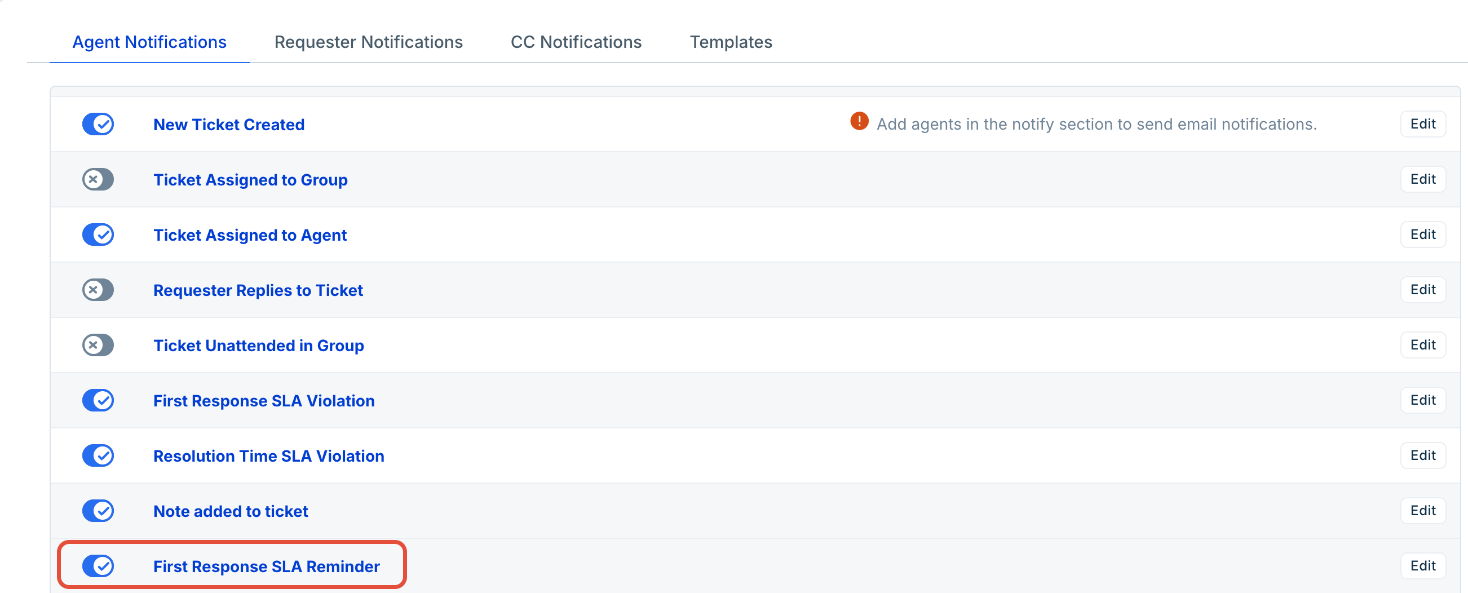
 To improve clarity, the notification events are grouped into notifications for ticket activity, SLA events, and collaboration. In Freshdesk, all of these notifications are available together under the Agent Notifications tab.
Notifications to monitor ticket activity
These notifications keep agents informed about ticket creation, assignment, replies, and unattended tickets.
Event | Description |
New ticket created | Sends a notification to the agents listed in the Notify agents field when a new ticket is created. If no agents are specified, no notification is sent, even if notifications are enabled. |
Ticket assigned to group | Sends a notification to all agents in the assigned group when a ticket is routed to that group. This notification is disabled by default. Note: Use this notification carefully for large groups, as every group member receives the email. |
Ticket assigned to agent | Sends a notification to an agent when a ticket is assigned to them. |
Requester replies to ticket | Sends a notification to the assigned agent when the requester replies to an existing ticket. This notification is disabled by default. |
Ticket unattended in group | Sends a notification when a ticket remains unattended in a group for longer than the duration configured in Group settings. You can use the {{elapsed_time}} placeholder to display how long the ticket has been waiting. |
Notifications for SLA events
These notifications help agents stay on top of SLA commitments by sending reminders before a deadline and alerts when an SLA target is breached.
Note: SLA notifications are available only on the Pro plan and above. Notifications are sent only when an active SLA policy is configured.
Event | Description |
First response SLA reminder | Sends a notification to the assigned agent before the first response SLA deadline, allowing them to respond before a breach occurs. |
First response SLA violation | Sends a notification to the assigned agent when the first response SLA target is breached. |
Next response SLA reminder | Sends a notification to the assigned agent before the next response SLA deadline. |
Next response SLA violation | Sends a notification to the assigned agent when the next response SLA target is breached. |
Resolution time SLA reminder | Sends a notification to the assigned agent before the ticket's resolution due time. |
Resolution time SLA violation | Sends a notification to the assigned agent when the resolution SLA target is breached. |
Note: Reminders and violations work as a pair — the reminder gives the agent a chance to act before the deadline, and the violation creates a record if they do not. It is recommended to have both enabled simultaneously for all SLA types.
Notifications for collaboration
These notifications help agents collaborate with teammates by notifying them about notes, threads, and mentions.
Event | Description |
Note added to ticket | Sends a notification to the agents listed in the Notify agents field when a note is added to a ticket. Tip: Tag internal collaborators in a note to notify them without assigning the ticket. |
New threads on my tickets | Sends a notification to the assigned agent and ticket watchers when a new thread is created on one of their tickets. |
New replies on my thread | Sends a notification to the assigned agent, ticket watchers, and tagged users when someone replies to a thread. |
Threads I am tagged in | Sends a notification when an agent is mentioned in a thread. |
Use case: notify agents when a new ticket is created
The support team wants all agents in the Billing group to receive an email whenever a new billing ticket is created.
To do this, you can set up the New Ticket Created agent notification as follows:
- Go to Admin > Workflows > Email Notifications.
- Select the Agent Notifications tab.
- Click New Ticket Created or Edit next to the notification.
- Edit the subject line and message as needed.
- In the Notify Agents section, add the agents who should receive this notification. For example, all agents in the Billing group.
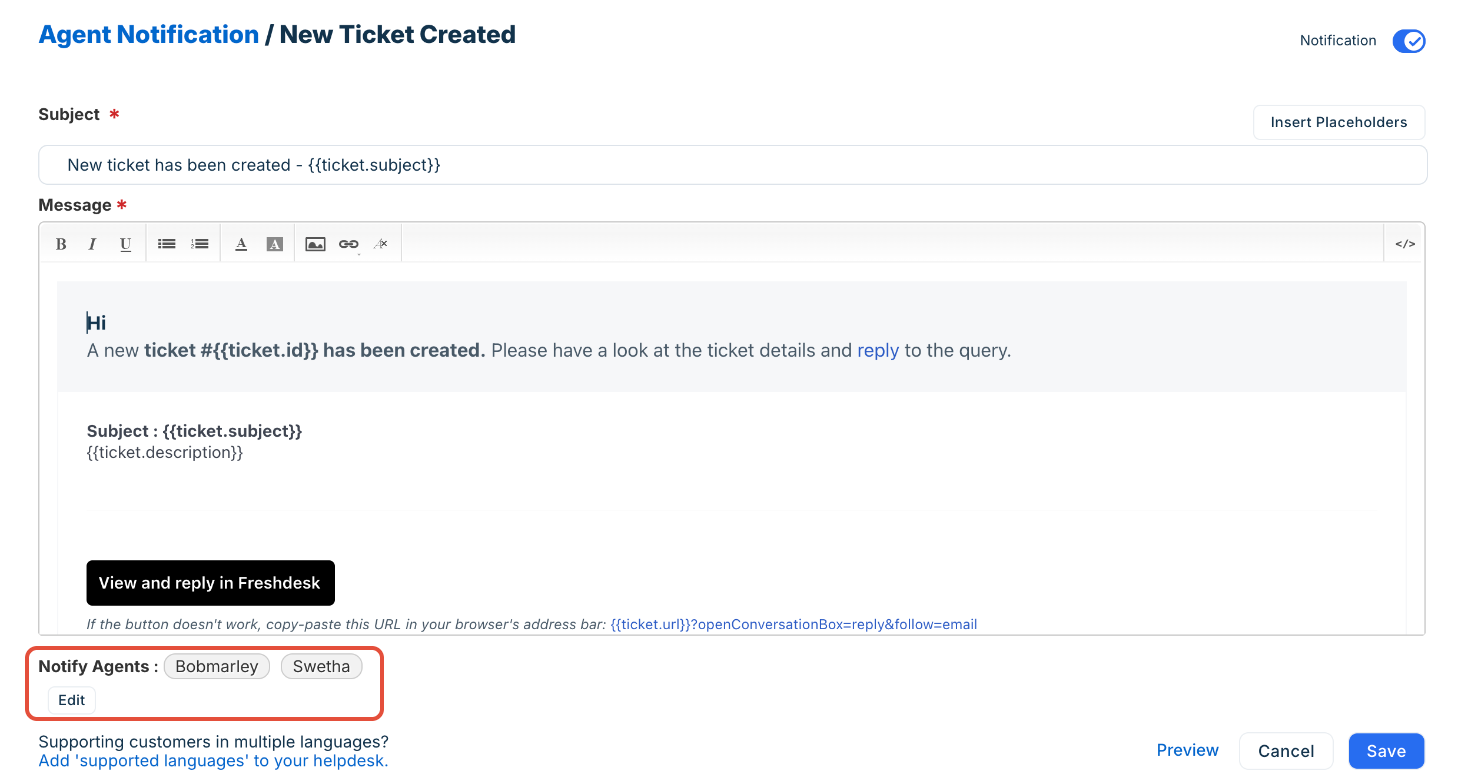
- Use placeholders such as {{ticket.id}} and {{public.url}} to include dynamic ticket information.
- Click Save.
- Enable the toggle to activate the notification.
Note: You can add multiple agents only to the new ticket created agent notification. For all other notification types, only the assigned agent on the ticket receives the notification. To notify multiple agents on other event types, set up an automation rule.
Use case: alert agents before an SLA is breached
Your team has a 4-hour first-response SLA. You want agents to receive a reminder 30 minutes before the deadline so they can reply in time and avoid a violation.
Follow these steps to set up email notifications for SLA reminders:
- Go to Admin > Workflows > Email Notifications.
- Select the Agent Notifications tab.
- Confirm that the First Response SLA Reminder is toggled on.
- Click Edit to customize the subject and message body.
- Use placeholders such as {{ticket.id}} and {{ticket.subject}} to give agents direct context.
- Click Save.
Also, confirm that First Response SLA Violation is enabled, so agents are notified if they miss the deadline despite the reminder.
Configure requester notifications
Requester notifications keep customers informed about activity on their ticket from submission through to resolution.
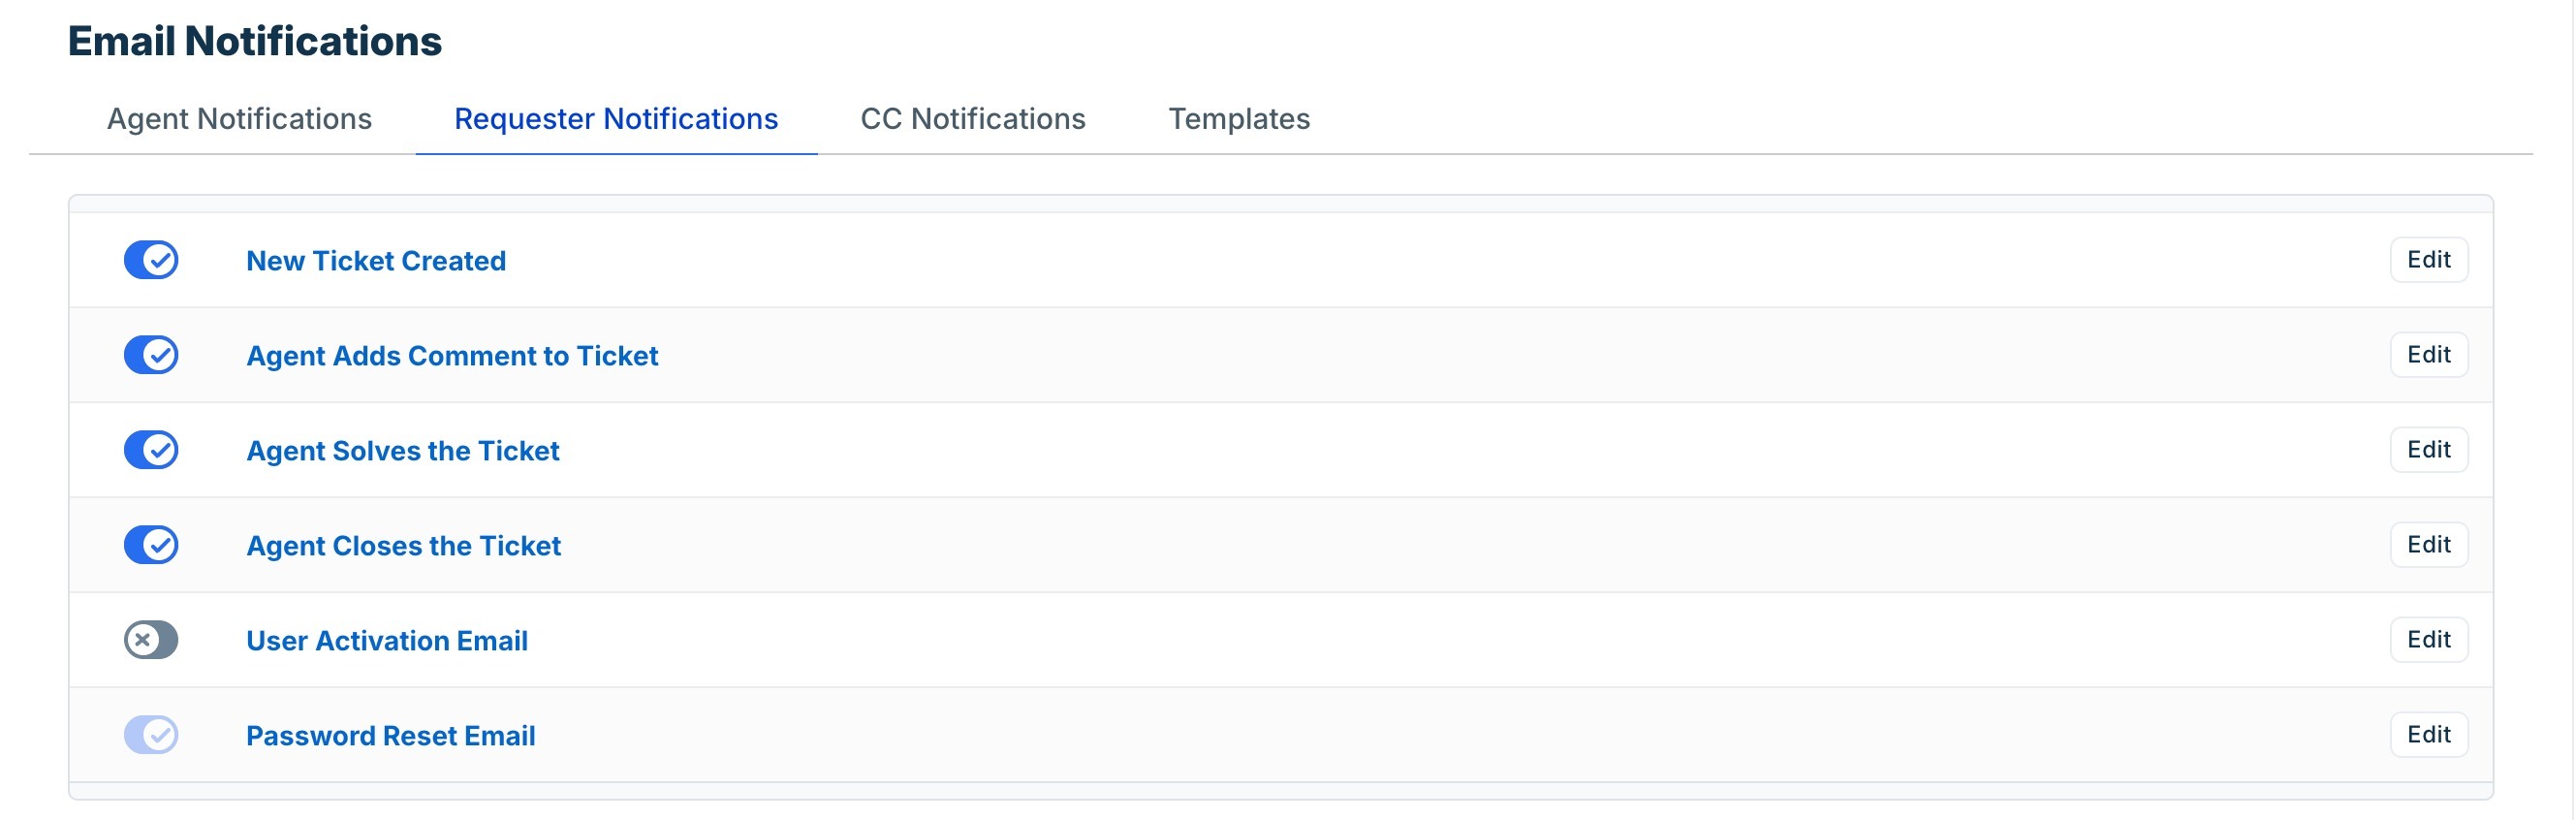
To configure requester notifications, follow these steps:
- Go to Admin > Workflows > Email Notifications.
- Click Requester Notifications.
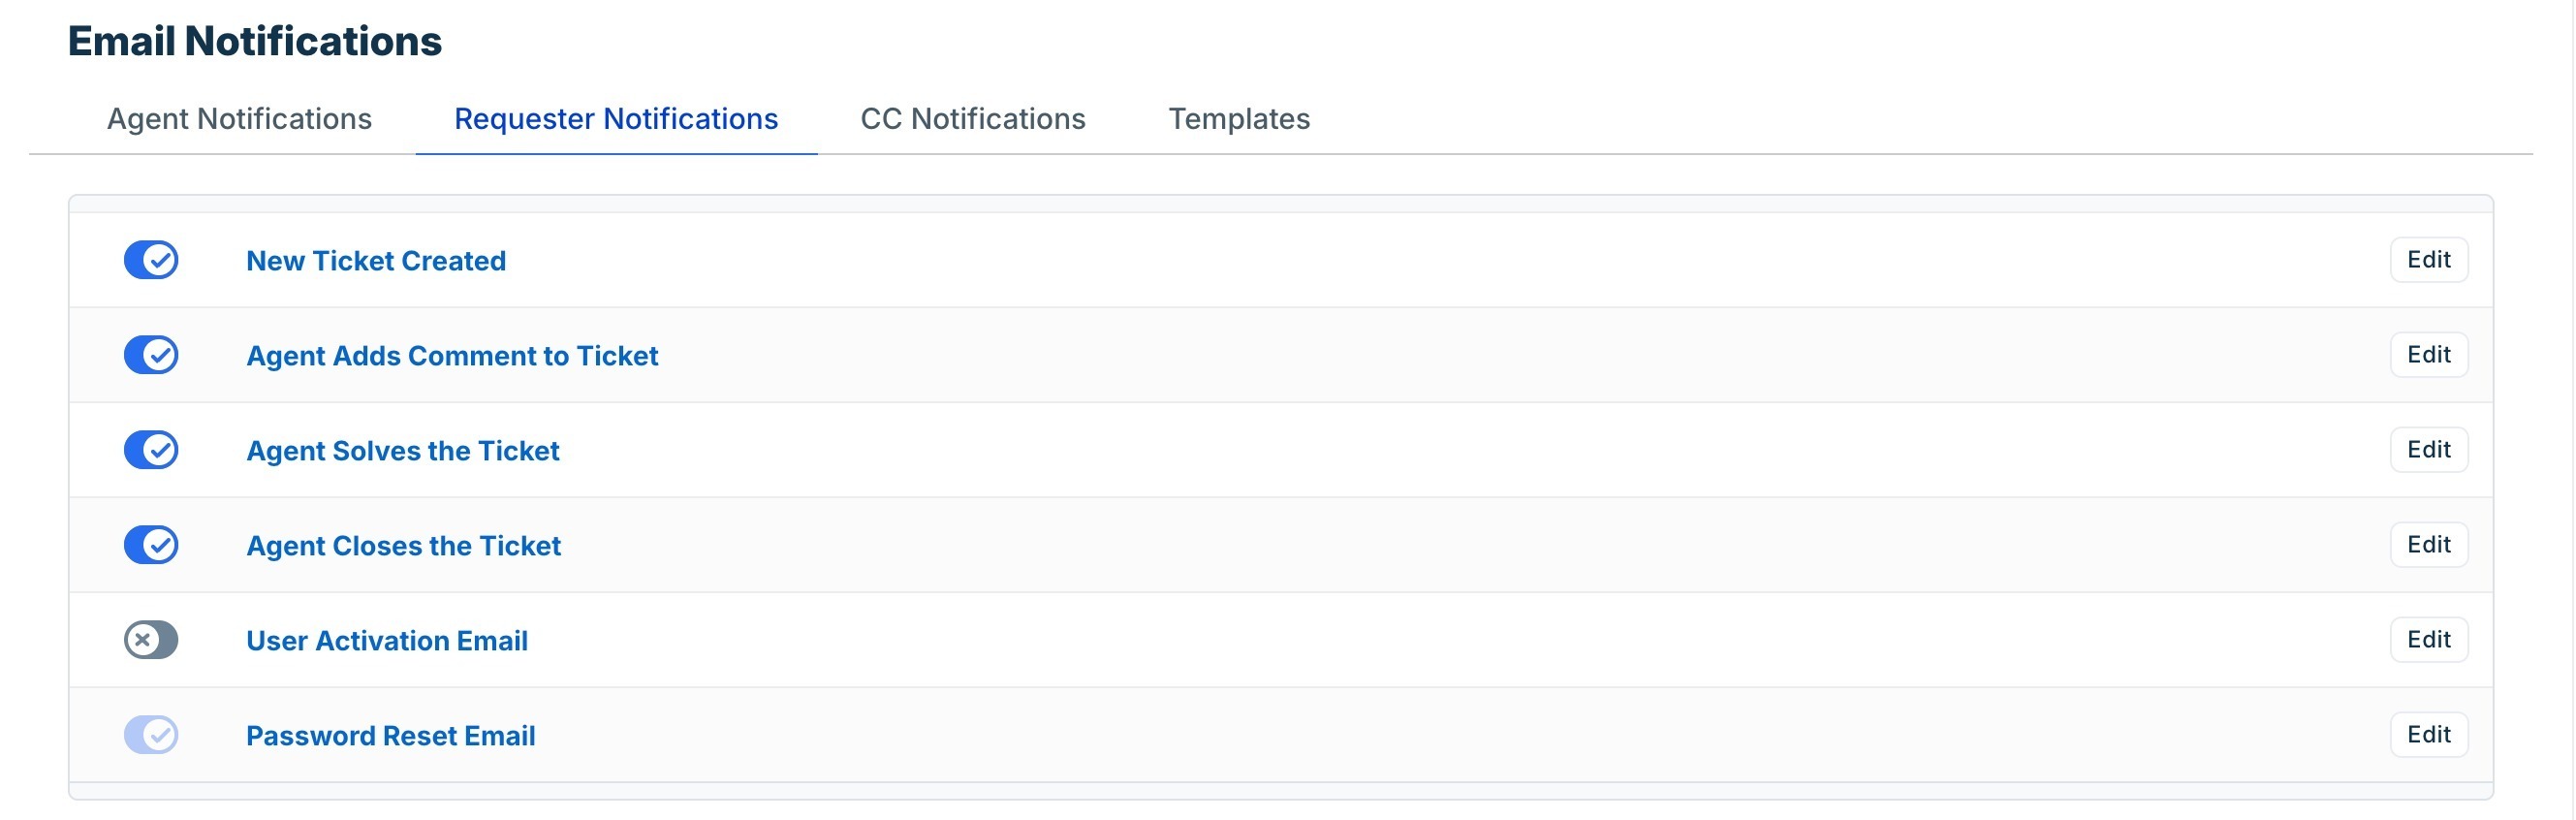
The following table lists the different requester notification events:
Event | Description |
New Ticket Created | Sends a notification to the requester when they submit a ticket. You can use this to set expectations and reduce follow-up emails asking whether the request was received. |
Agent adds comment to ticket | Sends a notification to the requester when an agent adds a public comment. The email includes the comment body, the agent's name, and a direct link to view and respond to the ticket. |
Agent solves the ticket | Sends a notification to the requester when their ticket is resolved. As a best practice, you can include a CSAT survey link or a direct reference to the ticket using {{ticket.url}} in case the customer wants to reopen it. |
Agent closes the ticket | Sends a notification to the requester when their ticket is closed. |
User activation Email | Sends a notification to new customers to activate their Freshdesk account. Disabled by default. Enable this if you use the customer portal. |
Password reset Email | Sends a notification when a requester requests a password reset. |
Note: If you turn off the User activation email notification, customers will not receive an activation email after signing up unless you send it manually from the contact profile. Password reset emails are also affected when this toggle is off.
Use case: send notifications to the requester when an agent solves the ticket
Notify the ticket requester proactively once an agent resolves the ticket, ensuring they are aware their issue has been addressed. For example, you can send CSAT surveys using this event.
- Go to Admin > Workflows > Email Notifications.
- Select the Requester Notifications tab.
- Click Agent solves the ticket or Edit next to the notification.
- Customize the email body. Add placeholders such as {{ticket.id}} and {{public.url}} to give customers a direct reference to their ticket.
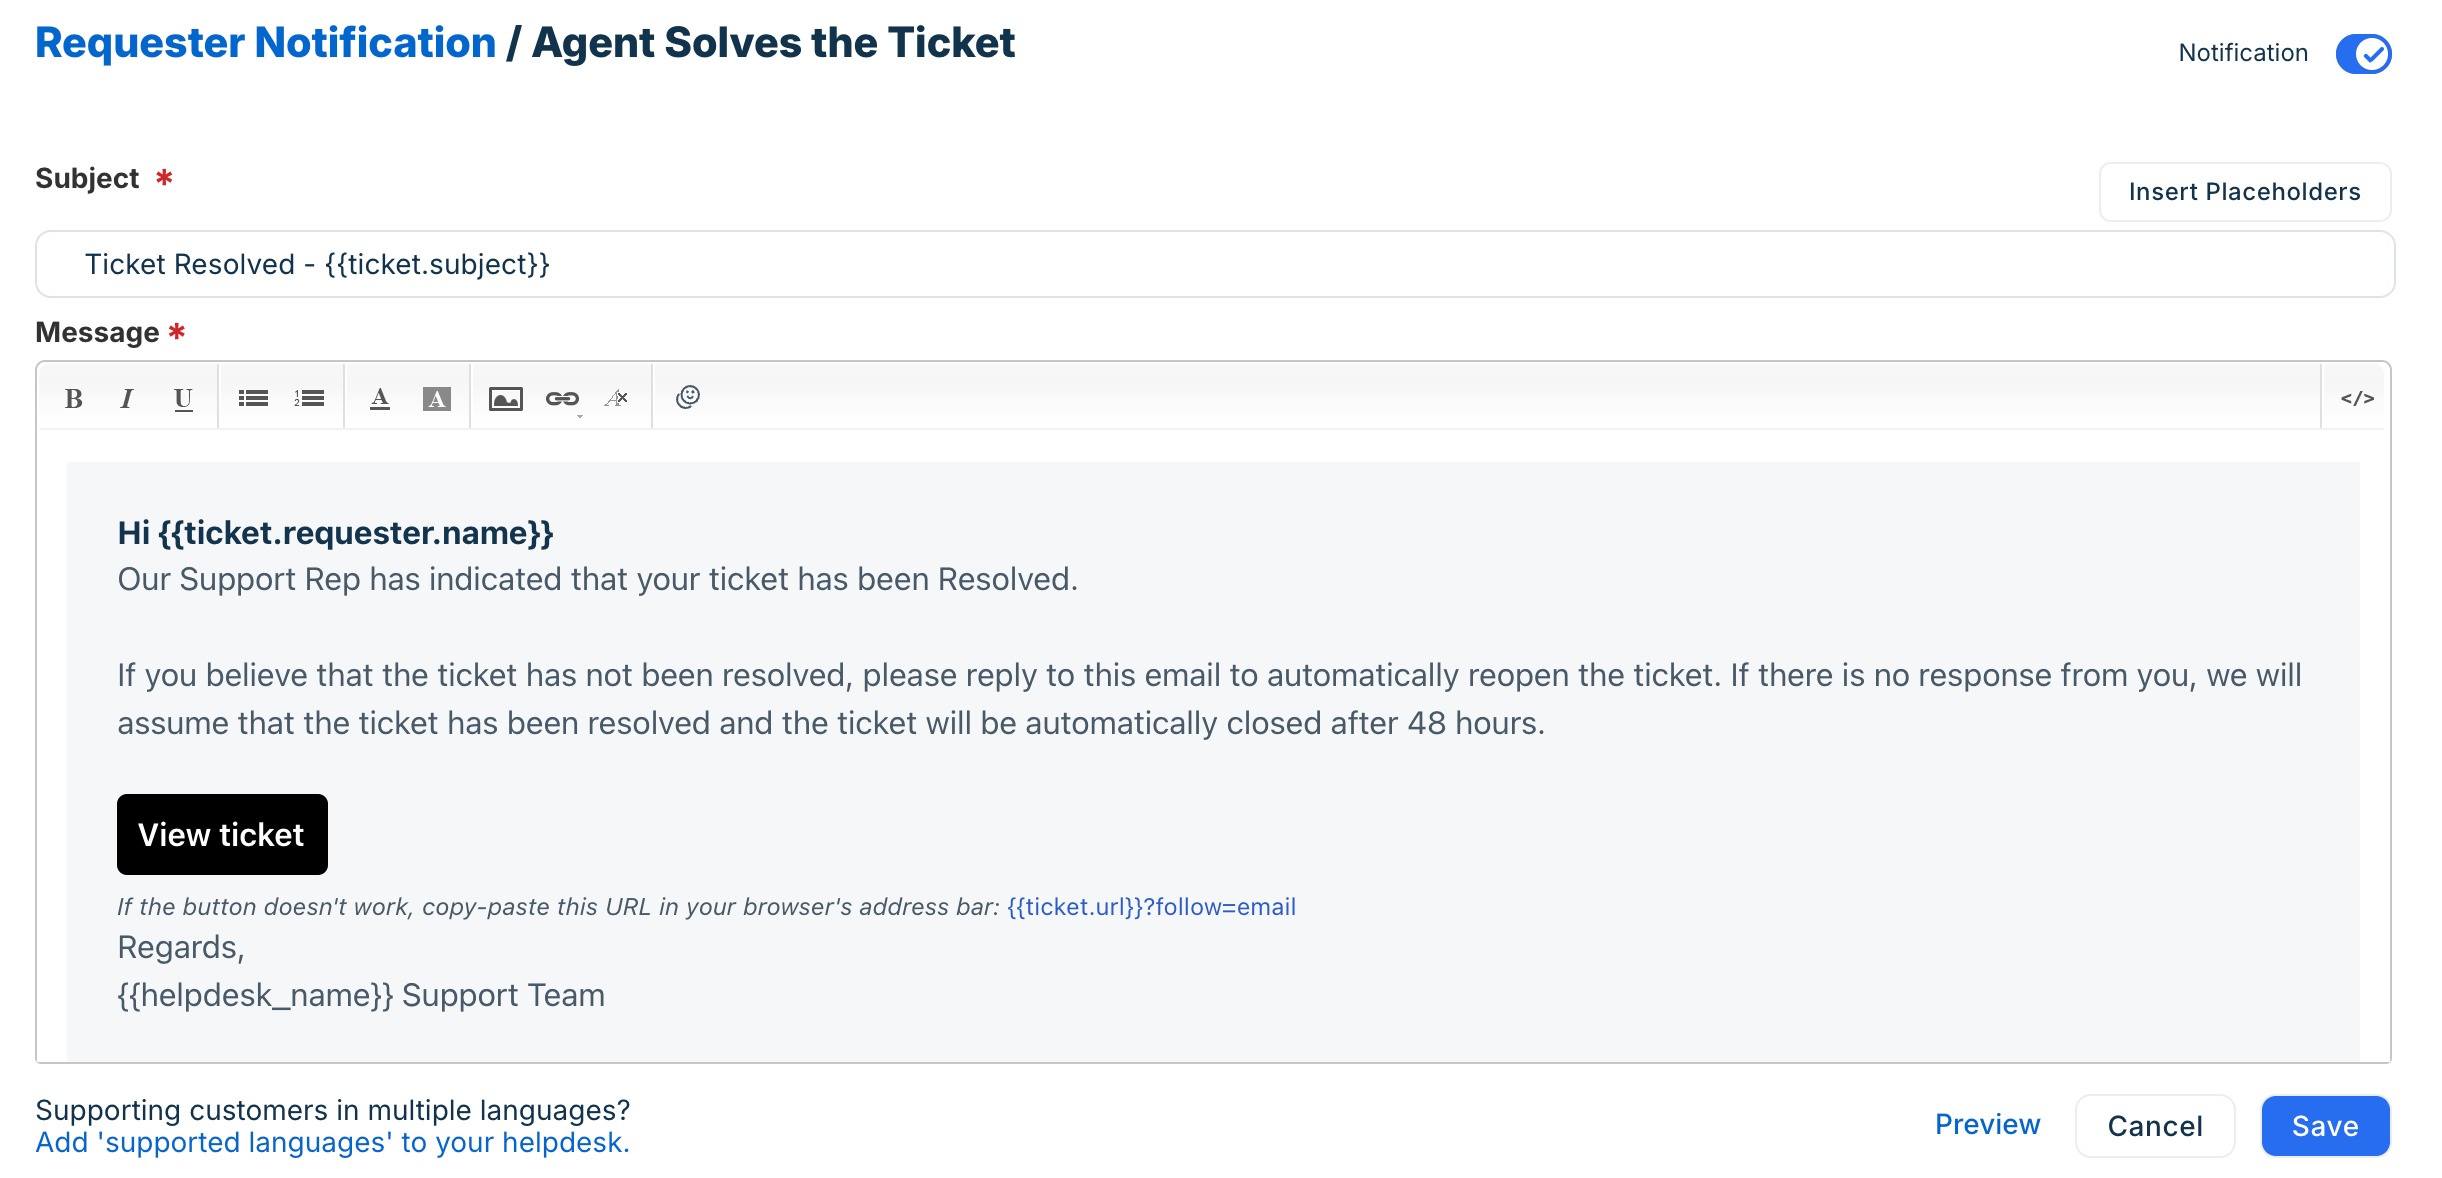
- Click Save.
- Enable the toggle to activate the notification.
Note: If requesters receive duplicate notifications when a new ticket is created, a ticket-creation automation rule may be sending an additional email alongside the default notification.
Open the ticket, click Activities in the top right corner, and check whether an automation rule ran. If the rule includes a Send email to requester action, either remove it or add a Skip new ticket email notification action to prevent the duplicate.
Configure CC notifications
CC notifications are sent to anyone added to the CC field on a ticket. These notifications ensure that stakeholders copied on a ticket are informed about key updates without being directly involved in ticket handling.
When a ticket is created with CC users, they receive the initial notification. The subsequent agent replies are delivered directly as regular emails rather than separate notification triggers. However, whenever a public note is added to the ticket, a notification is sent to all CC’d users regardless of how the ticket was created.
The types of CC notifications you can configure are:
- New ticket created: Sent to users added in the CC field only when an agent creates a ticket for a customer and adds them as CC.
- Note added to the ticket: Sent to everyone in CC when a public note is added.
To configure CC notifications, follow these steps:
- Go to Admin > Workflows > Email Notifications.
- Click CC Notifications.
Use case: notify stakeholders about escalations
Your team manages a critical outage ticket for an enterprise customer. The customer's IT manager is included as a CC. Whenever your agent adds a public update note, the IT manager should receive it automatically.
- Go to Admin > Workflows > Email Notifications.
- Select CC Notifications.

- Click Note added to ticket.
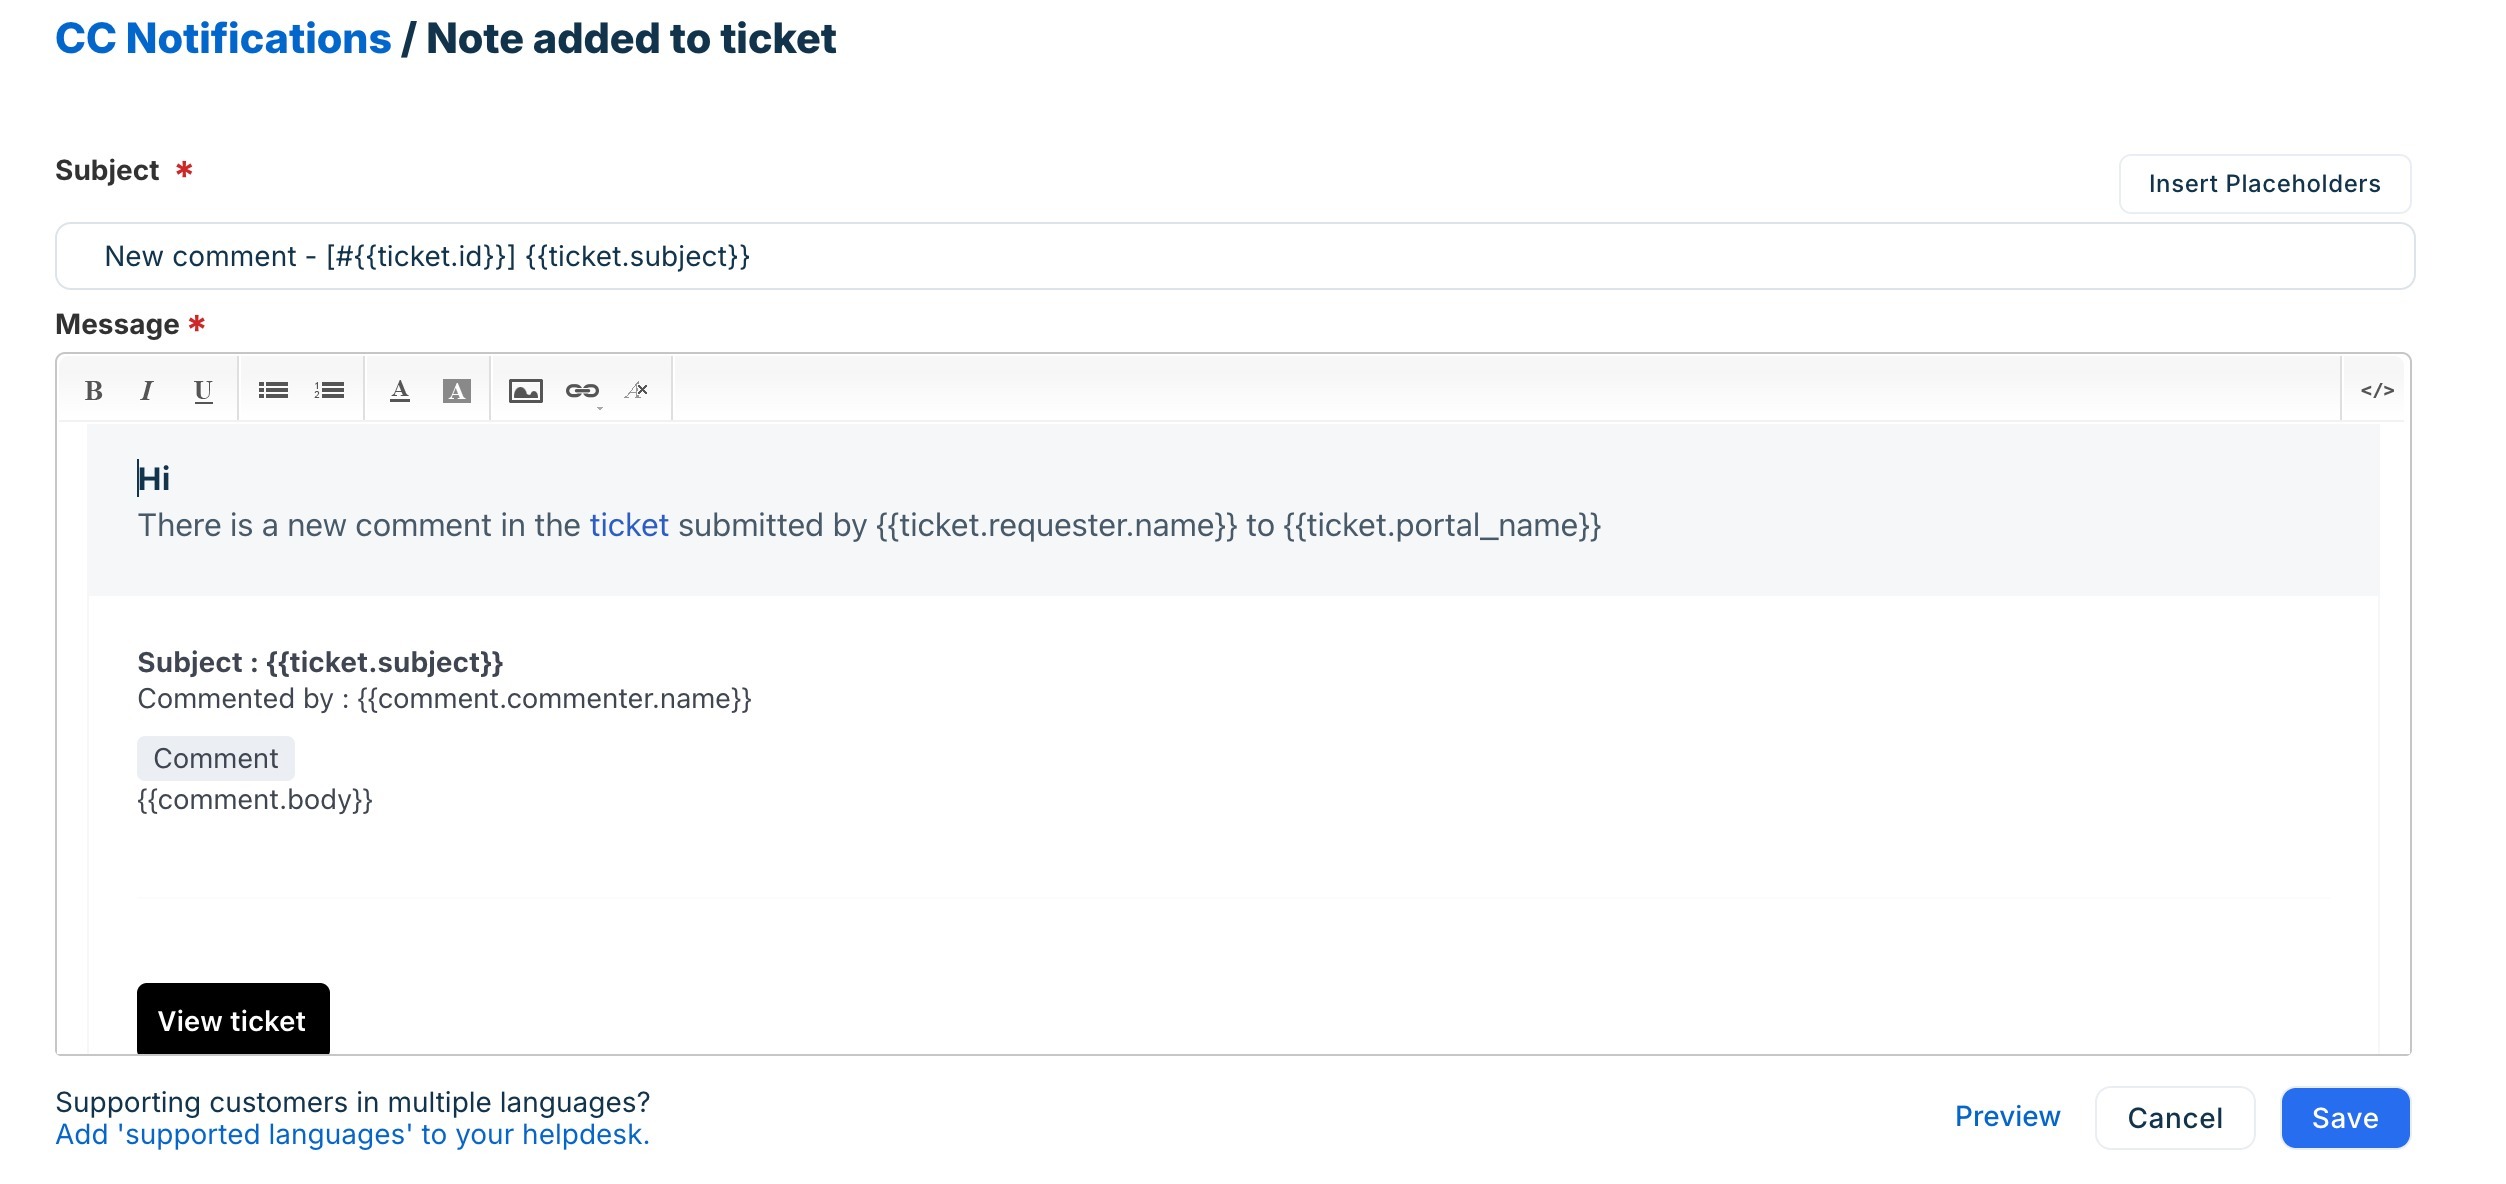
- Review or customize the email template if needed. You can also add placeholders such as {{ticket.id}} and {{ticket.subject}}.
- Click Save.
Configure templates
Templates are different from the notification tabs. They do not trigger automatically based on ticket events. Instead, they define the default content that pre-populates the agent's reply editor whenever an agent responds to or forwards a ticket.
The different types of templates include:
- Agent reply template: Pre-fills the message body when an agent clicks Reply on a ticket. Applies to all agents across your account.
- Agent forward template: Pre-fills the message body when an agent forwards a ticket to a third party, such as a vendor or an internal team outside Freshdesk.
You can customize templates with the following:
- Placeholders: Use {{ticket.requester.name}}, {{ticket.id}}, {{ticket.description}}, and {{ticket.url}} to automatically pull ticket data into the reply.
- Subject line threading: Include [#{{ticket.id}}] in the subject line to ensure email conversations thread correctly when customers reply.
- Global signature: Add a company signature directly in the template body using the rich text editor or HTML. This ensures every agent reply carries consistent branding, contact details, or disclaimers. Individual agents can still set their own personal signatures from their profile settings.
- Cursor position: The position of the cursor in the saved template determines where the agent starts typing when they open a reply. Place the cursor on a new line below your greeting so agents know exactly where to begin.
- Font and formatting: You can set a default font in Helpdesk Settings. Agents can also choose their own font preferences from their profile if permitted.
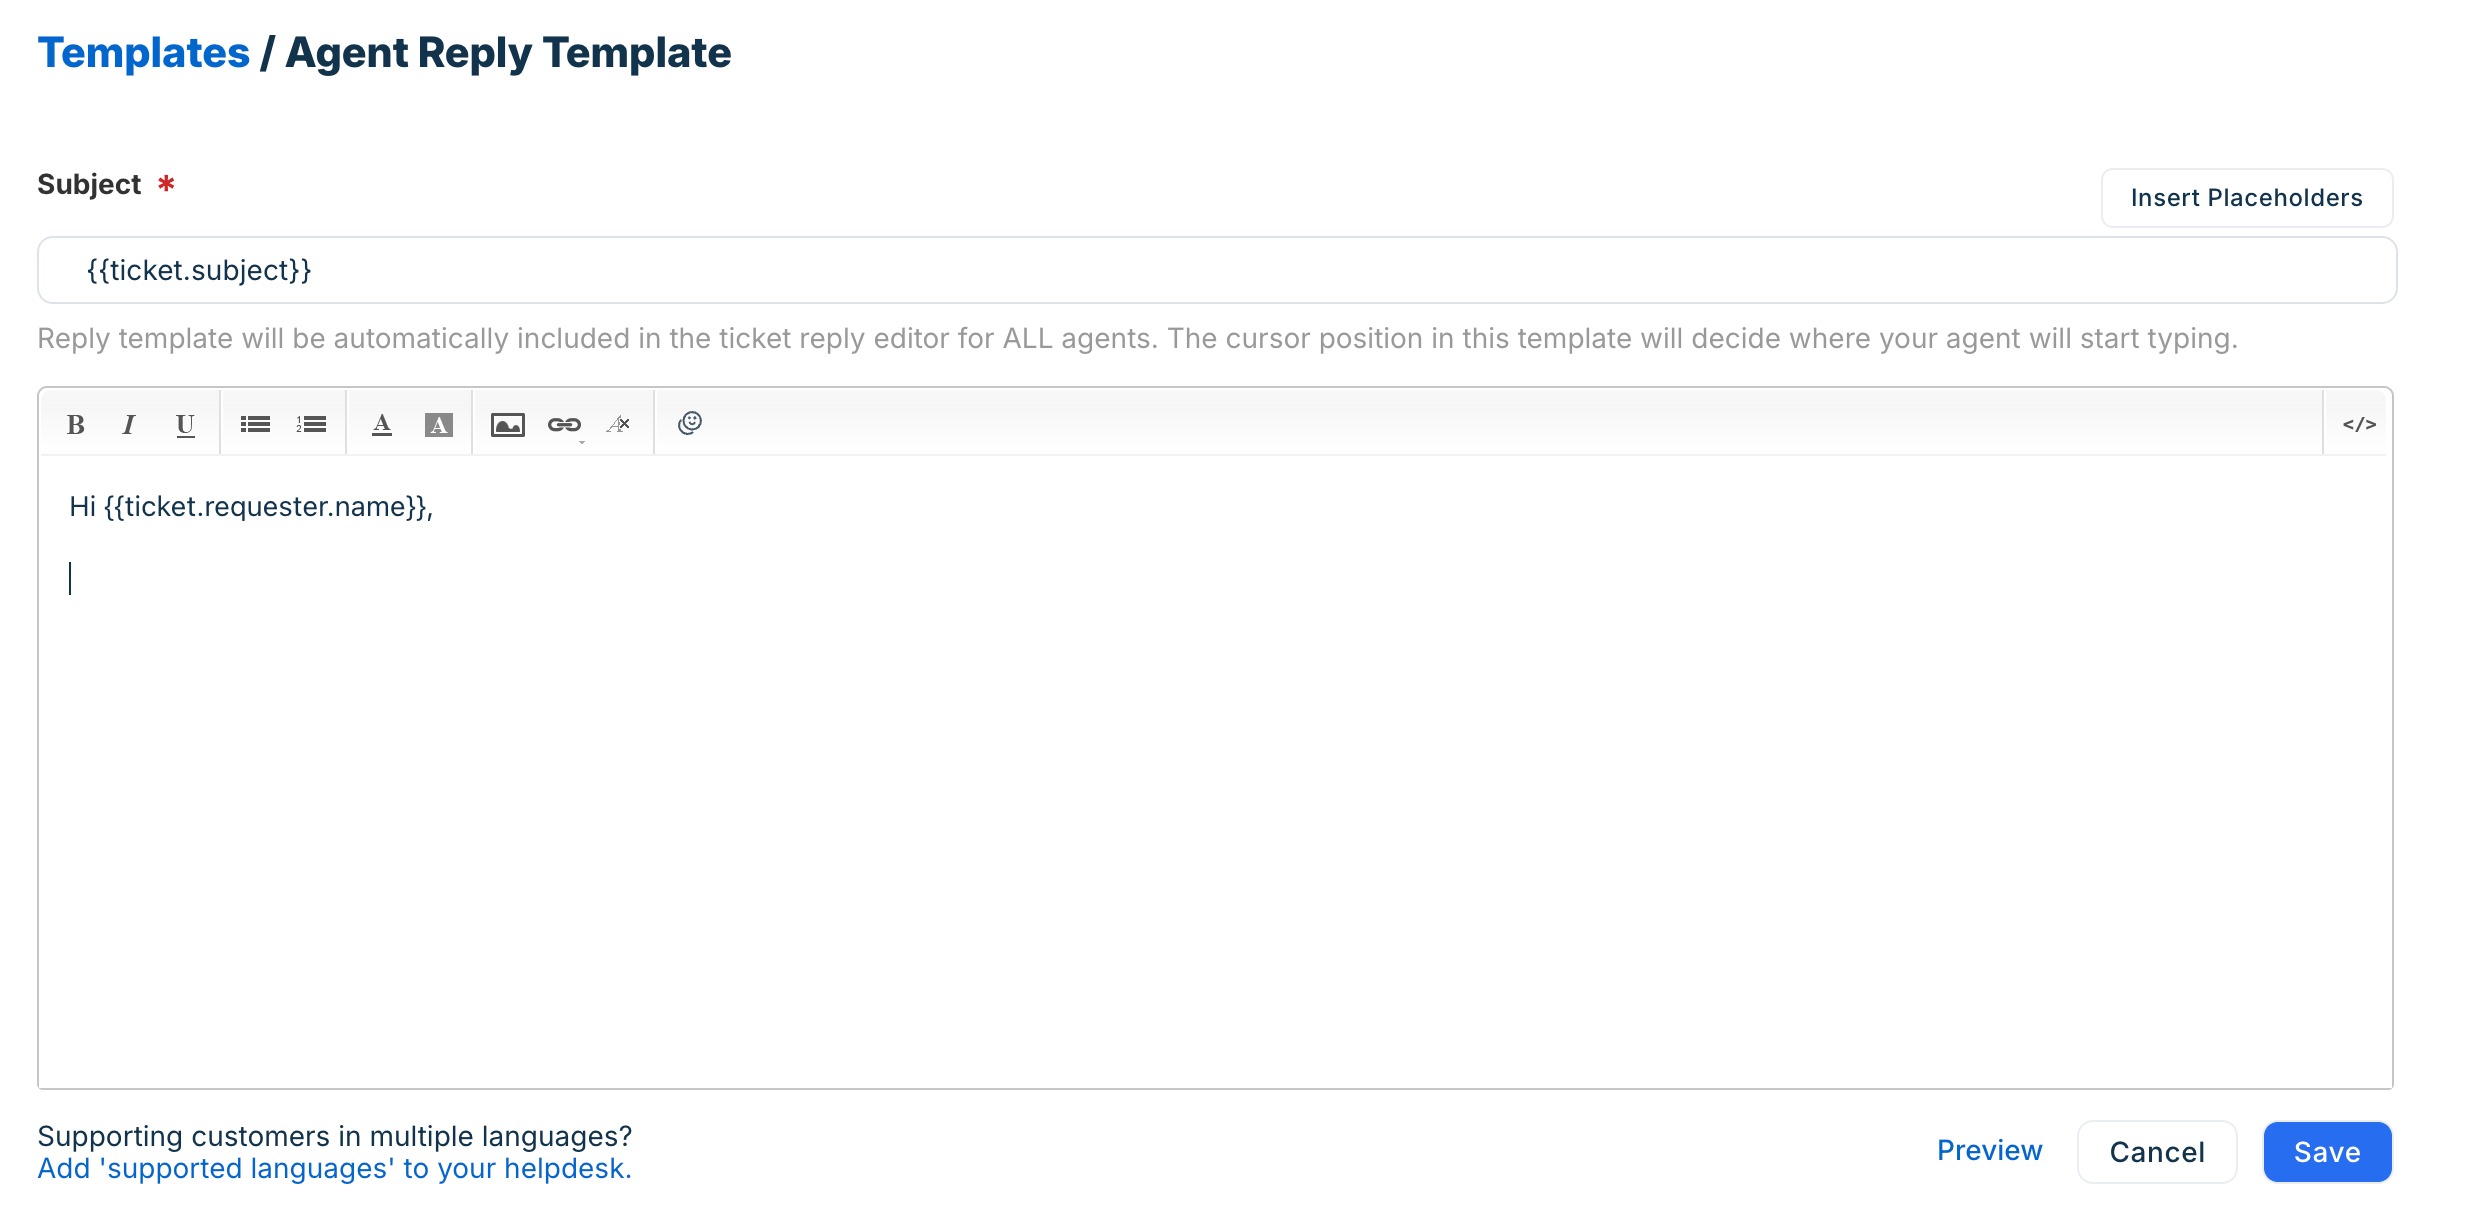
Note: The Agent Reply Template is automatically included in the ticket reply editor for all agents. The cursor position in the template will determine where the agent starts typing.
To update a reply or forward template:
- Go to Admin > Workflows > Email Notifications.
- Select Templates.

- Edit the required agent reply or forward template.
- Click Insert Placeholder to add fields such as Ticket ID. You can also add prefixes to the placeholder. For example, add your product name to all Ticket IDs when replying using [#prefix-{{ticket.id}}].
For more details, see Use dynamic placeholders. - Click Save.
Use case: standardize agent replies with a greeting and signature
You want every agent's reply to open with the customer's first name and close with a standard company sign-off, so no agent forgets either.
- Go to Admin > Workflows > Email Notifications.
- Select the Templates tab.
- Click Edit next to Agent Reply Template.

- In the subject field, enter {{ticket.subject}} or add [#{{ticket.id}}] as a prefix: [#{{ticket.id}}] {{ticket.subject}}.
- In the message body, enter your greeting: Hi {{ticket.requester.name}}.
- Leave a blank line below the greeting. This is where the agent's cursor will land and where they will type their response.
- Below that, add your standard sign-off and any branding or disclaimer text.
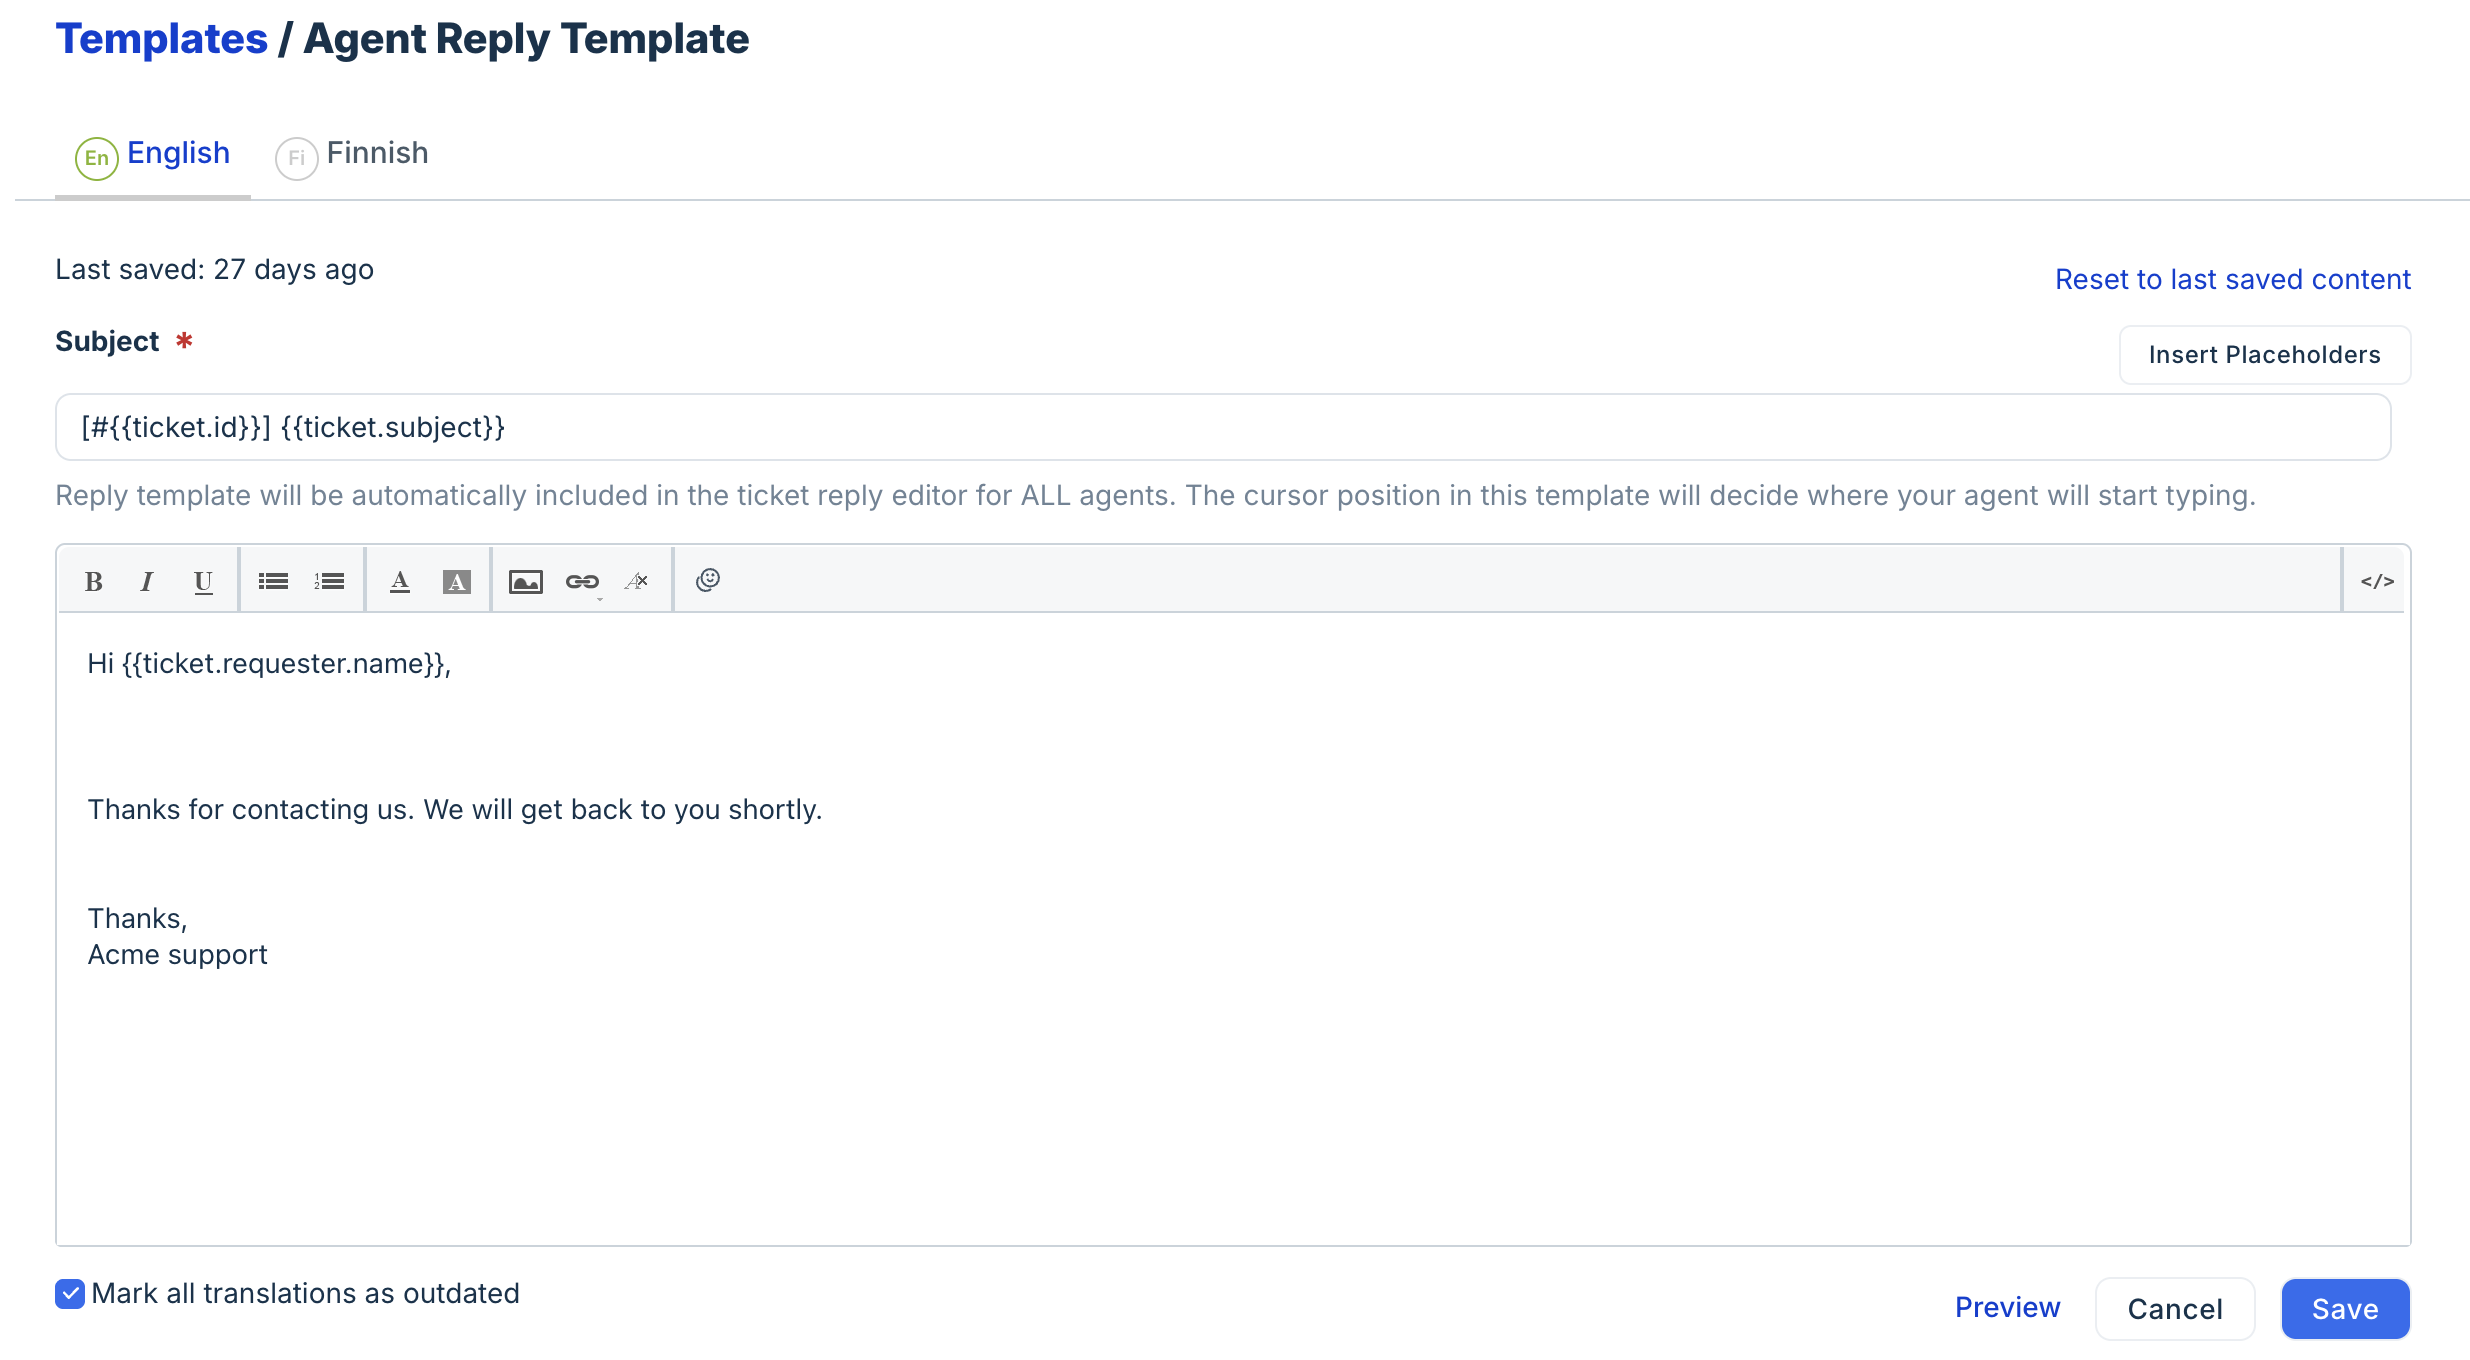
- Click Save.
Disable email notifications
You can disable email notifications anytime whenever they are not required. When a notification is disabled, Freshdesk stops sending emails for that event across your account.
You may want to disable a notification in the following scenarios:
- To prevent duplicate emails when an automation rule sends a customized notification for the same ticket event.
- To notify only specific customers or agents using automation rules instead of the default notification.
- To reduce unnecessary notifications. For example, when agents only need assignment notifications and not updates for ticket creation, notes, or threads.
- To avoid redundant notifications when agents already receive updates through other channels or workflows.
- To stop sending notifications for specific ticket events, such as ticket resolution, closure, or note additions.
Note: If emails continue to be sent after disabling a notification, check your automation rules. An automation may be configured to send a separate email for the same event.
To disable a notification:
- Go to Admin > Workflows > Email Notifications.
- Select the relevant notification category.

- Select the notification type you want to disable and turn the toggle off.
Using email notifications with automation
In addition to email notifications, you can use automation rules to send emails to agents and customers. While notifications apply to all tickets automatically, automations give you more control.
With automations, you can send emails conditionally, target specific recipients, or substitute a notification with a custom message. Understanding which system is responsible for a given email helps you configure, edit, or stop it correctly.
Email notifications | Automation rules |
Apply to all tickets; every ticket triggers the notification with no filtering. | Apply only when conditions are met. With this, you can control and set the rules for who should get the email and when. |
Best for standard, always-on emails. For example, new ticket acknowledgments, assignment alerts, SLA reminders. | Best for targeted or conditional emails. For example specific ticket types, customer segments, or time windows. |
Cannot exclude recipients or apply conditions. | Can exclude specific requesters, filter by email address, priority, source, and more. |
The following sections describe the most common scenarios in which email notifications and automation rules work together, including how to identify which system is sending an email, when to use automations instead of notifications, and how to temporarily switch between the two.
Identify the source of the email notification
When a ticket is created or updated, Freshdesk may send an email from either a notification template or an automation rule. Both can be active at the same time and send emails independently.
This can lead to two common issues:
- You edit a notification template, but the customer still receives the same content, because an automation rule is sending its own email on the same event.
- You receive an email you did not set up, and you cannot find it in Email Notifications because it is triggered by an automation rule rather than a notification template.
To identify the source of an outgoing email, follow these steps:
- Open the relevant ticket in Freshdesk.
- Click Activities in the top-right corner of the ticket.
- Review the log for any automation rule that ran on the ticket. If a rule is triggered, you will see the automation rule name.
In this case, edit or disable the automation rule. You can click on the rule name to go to the Automation Rules page. - If no automation rule appears in the log, it indicates that the email is coming from a notification template. Locate the matching notification type from the Email Notifications page.
Tip: After-hours response emails and business-specific emails (such as return confirmations) are almost always sent by automation rules, not notification templates. Always check Activities first before editing a notification template.
Use automations for conditional or targeted emails
As email notifications apply globally, you cannot filter them by recipient, ticket source, or any other condition. When you need more control over who receives an email or when it is sent, use an automation rule instead of, or in addition to, the notification.
Common scenarios where an automation rule is the right choice:
- Send a notification to specific email addresses:
Use a ticket creation automation rule with the condition "In Tickets > if To email > Is > [email address]" and action send email to group, agent, or requester. - Exclude specific customers from receiving notifications:
In this case, keep the notification enabled and add a ticket creation automation rule with the action Skip new ticket email notifications for the excluded recipients. - Send a business-specific or custom email:
Use a ticket creation automation rule with conditions specific to that ticket type, priority, or time window instead of modifying the global notification template.