
 Community
 Video Library
 Agent Training
 Freshservice
 Freshdesk
 Freshchat
 Freshcaller
 Freshsales
 Freshteam
 Freshworks Neo
 Freshsurvey
 Growth
TABLE OF CONTENTS
This article provides details about the API library in your chatbot and the steps to configure, test, and reuse API calls across your dialogs.
Prerequisites:
- Ensure you have access to the chatbot you intend to configure.
- Ensure you have the endpoint URL, method, payload structure, and authentication details for the external system.
Create and use the API library
The API library page allows you to call an external system from within a bot conversation to fetch or push data, and then display the result to the customer.
For example, the bot can look up an order status in your commerce system mid-conversation, or create a ticket in your Freshdesk account from details the customer provides.
You configure an API once, its name, method, URL, headers, and response attributes, and then reference it from any dialog in that bot. A configured API includes following parts:
- The request: The call the bot sends out. The request can include placeholders, so a single API carries different values based on the customer's earlier answers.
- Values to be used in Bot flows: The body and header attributes you keep from the API's response. Only these attributes become available as placeholders in your messages, actions, and conditions. Add them during configuration, not afterward.
Supported APIs and limits
Before you proceed, it is important to know the following constraints:
- Only REST APIs with a JSON response are supported.
- An API request times out after 10 seconds if no response is received.
- A Postman collection can contain a maximum of 20 APIs, and the file must be 20 KB or smaller.
Create an API
To create an API, follow these steps:
- Go to AI Agent Studio > Chatbots.
- Select the preferred chatbot, or create a new one.
- Go to Flows > Configure > API library.
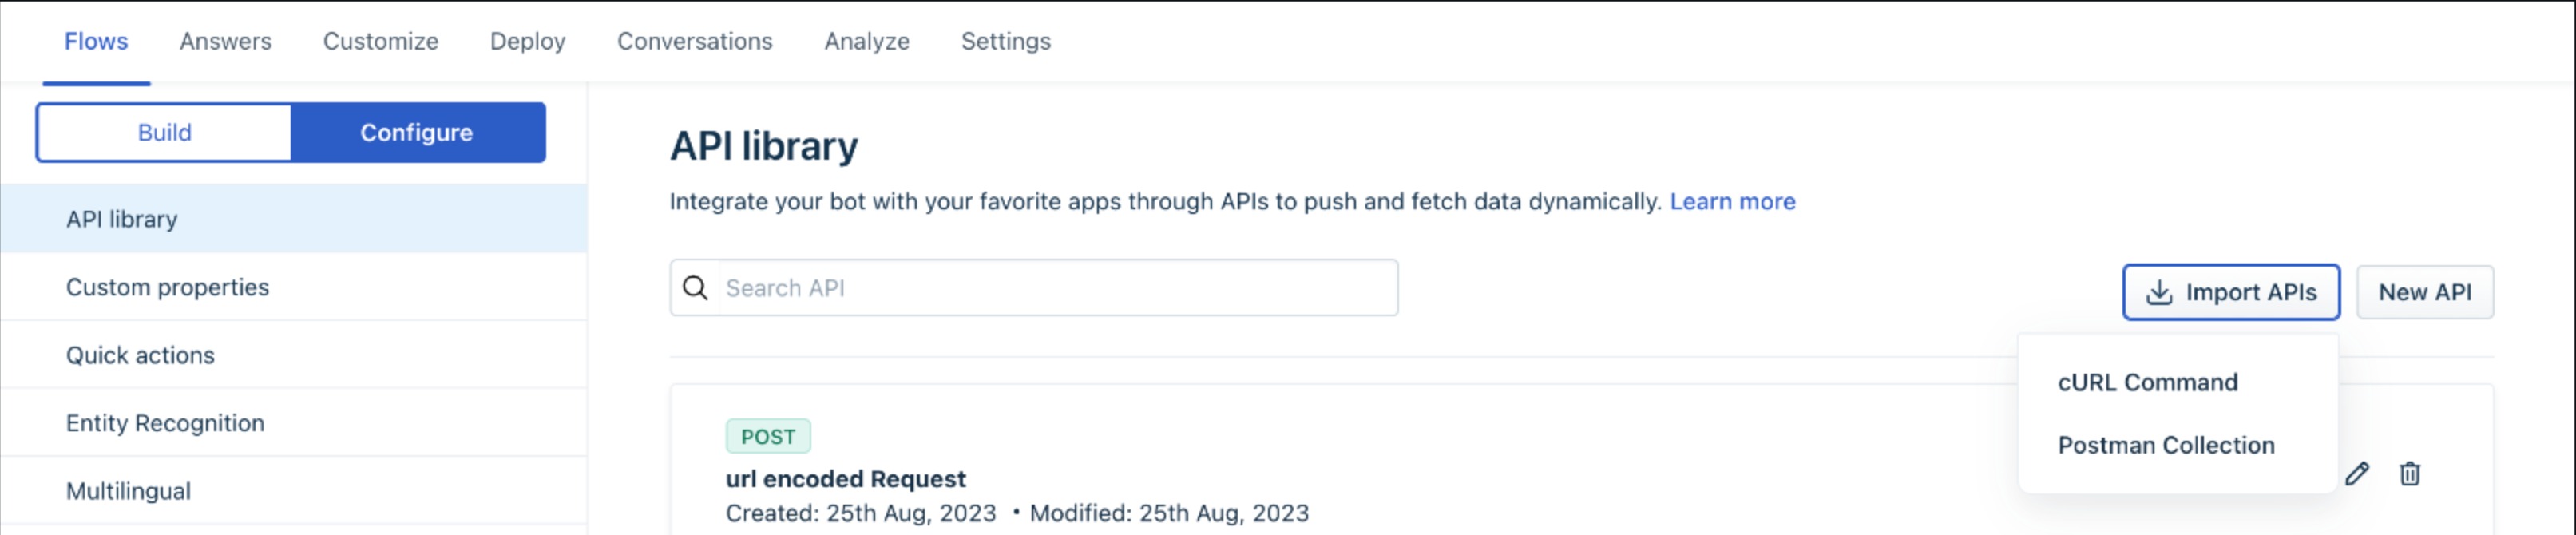
- Click Add new. The New API panel opens.
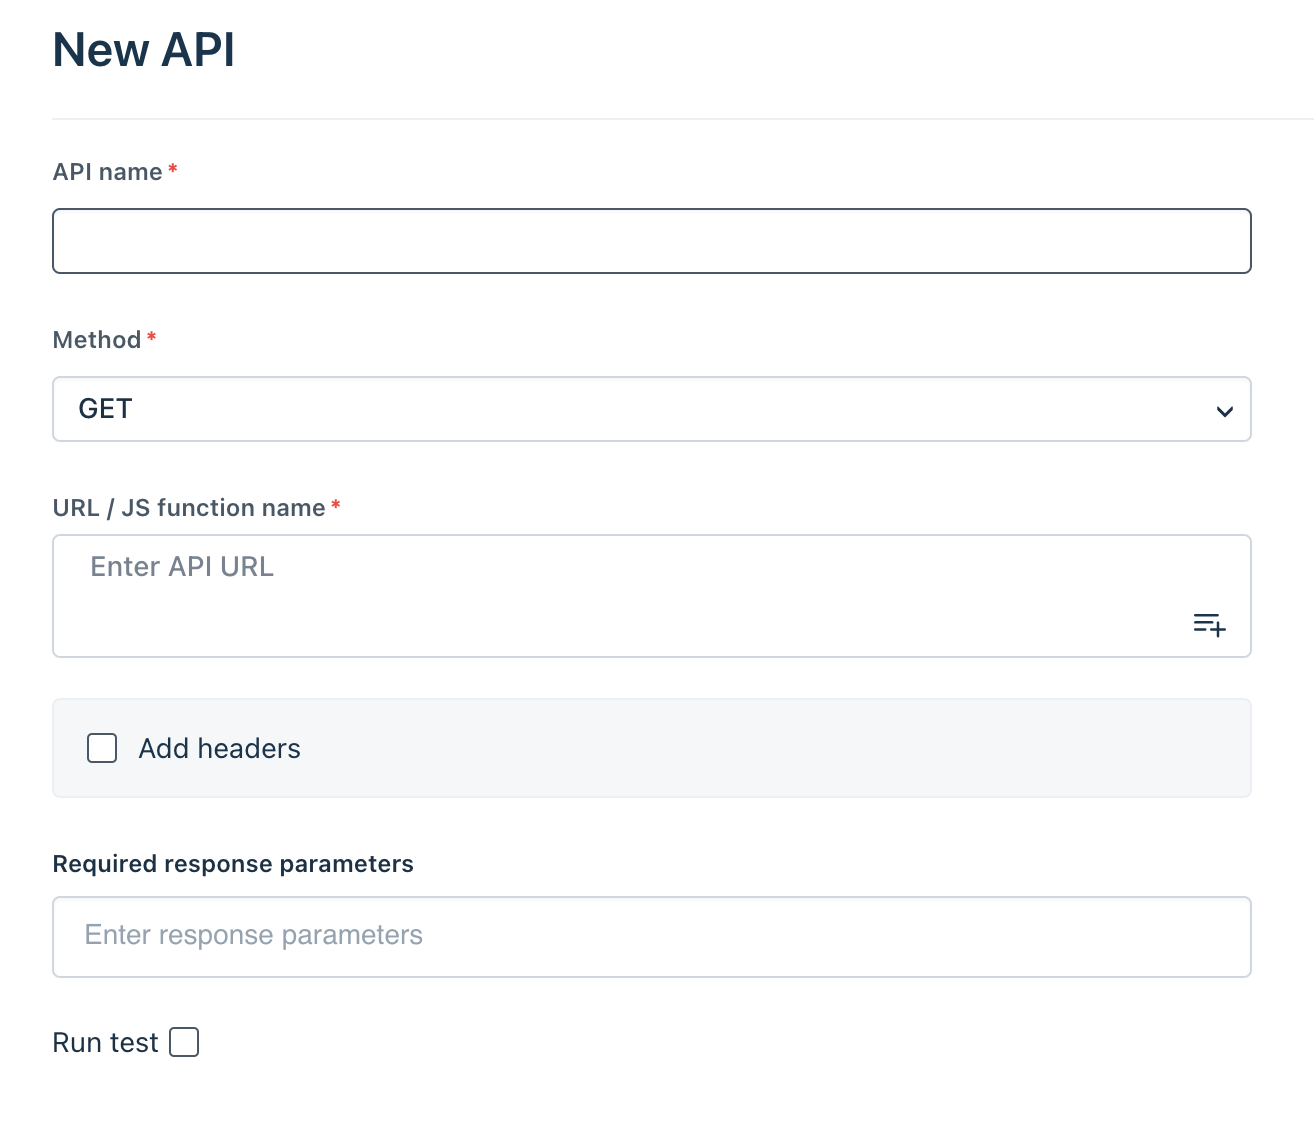
- Configure the following fields:
- API name: Enter a name for the API call. Name the call for the task it performs, because this name identifies the API in your dialogs.
- Method: Select the type of call. The options are GET, PUT, POST, DELETE, or a JS function. GET is selected by default.
- Payload type: Select the format of the request body. The options are JSON, Multipart form data, or URL Encoded form.
- URL / JS function name: Enter the endpoint URL. Use the content picker icon in the field to insert placeholder values such as customer input, other API responses, or default parameters.
- Enter the payload content: Enter the request body. Use the content picker icon in the field to insert placeholders.
Note: Payload type and payload content appear only for methods that send a request body (POST and PUT).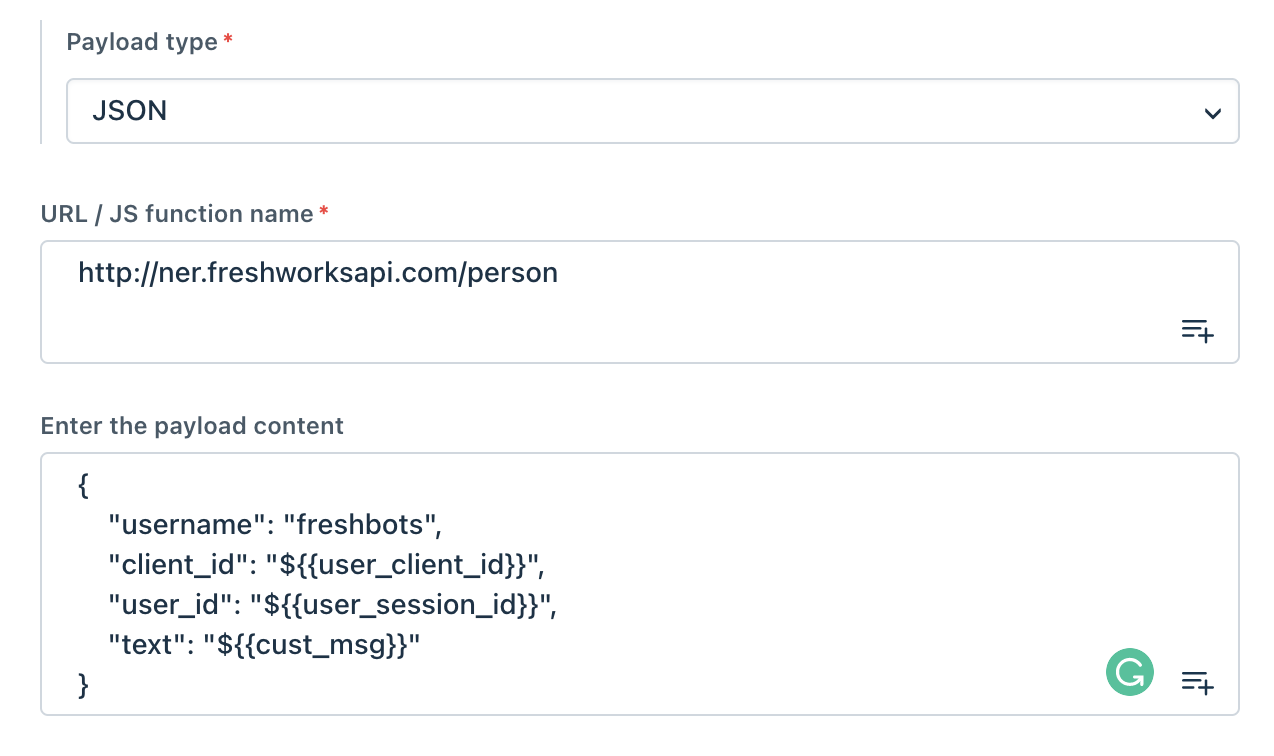
- To send headers with the request, select Add headers, then configure each header:
- Enter the header's Key and Value. Use the content picker icon in the Value field to insert placeholders.
- Select Hide to mask the header's value in the Activity logs and API logs in the Tickets section.
- Click + to add another header row.
Tip: Select Hide for headers that carry credentials, such as an authorization token, so the value stays masked in logs.
- On the Response tab, click Run test to make a sample call and confirm the API is configured correctly. The result appears under Body and Header.
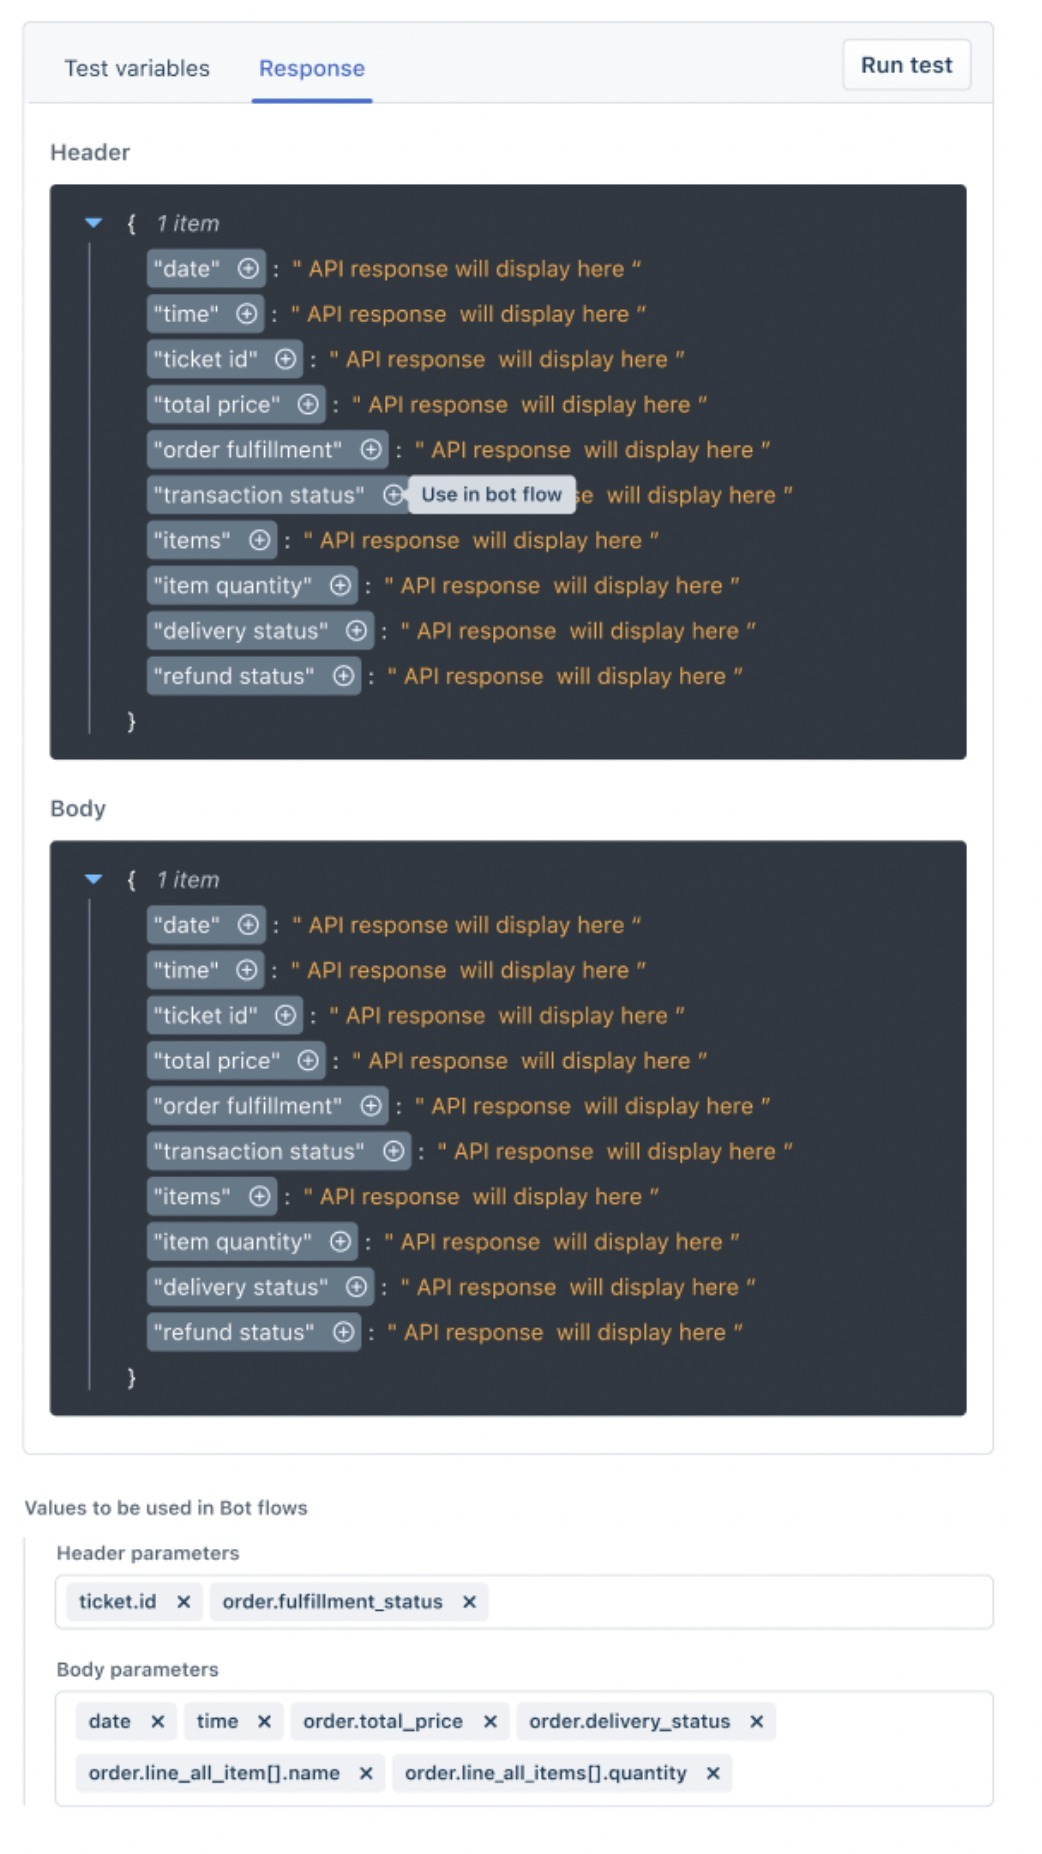
- Under Values to be used in Bot flows, enter the response attributes you want to reference in your dialogs:
- Body parameters: Enter the attributes from the response body, such as products[].id or products[].name.
- Header parameters: Enter the attributes from the response headers.
- Each attribute you add appears as a chip. Click × on a chip to remove that attribute. Only the attributes you add here become available as placeholders in your dialogs. [Screenshot 6]
- Click Save.
Import API
Alternatively, if you already have an API configured as a cURL command or Postman Collection, you can import it into the API library instead of configuring each field manually.
- cURL commands are command-line commands used to interact with APIs. You can import an existing cURL command into the API library instead of configuring the API manually.
- Postman Collections are files that organize and store API requests. You can import a Postman Collection to add its APIs to the API library without configuring each API manually.
To import an API:
- Go to Flows > Configure > API library > Import APIs.

- Select the import method.
- Complete the import.
Note: Postman collection versions 2 and 2.1 are supported. A Postman Collection can contain a maximum of 20 APIs and must be 20 KB or smaller.
Configure multipart form data
Use Multipart form data when you need to send multiple types of data in a single API request, such as text and file attachments. For example, you can collect a customer's issue description and a screenshot in separate steps of a bot conversation and send both to a third-party application in a single request.
- In the New API panel, select POST or PUT as the Method.
- From the Payload type dropdown, select Multipart form data.
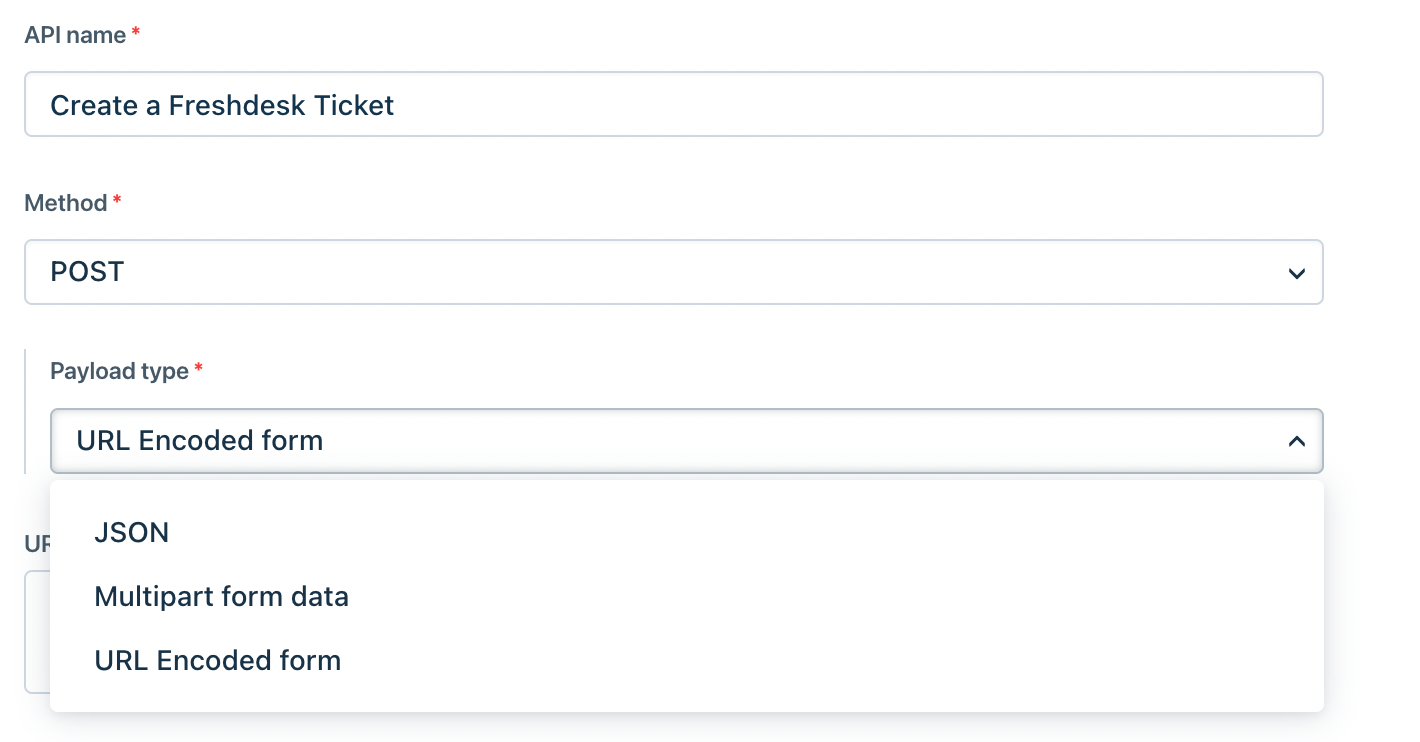
- A set of fields for configuring the multipart request appears. Each field represents a piece of data that you want to send in the API request.
- Enter the Key for the first field. The key identifies the data that you want to send to the external system.
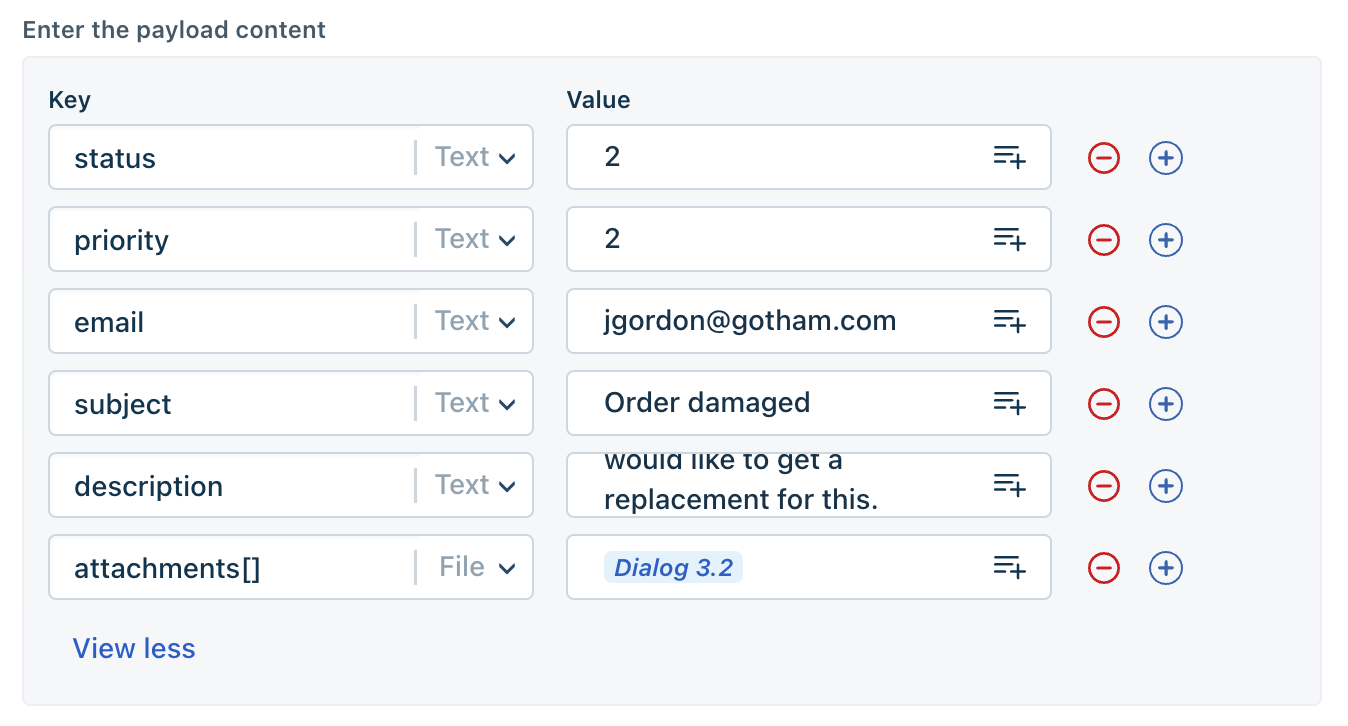
- Select the Content type for the key. You can select Text or File.
- If you select Text, configure the value that you want to send:
- Use the content picker to select a value collected from the customer through a dialog that uses Text field input.
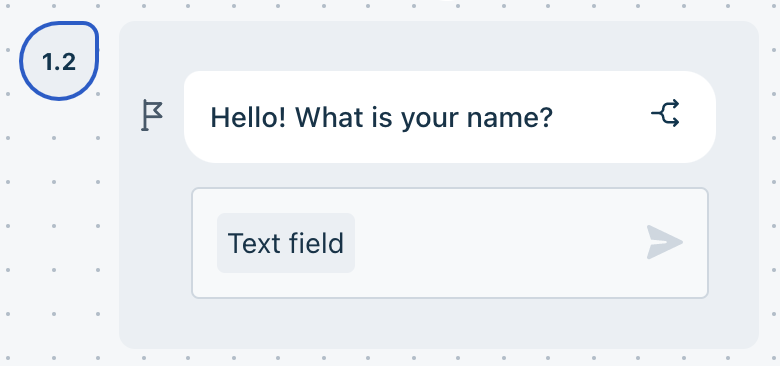
- The value collected in the dialog is passed to the corresponding field when the multipart API is triggered.
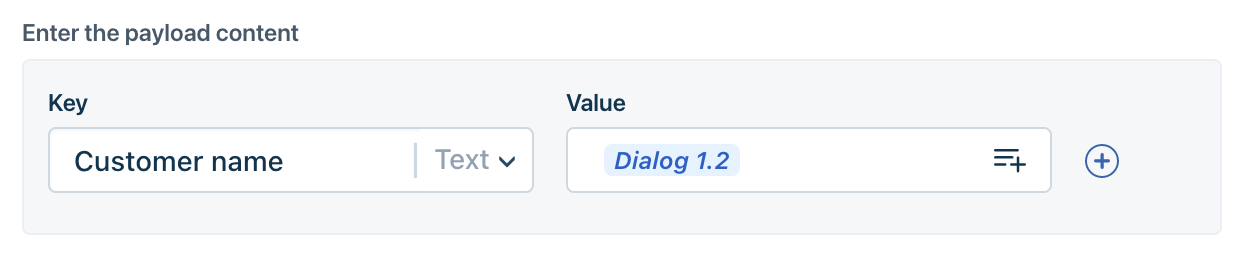
- You can also enter a static value instead of using a value collected from the customer. Use a static value when the same value needs to be sent for every customer. For example, if your service supports only one language, you can set the language as a static value.
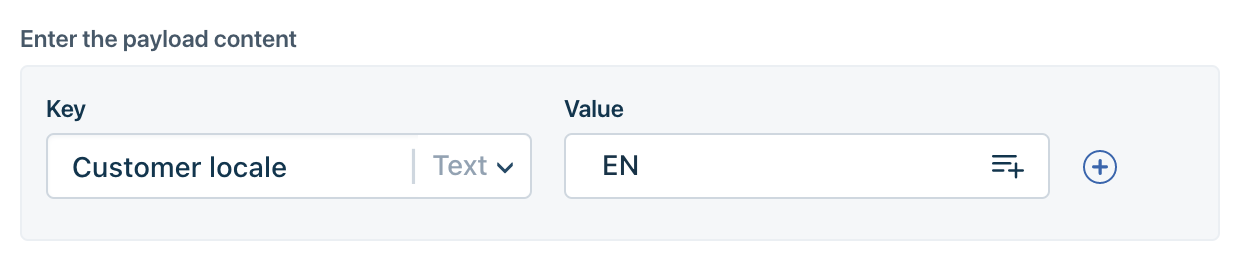
- Use the content picker to select a value collected from the customer through a dialog that uses Text field input.
- If you select File, configure the file that you want to send:
- Use the content picker to select a file or image collected from the customer through a dialog that uses File and Image input.
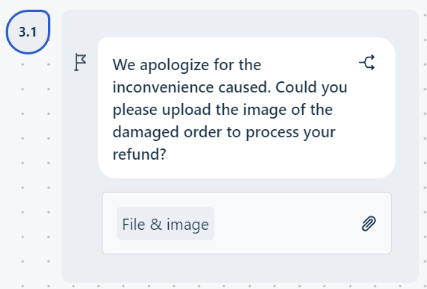
- The file collected in the dialog is passed to the corresponding field when the multipart API is triggered.
- Use the content picker to select a file or image collected from the customer through a dialog that uses File and Image input.
- Configure any required headers and response parameters as described in the API configuration steps.
- On the Response tab, click Run test to verify the API configuration.
- Click Save.
View and manage APIs on the API list page
The API list page shows every API configured for the bot. To open it, go to Flows > Configure > API library.
On this page, you can do the following:
- Search for a configured API.
- See each API's action (GET, POST, and so on).
- See each API's creation date and last modified date.
- Edit or delete an API.
- Create a new API.
Use an API response in a dialog
You can reference an API from a message, an action, or a condition. In each case, the bot builder
Reference an API in a message
A message displays an API value to the customer, such as a ticket ID or an order status. To reference an API in a message, follow these steps:
- Type the message or question to be displayed to the customer.
- Click the + icon to open the placeholders, then select APIs.
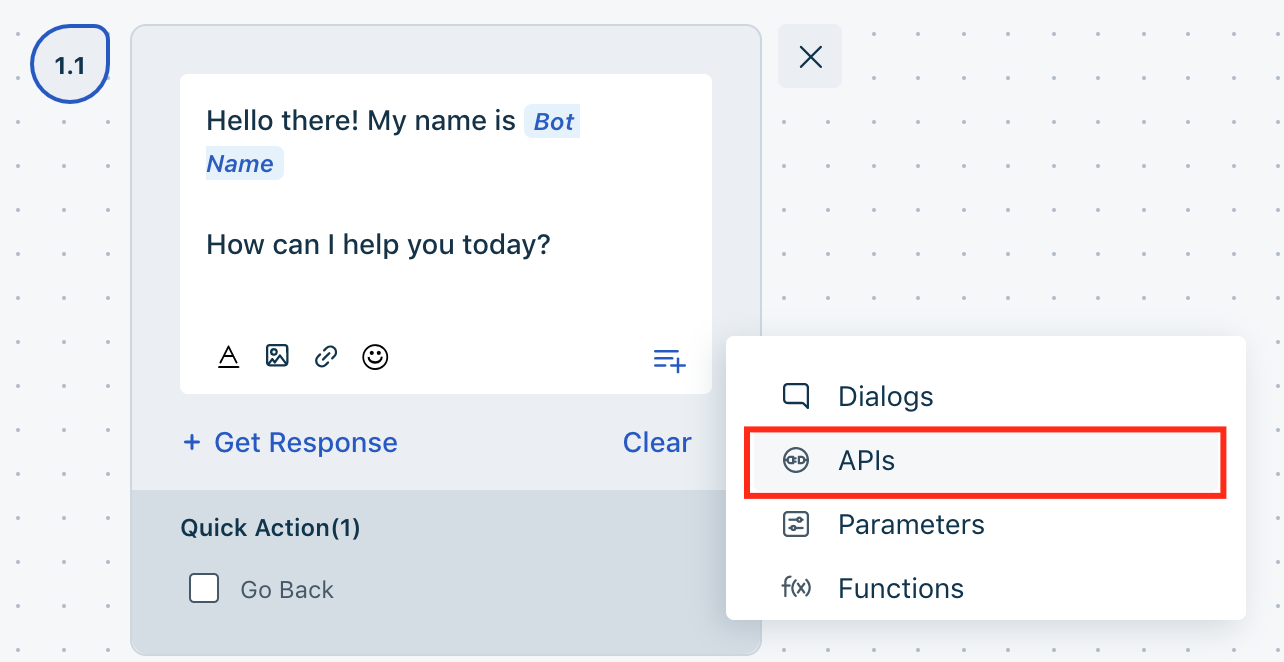
- Select the required API to append it to the text box.
- Select the response value you want to display.
For example, if the bot creates a ticket during the conversation, set up a create ticket API call and then reference the ticket ID from its body parameters in your confirmation message.
Trigger an API from an action
An action runs the API call without displaying its result to the customer, and gives you control over the call's position in the flow. To trigger an API from an action, follow these steps:
- Create a new action in the dialog.
- Set the Action type to Trigger API.
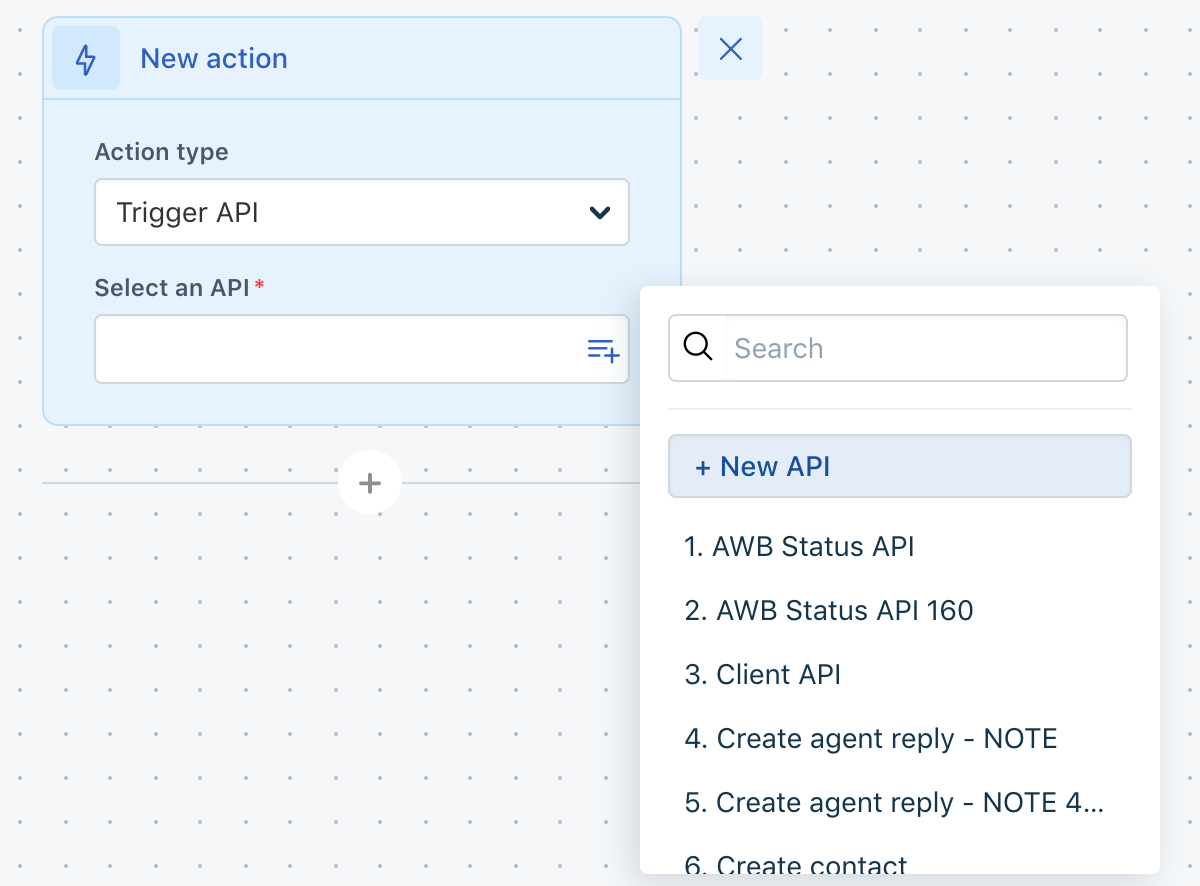
- Select the required API from the bot's API library.
You can insert a Trigger API action anywhere in the flow. Place the action before a message to run the call first, or after a message to run it once the message is sent.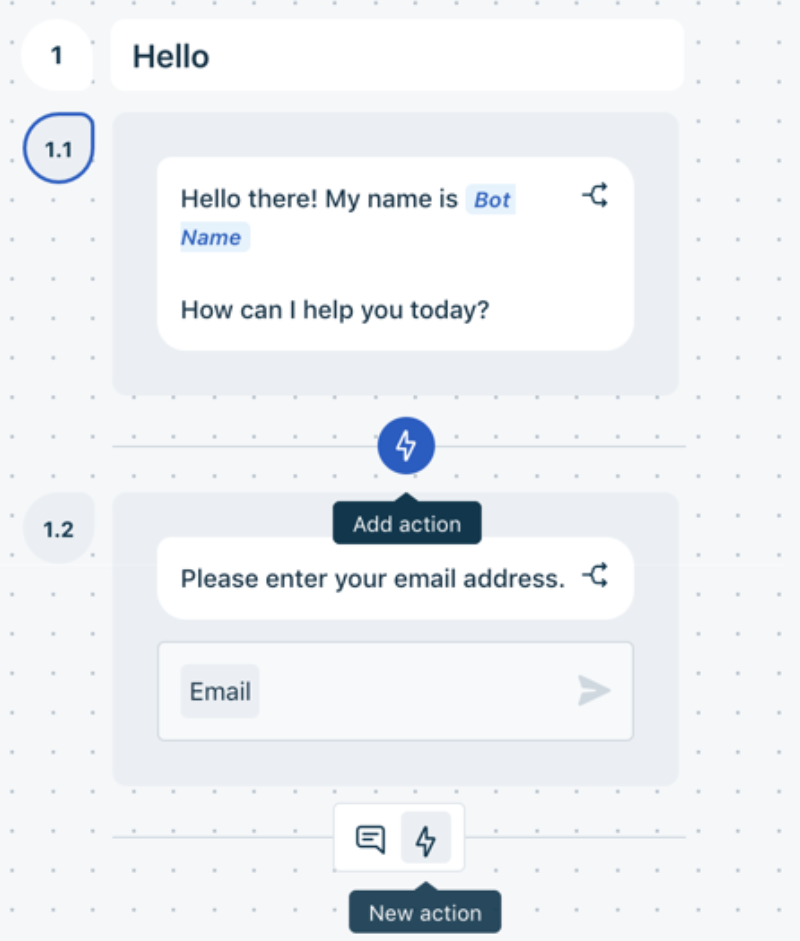
Use an API response in a condition
A condition uses the API response to change the path the conversation takes.
You can use the API's response both in the body of the condition and in the condition's value section. For example, in a subscription flow, read the payment status from the API response. If the status is unpaid, redirect the customer to a different dialog or flow. If the status is paid, show a message confirming it.
To use an API response in a condition, follow these steps:
- Open the Conditions tab for the required dialog.
- Click the + icon to open the placeholders, then select APIs from the drop-down.
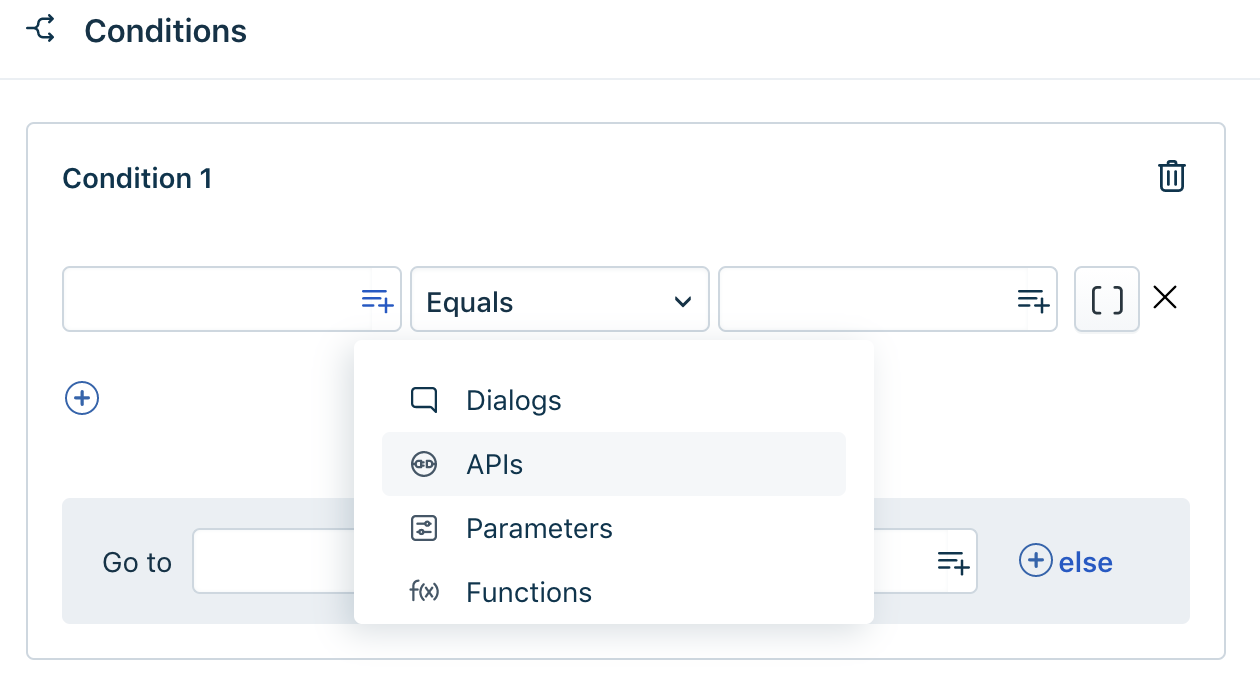
- Select the required API call.
- Select the response value.