
 Community
 Video Library
 Agent Training
 Freshservice
 Freshdesk
 Freshchat
 Freshcaller
 Freshsales
 Freshteam
 Freshworks Neo
 Freshsurvey
 Growth
 Free
FreeTABLE OF CONTENTS
- Prerequisites
- Create an Email AI Agent
- Test the agent
- Deploy the Email AI Agent
- Email AI Agent — key differences from chat
The Email AI Agent in Freddy AI Agent Studio handles incoming customer emails automatically — reading each ticket, generating a contextual response grounded in your knowledge base, and either resolving it or escalating it to a human agent when needed. It works directly in the Freshdesk ticket inbox, visible to both customers in their email inbox and agents in the support queue.
This article covers how to create an email AI Agent, connect knowledge sources, write instructions, configure settings, test the agent, and deploy it to your mailboxes and support portals. For runtime behavior controls — handover settings, spam handling, and customer feedback — see Configure Email AI Agent trigger rules and automation.
Prerequisites
- Role: Administrator
- Mailboxes: At least one Freshdesk mailbox must be configured before deployment
- Knowledge sources: At least one knowledge source must be added before testing or deploying
- Agent limit: A combined maximum of 50 agents (chat + email) per account. Archive or delete an existing agent to free a slot.
Create an Email AI Agent
Create an email AI agent in 4 steps:
- Access AI Agent Studio
- Build — Knowledge, Instructions, Configurations
- Test
- Deploy
Access AI Agent Studio
- As an admin, navigate to AI Agent Studio from the left navigation.
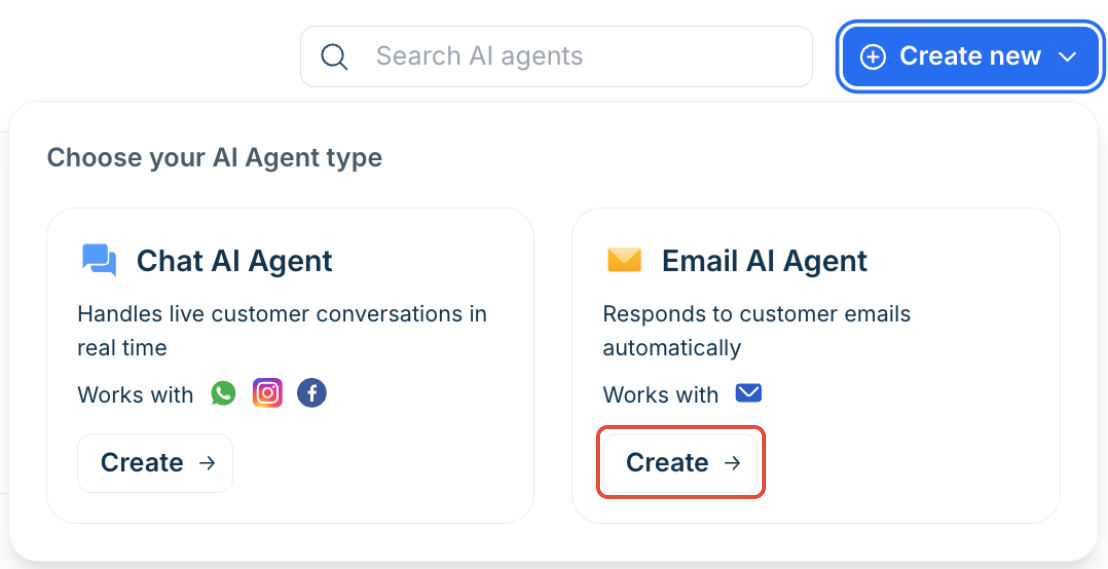
- On the AI Agents list page, select Create new and click Create under Email AI Agent. Standalone Freshdesk accounts will only have the Email AI Agent option.
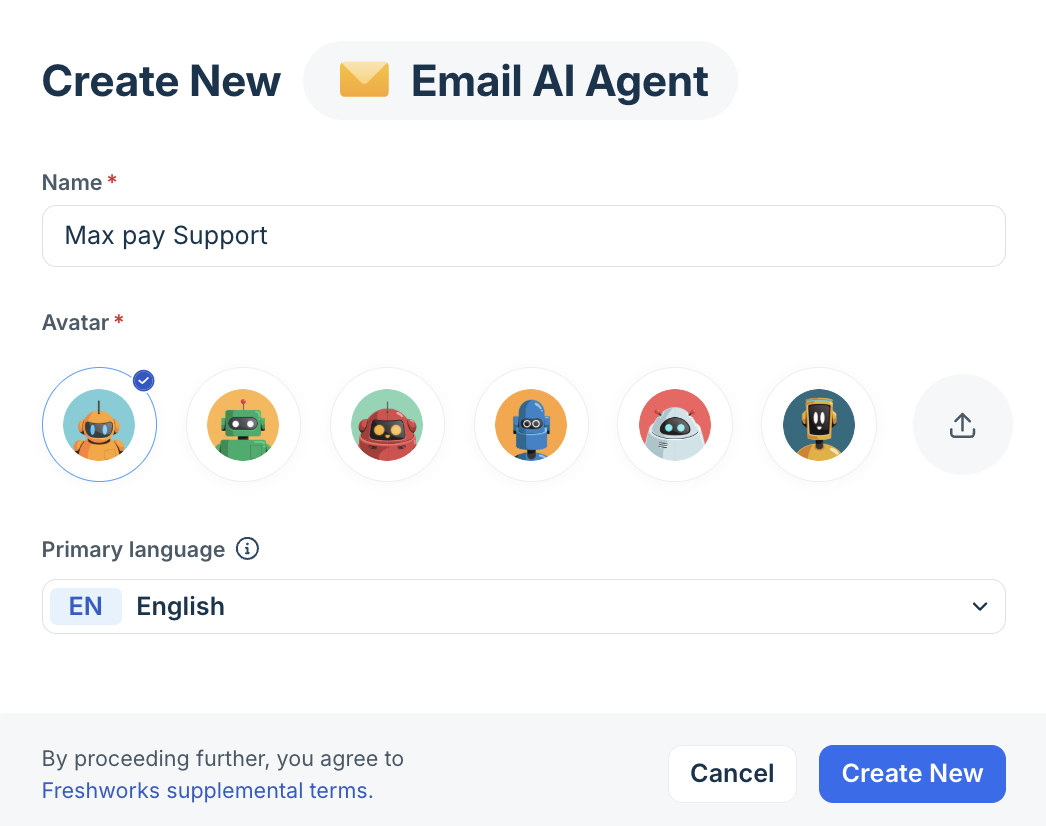
- In the Create New Email AI Agent dialog, enter a name and select an avatar - you can also upload your own avatar. The name is internal — it identifies the agent in AI Agent Studio and does not appear in customer emails.
- Select your Primary language and select Create New. The agent is created in Draft state.
Note: A combined maximum of 50 agents (chat and email) is allowed per account. Once the limit is reached, the Create new button is disabled. Archive or delete an existing agent to free a slot.
Build the Email AI Agent
The Build section has four sub-sections: Knowledge, Instructions, and Configurations.
Add Knowledge
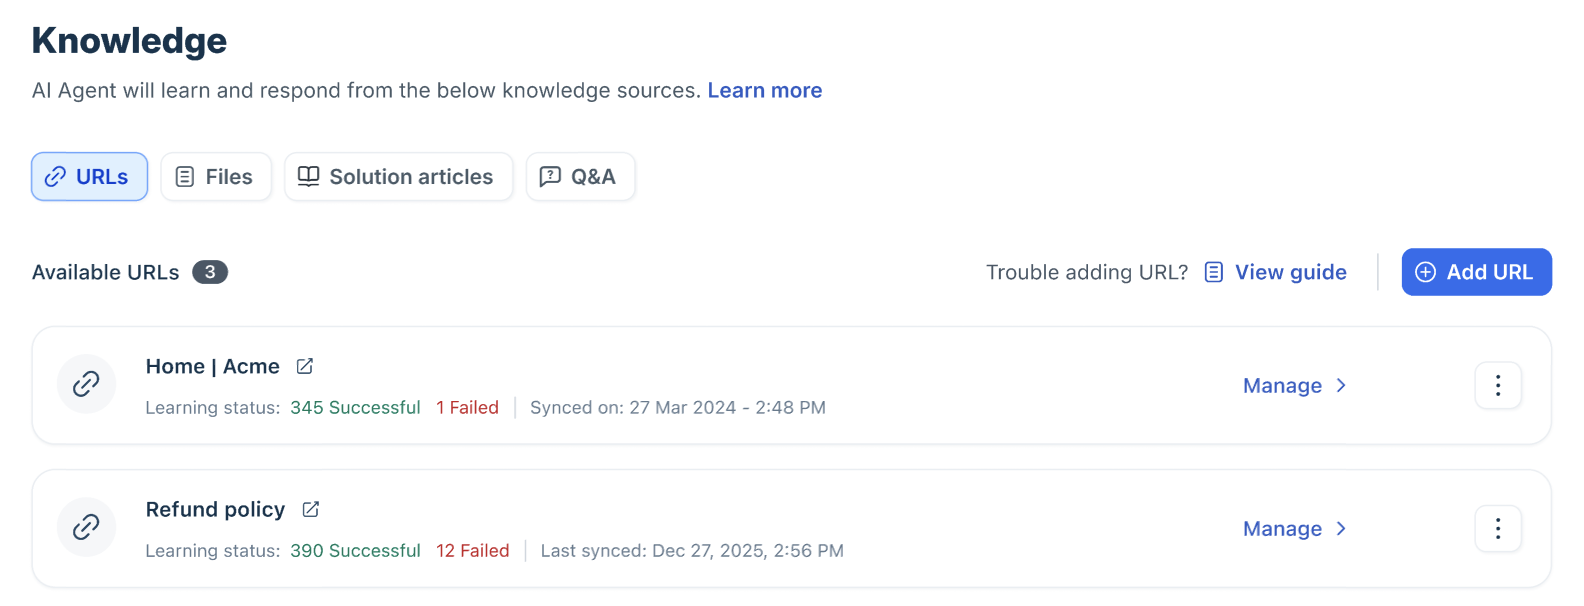
Navigate to Build > Knowledge. Add the sources your agent will draw answers from. The email AI Agent supports the following source types:
- Solution articles: Select the categories and portals the agent should use. Enable Portal filtering to ensure queries from a mailbox mapped to a specific portal are answered using only that portal's content — essential when running multiple brands.
- Uploaded files: Upload PDFs, Word documents, or text files. Toggle citation visibility per file.
- URLs: Enter URLs to crawl. Monitor sync status in the UI; failed crawls surface error details.
- Q&A: Add manual question-answer pairs for queries not covered by other sources.
Portal filtering: When portal filtering is enabled, a query arriving at a mailbox is answered using only knowledge linked to the portal that mailbox is mapped to. Enable this when you run multiple brands or portals from the same Freshdesk account.
For more detailed information on adding knowledge, refer to Build and curate knowledge for AI Agents.
Write Instructions
Navigate to Build > Instructions. Instructions define how the agent understands your business and how it communicates in email replies.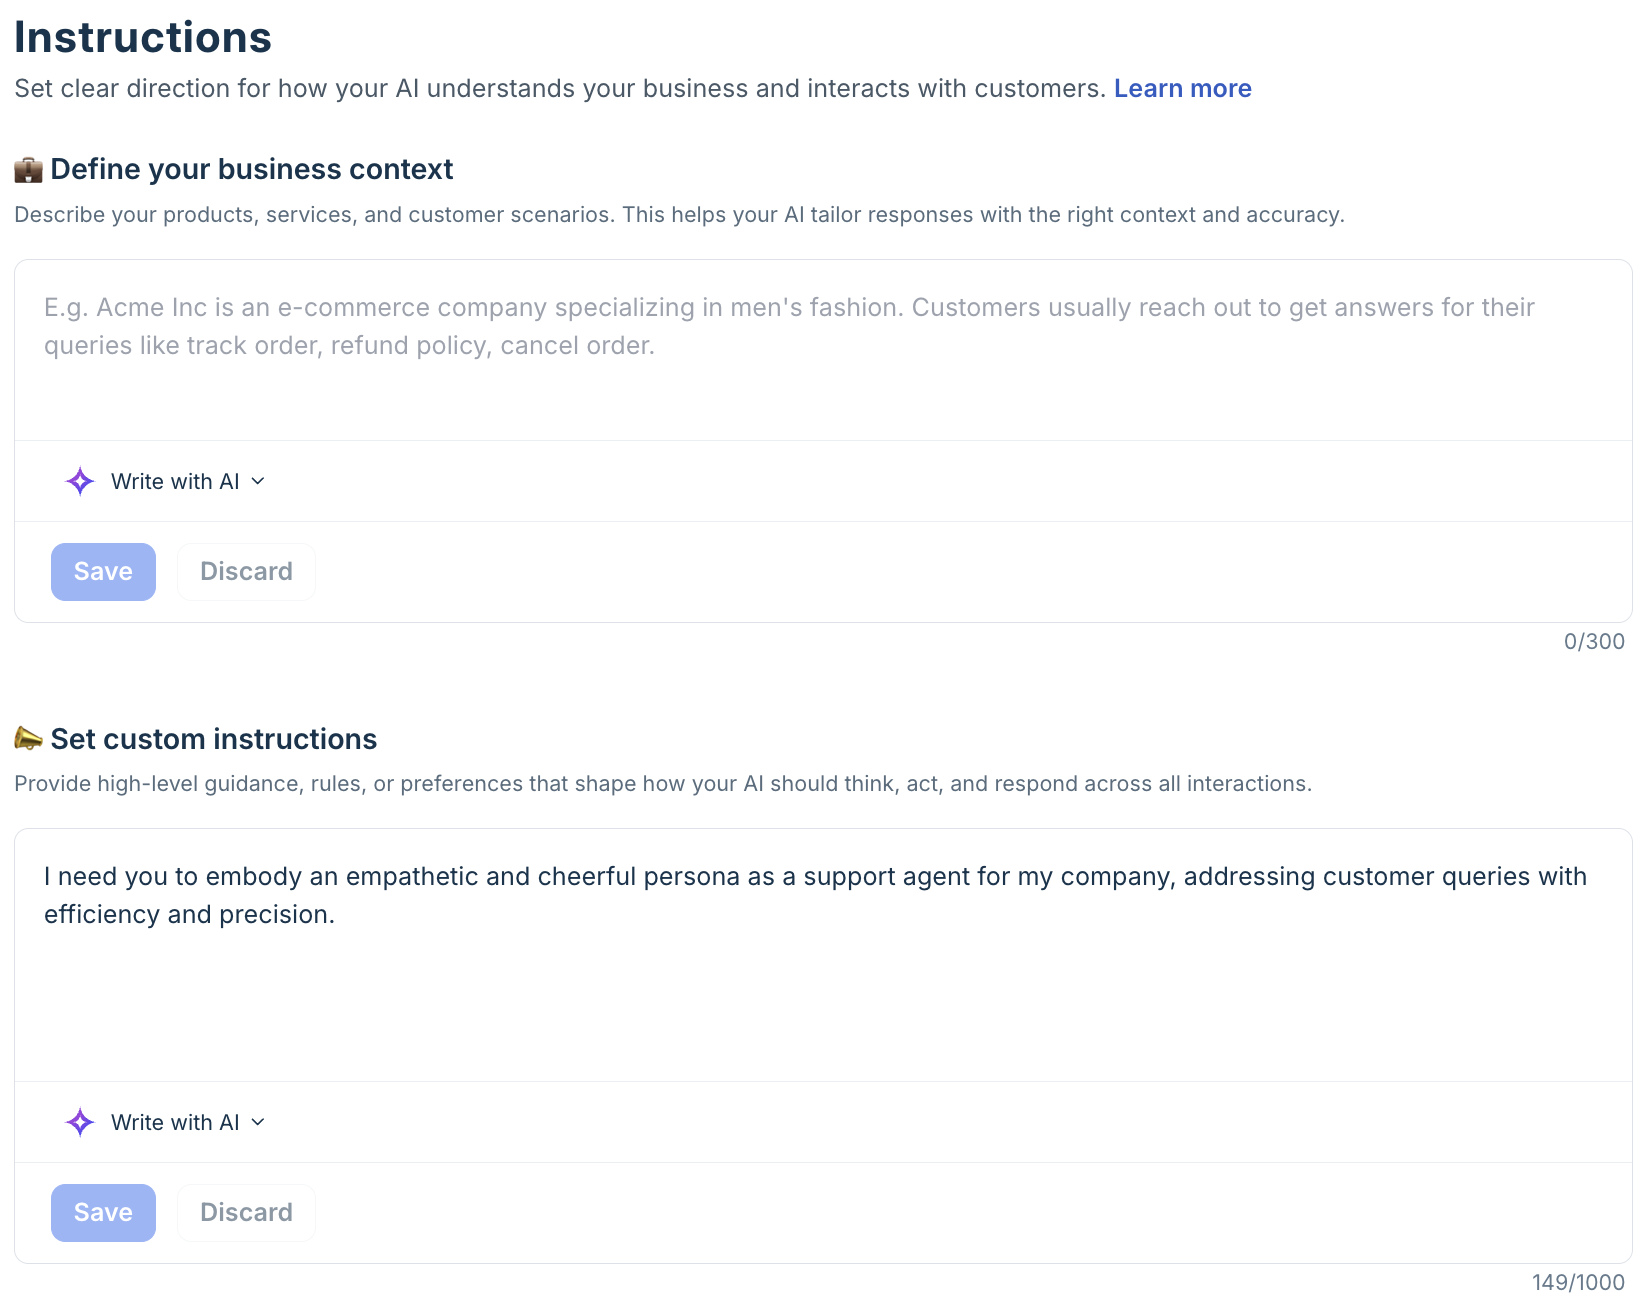
- Business context: Describe your company, products or services, and the scope of what the agent should handle. Be explicit about topics it should not address.
Example: "UrbanCart is a D2C fashion e-commerce brand. This agent handles post-purchase support: order status, returns, exchanges, and refund tracking. Do not handle pre-sales or product recommendation queries — redirect those to the sales team at sales@urbancart.com." - Custom instructions: Define tone, formality, response length, and language rules. The agent applies these across all email replies.
Example: "Respond in a warm, professional tone. Keep responses under 200 words. Always address the customer by first name. Never speculate — if you don't have a confirmed answer, acknowledge the query and escalate."
Best practice: Include examples of ideal responses in your instructions. The agent learns from concrete examples faster than it does from abstract rules. If your team uses an existing response template, paste it in and tell the agent to follow that format.
For more detailed information on writing instructions, refer to Configure agent identity and instructions.
Setup configurations
Navigate to Build > Configurations.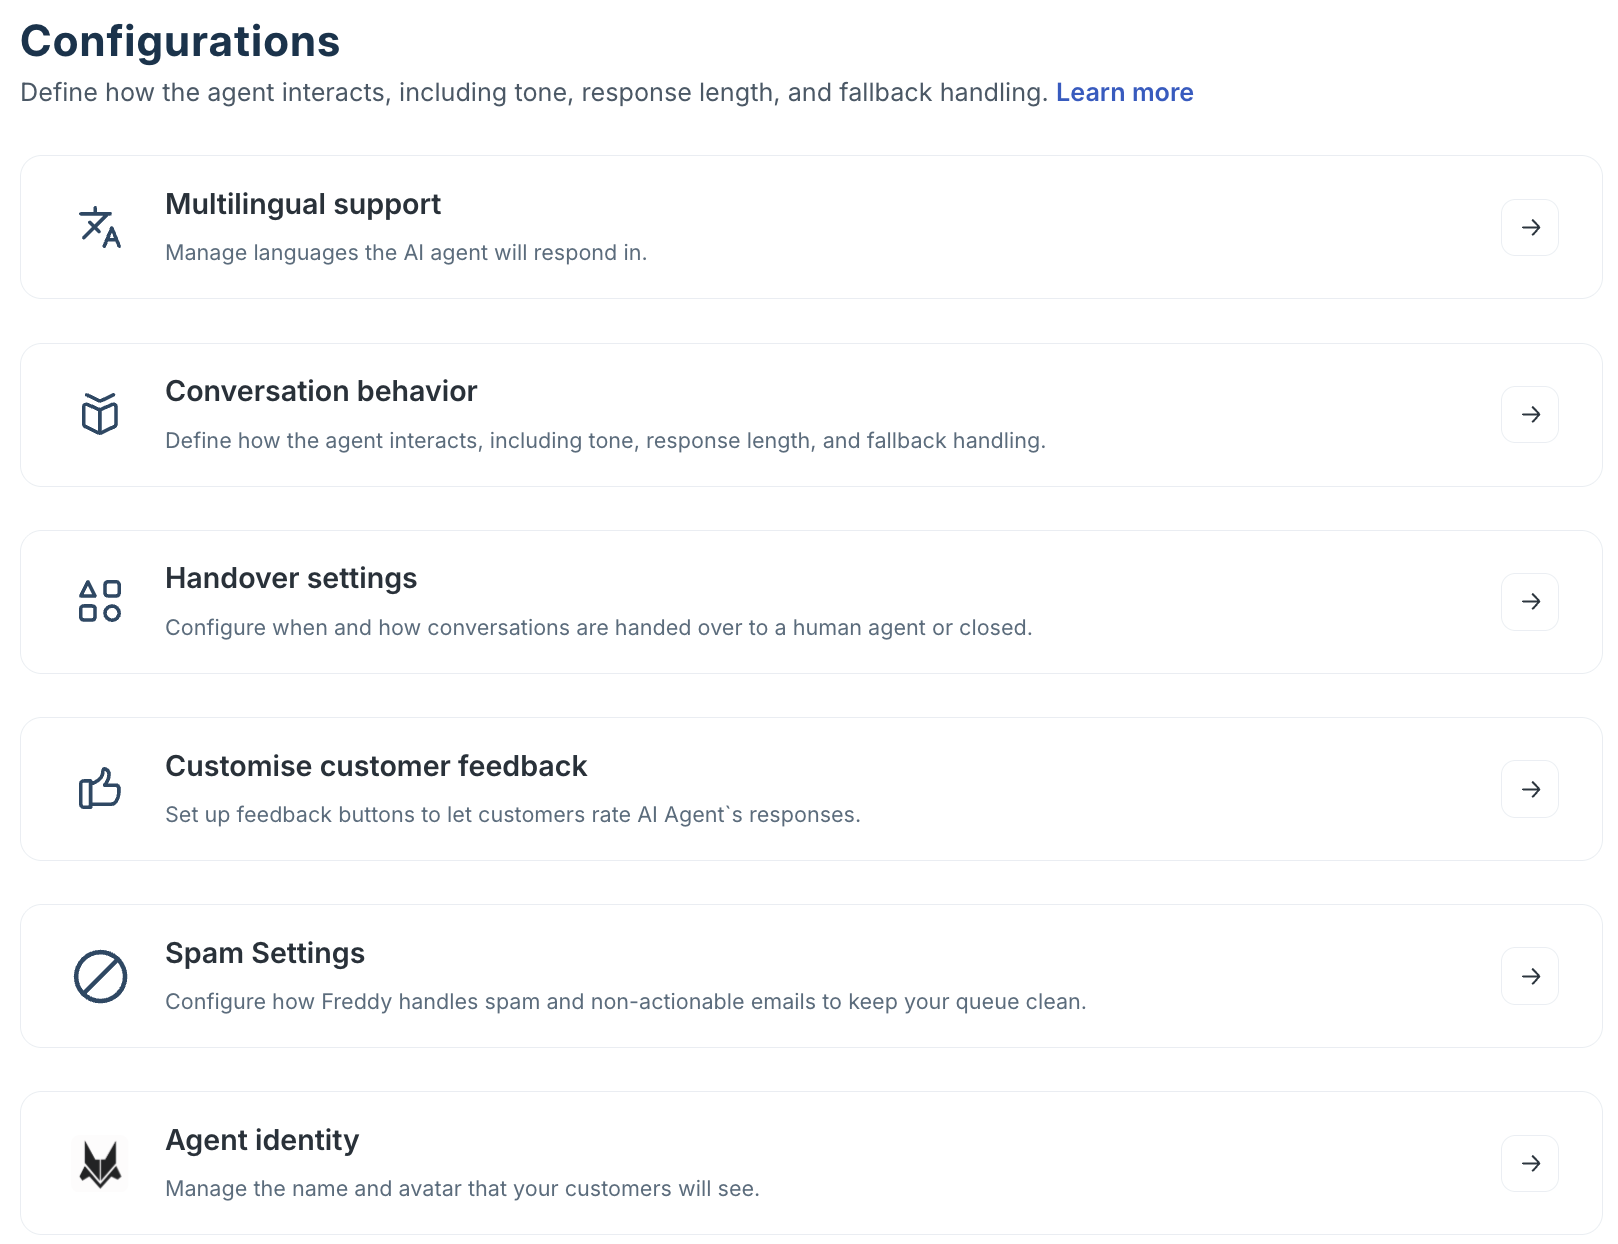
The Configurations section has five groups. Configure them in the following order:
1. Multilingual support
Enables the agent to detect and reply in the customer's language. Select from the supported languages list.
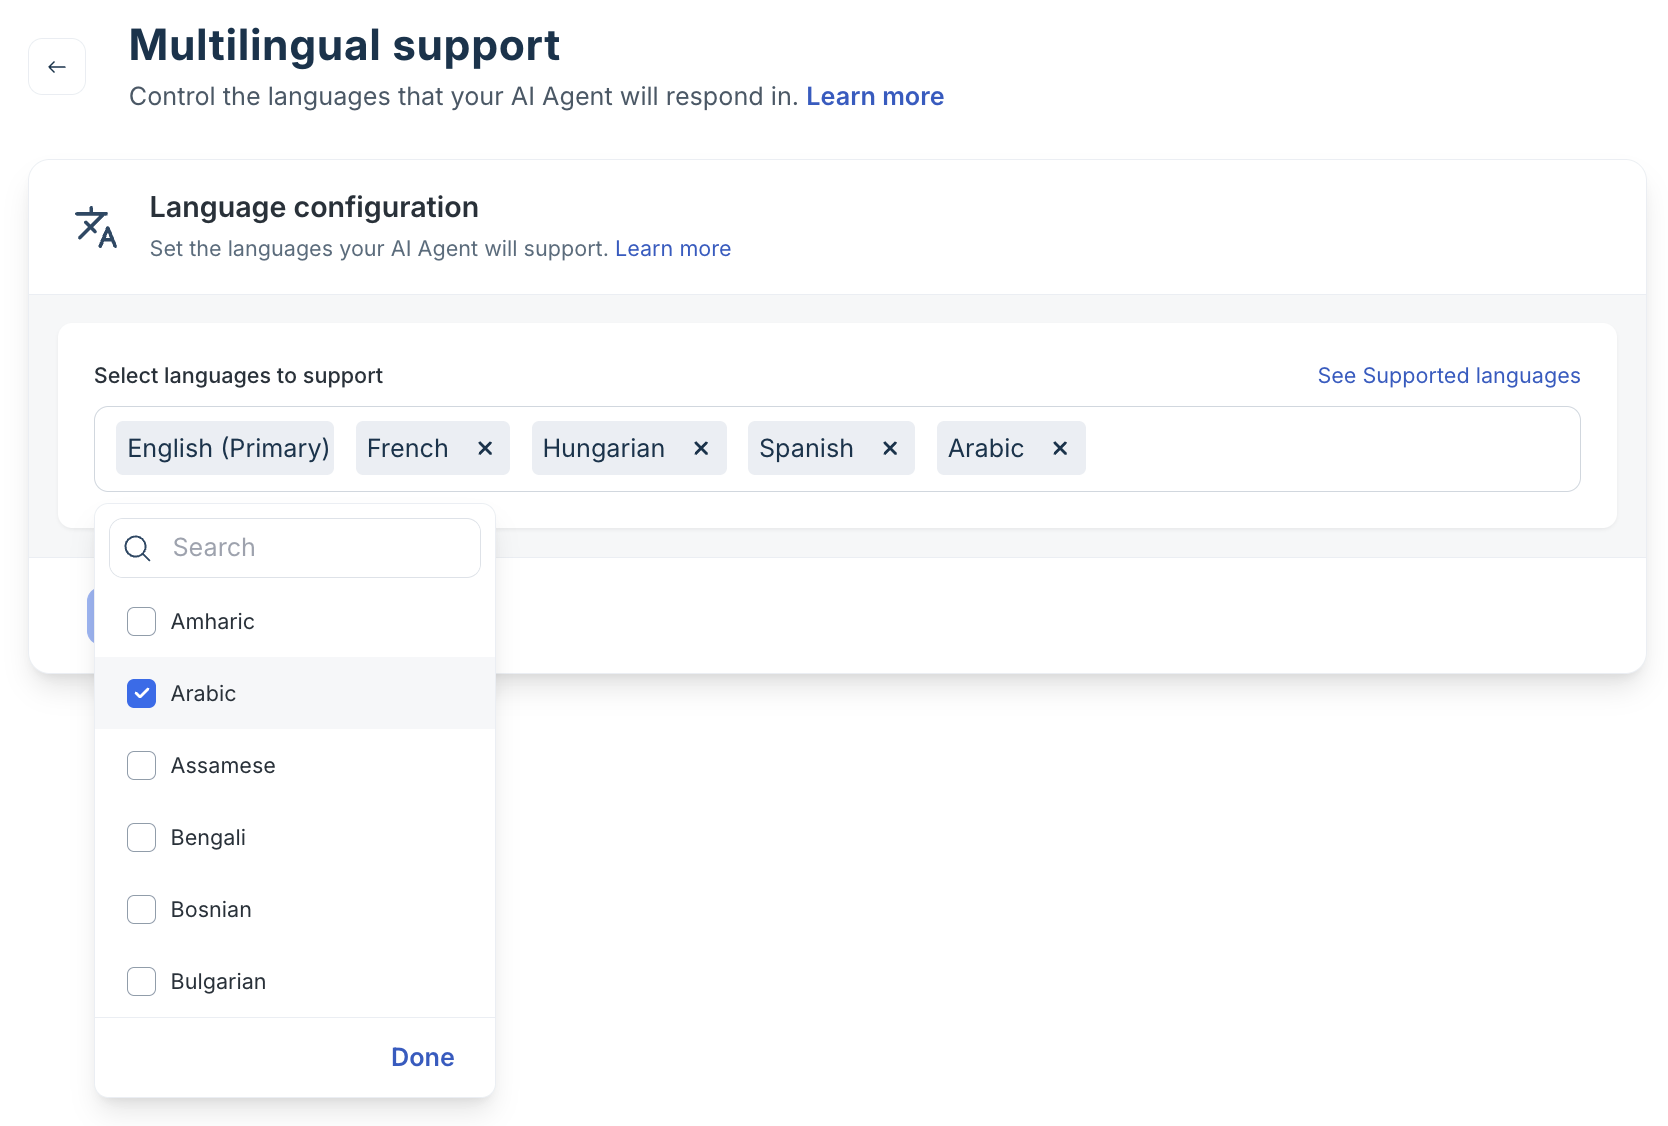 When enabled:
- The agent automatically detects the customer's language.
- Responses are generated in the detected language.
- If the language is unsupported, fallback handling applies.
- Handover rules apply regardless of language.
2. Conversation behavior
Controls how the agent structures its email replies and handles multi-turn exchanges. 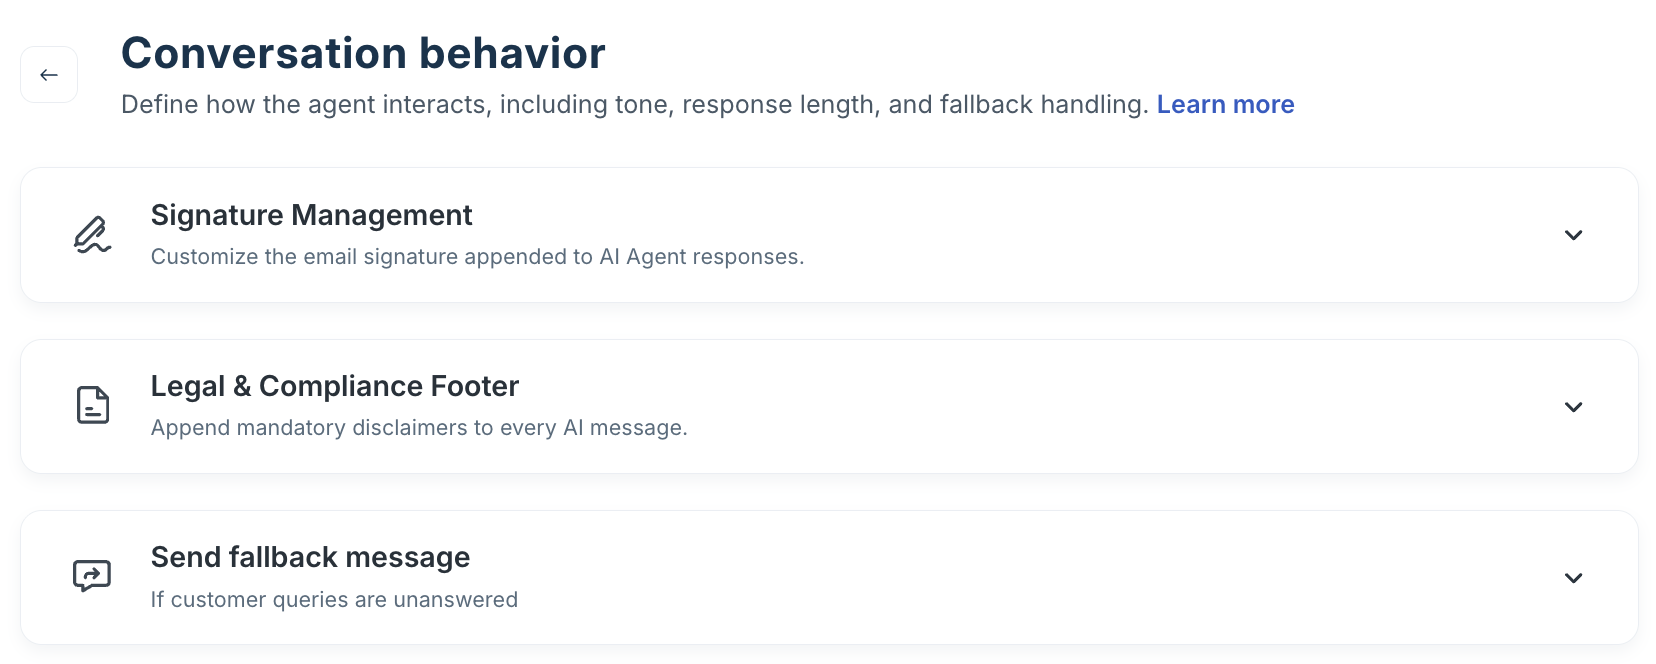
Configure the following sub-settings:
- Signature management: The sign-off block is appended to every AI email. Configure dynamic placeholders for agent name, team, and contact details. Supports language-specific variants.
- Legal & compliance footer: A mandatory disclaimer appended to every AI reply. Configure per-region or per-language variants. Required for GDPR, CCPA, and industry-specific compliance.
- Send fallback message: The message sent to the customer when the AI cannot generate even an initial response. Configure the copy to set expectations and guide the customer to alternate support paths.
For more detailed information on configuring conversion behavior, refer to Configure Email AI Agent trigger rules.
3. Handover settings
Determines when conversations are transferred to a human agent or automatically closed. 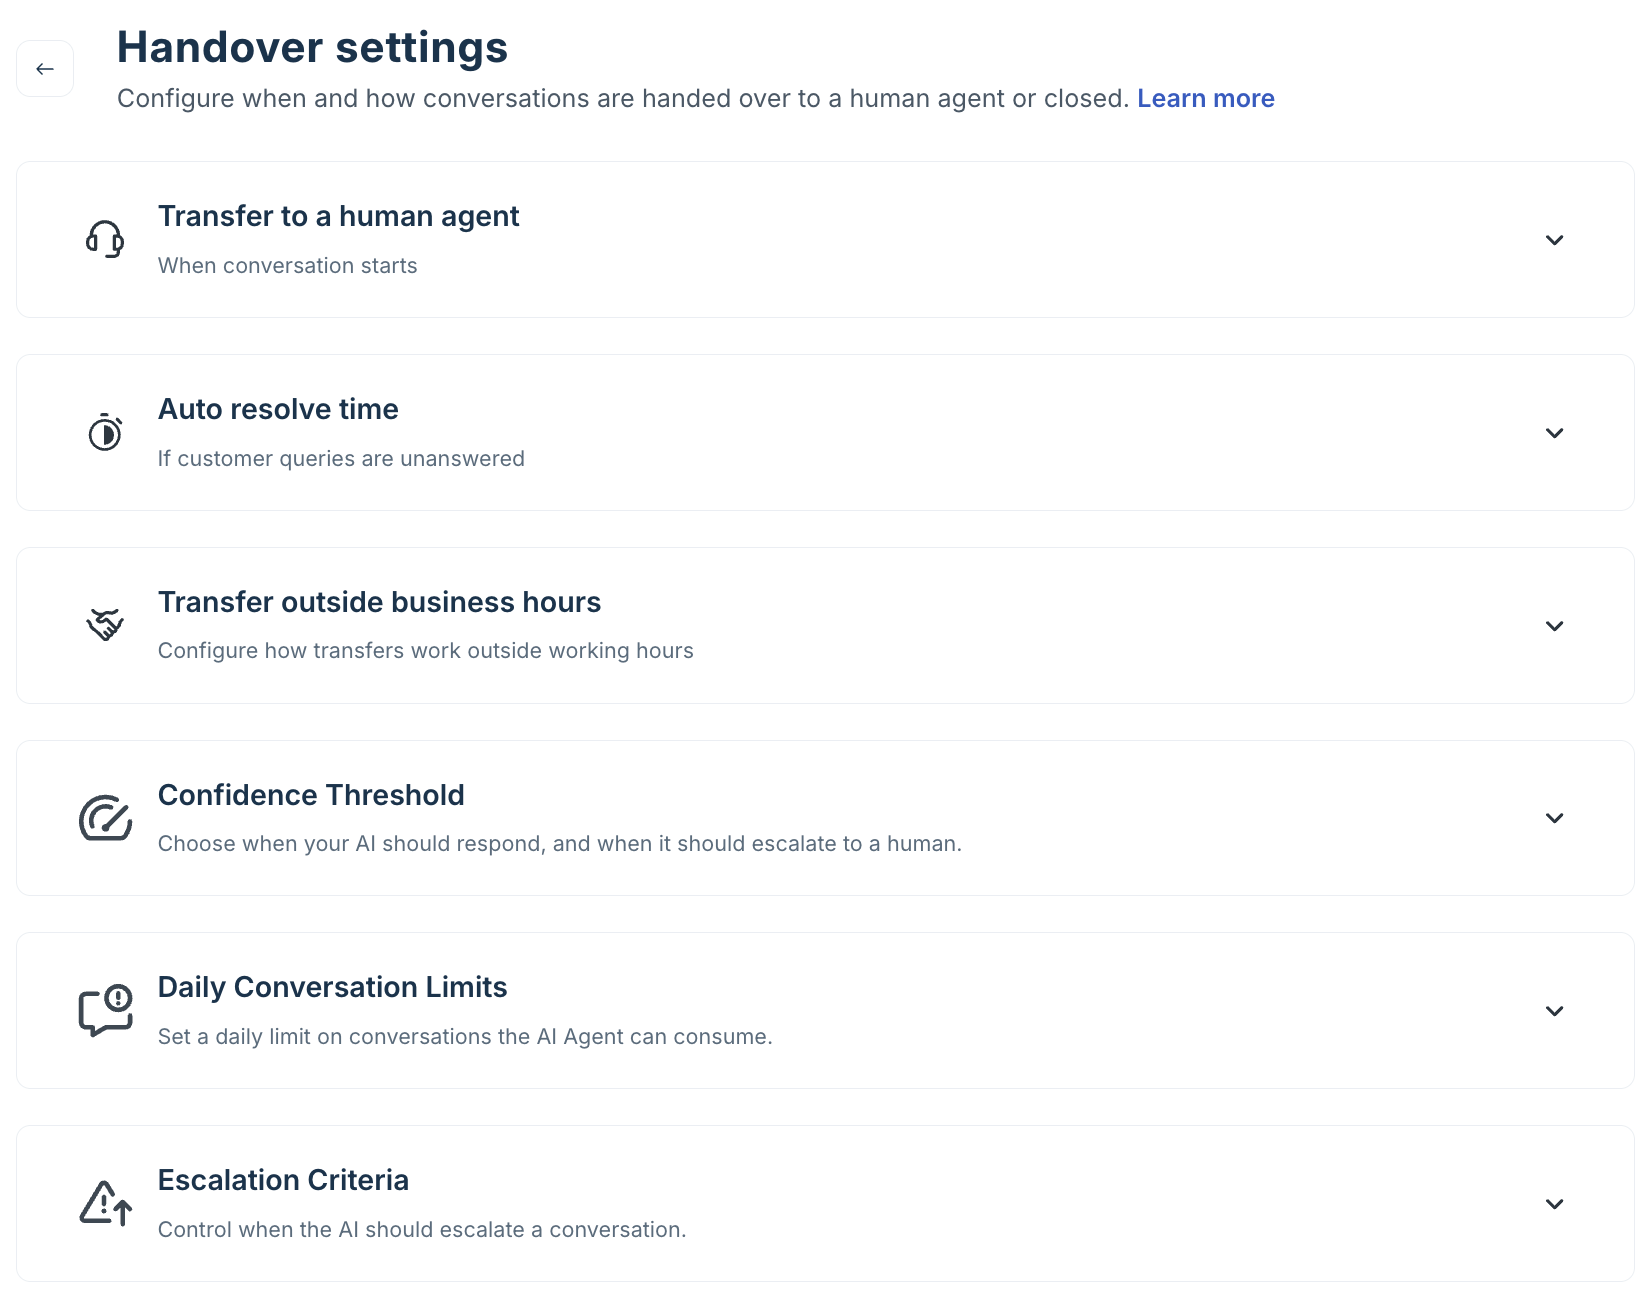
Configure the following:
- Transfer to a human agent: Define the conditions that trigger escalation — for example, customer frustration detected, workflow failure, or agent request.
- Auto-resolve conversations: Set inactivity thresholds that trigger the agent to close a ticket without human intervention.
- Transfer outside business hours: Configure how the agent behaves when no human agents are available — for example, send a message and queue the ticket for the next shift.
- Confidence threshold: Controls how cautious the agent is before replying. High (more cautious): replies only when highly confident, escalates when unsure. Medium (balanced): replies more broadly with fewer escalations.
- Daily conversation limits: A cap on the number of AI replies sent per day — useful for controlled rollouts or cost management. Conversations continue to arrive but the AI stops replying once the limit is reached.
- Escalation criteria: Unlike chat, the Email AI Agent handles conversations asynchronously — one reply per customer email. Each time the customer replies to an AI response,
- The agent reads the full thread history and generates a contextually aware follow-up reply.
- The agent retains context across turns within the same ticket thread.
- Each reply counts as one AI response against your daily message limit.
- If the customer's follow-up falls outside the agent's scope mid-thread, the agent escalates rather than guessing.
Multi-turn escalation criteria setting sets the maximum number of turns before automatic handover to a human agent.
Note: Multi-turn context is thread-scoped. If a customer opens a new ticket on the same issue, the agent treats it as a fresh conversation with no prior context.
For more detailed information on configuring handover settings, refer to Configure Email AI Agent trigger rules.
4. Customise customer feedback
Allows you to set up feedback buttons to let customers rate AI Agent's responses. 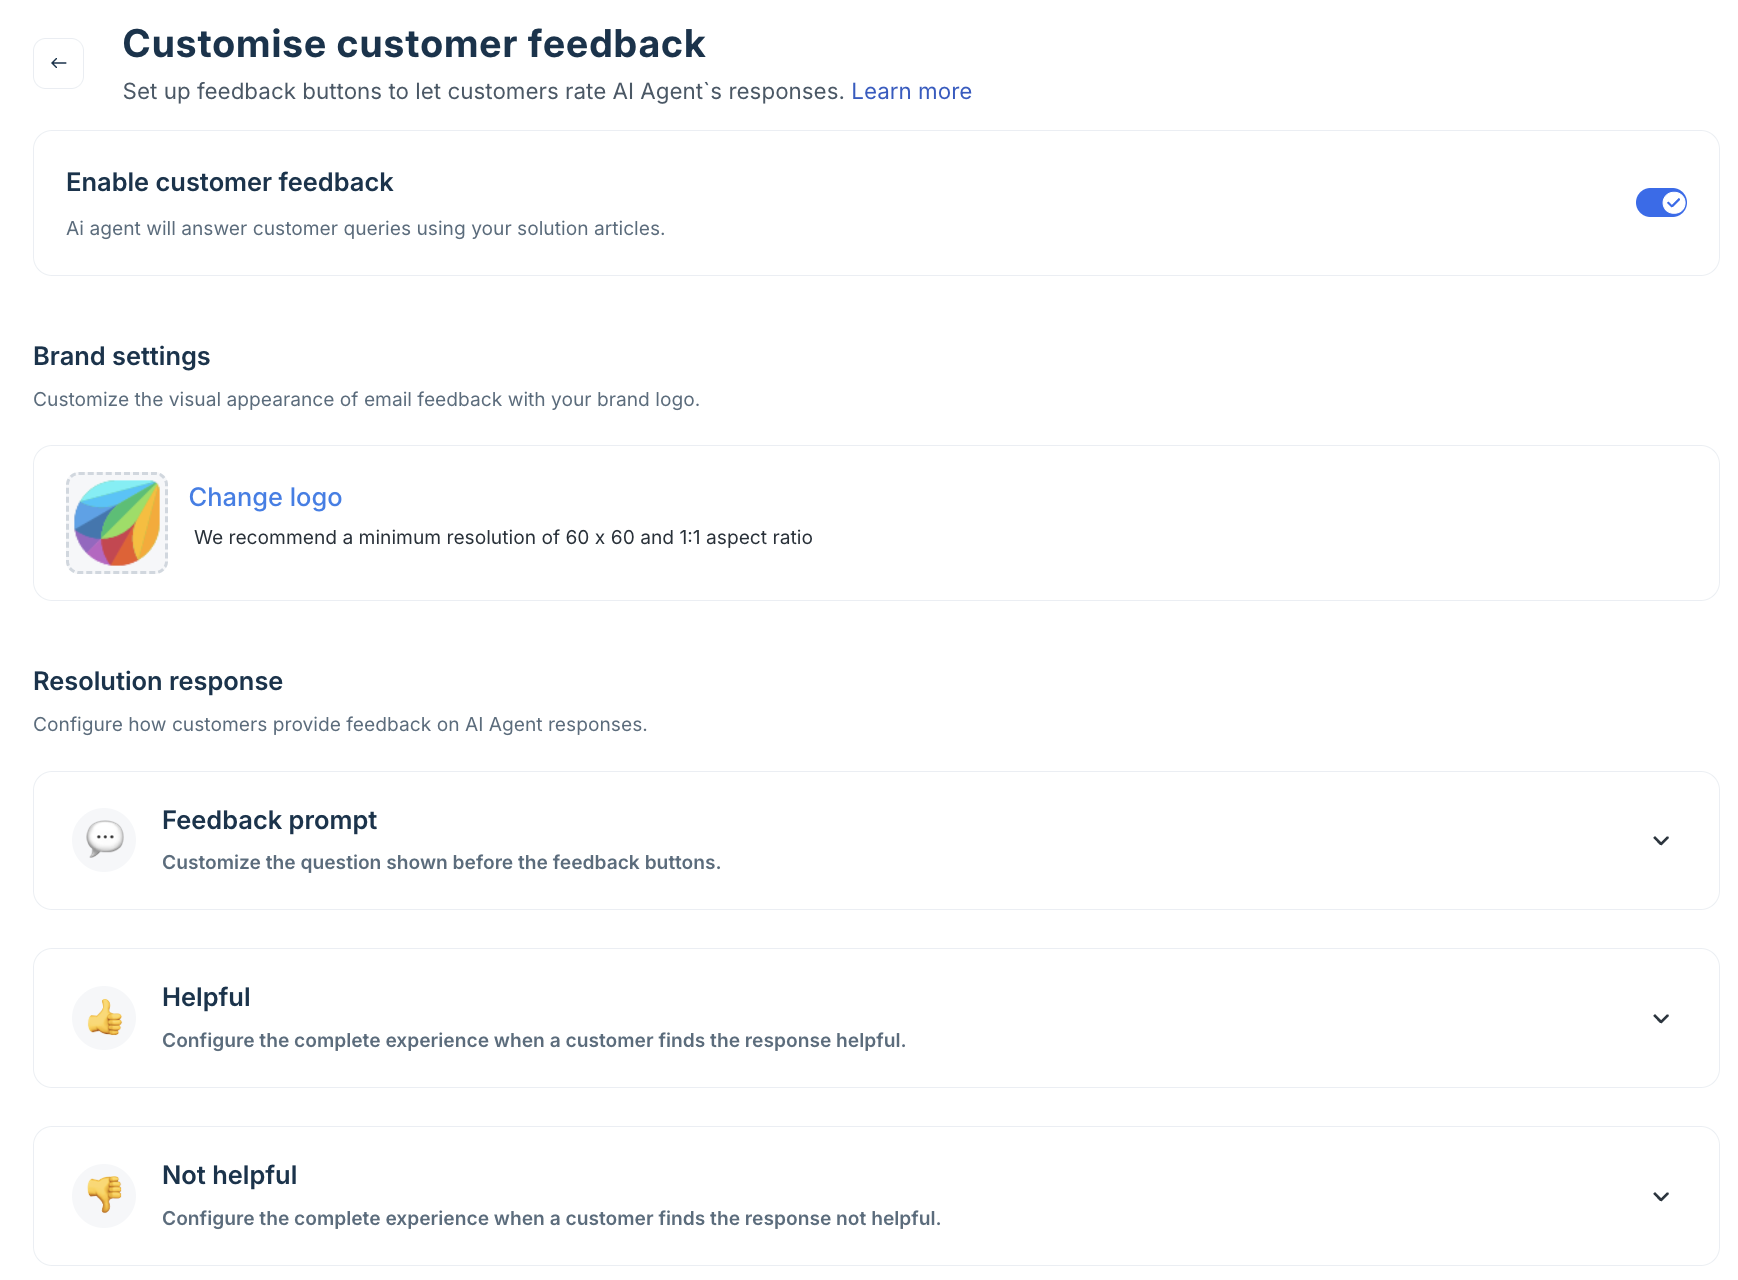
Configure the following:
- Brand settings: Customize the visual appearance of email feedback with your brand logo. It is recommended to use a minimum resolution of 60 x 60 and a 1:1 aspect ratio.
- Resolution response: Configure how customers provide feedback on AI Agent responses.
- Feedback prompt: Customize the explicit question or text prompt shown directly before the customer-facing feedback buttons.
- Helpful: Configure the complete automated experience, copy updates, or resolution actions when a customer finds the response helpful.
- Not helpful: Configure the complete experience, alternative support routing, or escalation workflows when a customer finds the response not helpful.
For more detailed information on configuring interaction feedback behaviors, refer to Configure Amail AI Agent trigger rules and automation.
5. Spam settings
Configure how the agent identifies and handles spam tickets. Enable spam detection to prevent AI Agents from forwarding non-actionable emails to humans and automatically close them. 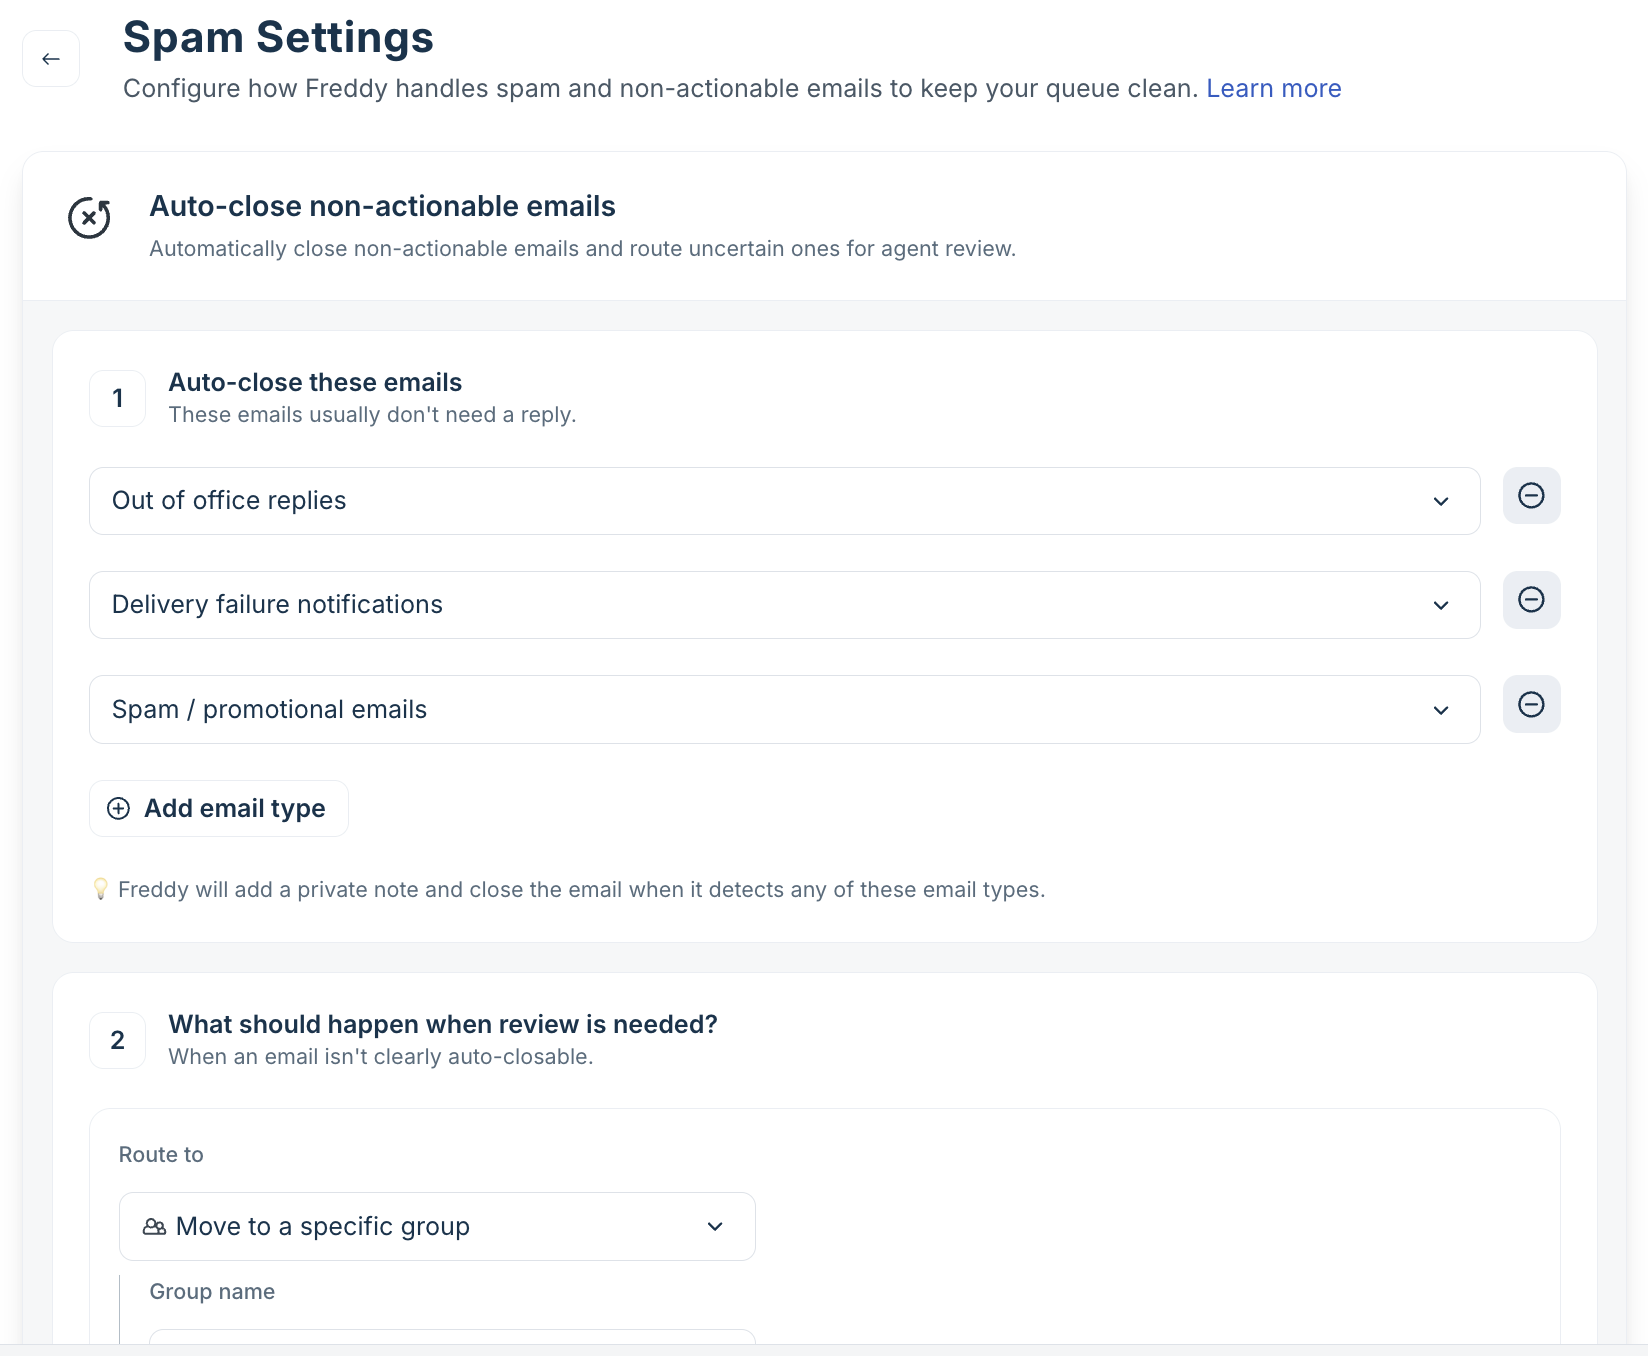
For detailed configuration, see Configure Email AI Agent trigger rules.
6. Agent identity
Controls the sender name and avatar that customers see in email replies. 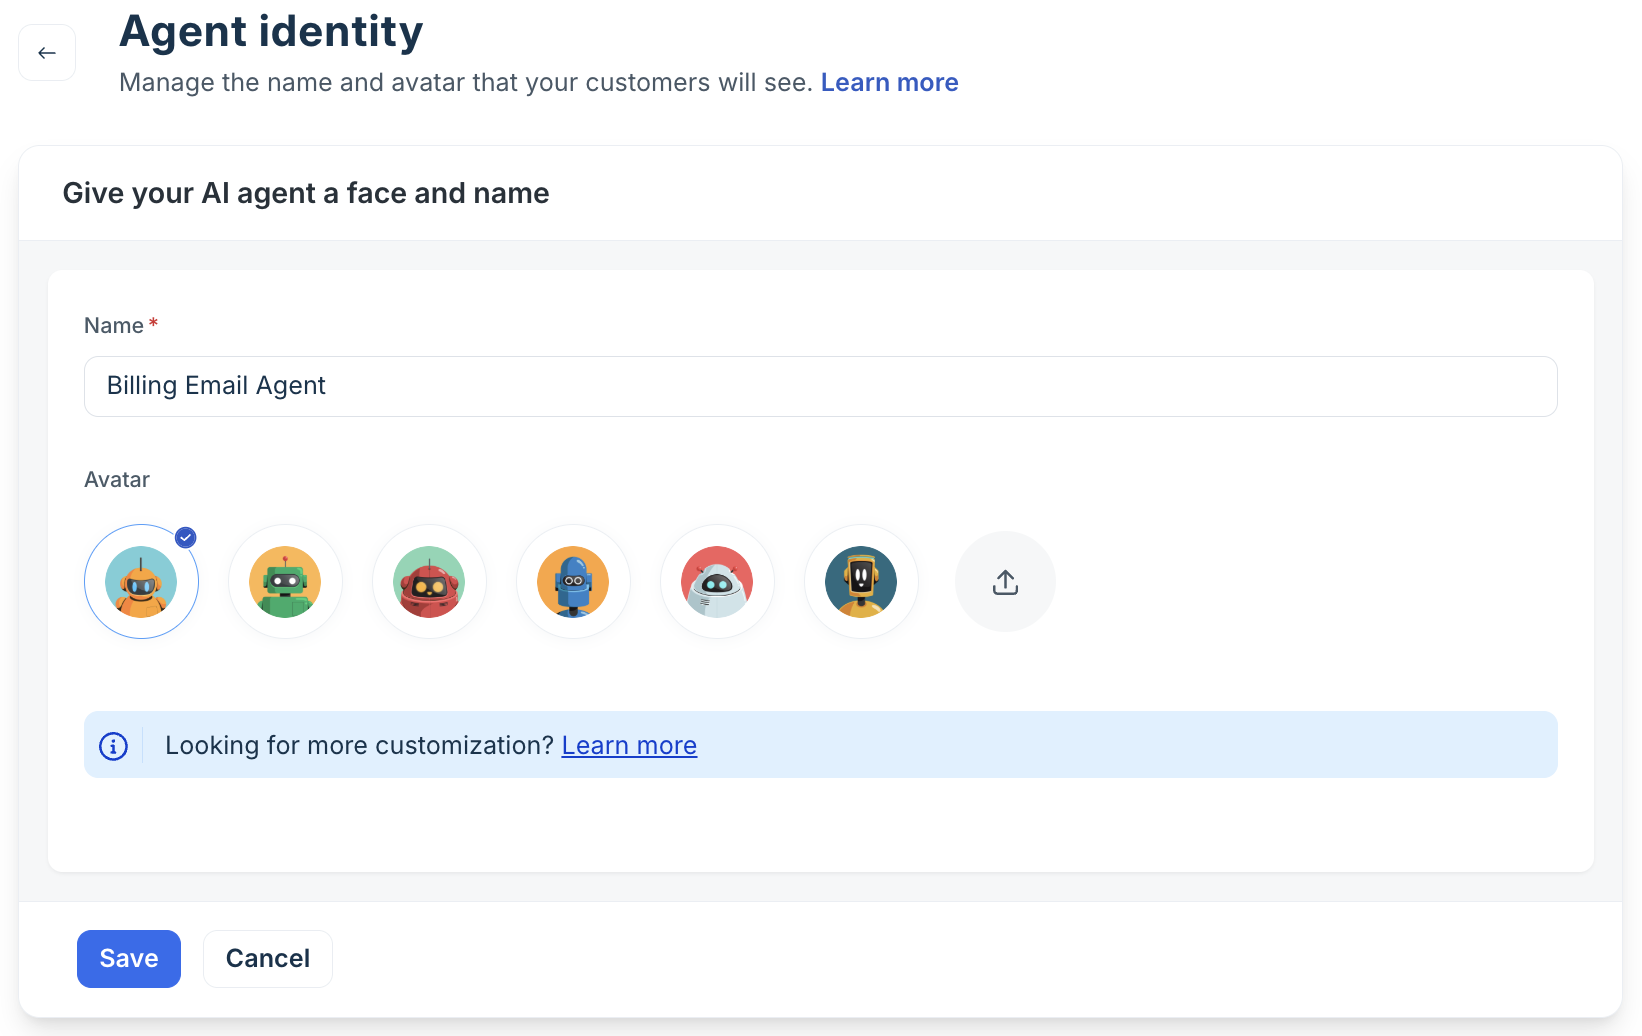
Navigate to Build > Configurations > Agent identity.
- Enter the display name used in outbound emails — for example, "UrbanCart Support" or "Freddy AI".
- Upload an avatar. Freshdesk uses the configured portal's brand image by default; uploading here overrides it for this agent.
- Save your changes.
Note: The sender email address (the From: address customers see) is determined by the mailbox the ticket arrived on — not by the agent identity setting. Different portals can display different sender identities based on their mailbox configuration.
Test the agent
Navigate to Test in the left navigation. Testing your email agent before mapping it to a live mailbox is strongly recommended. The Test section has two tools:
Preview — single-query testing
- Select Preview AI Agent.
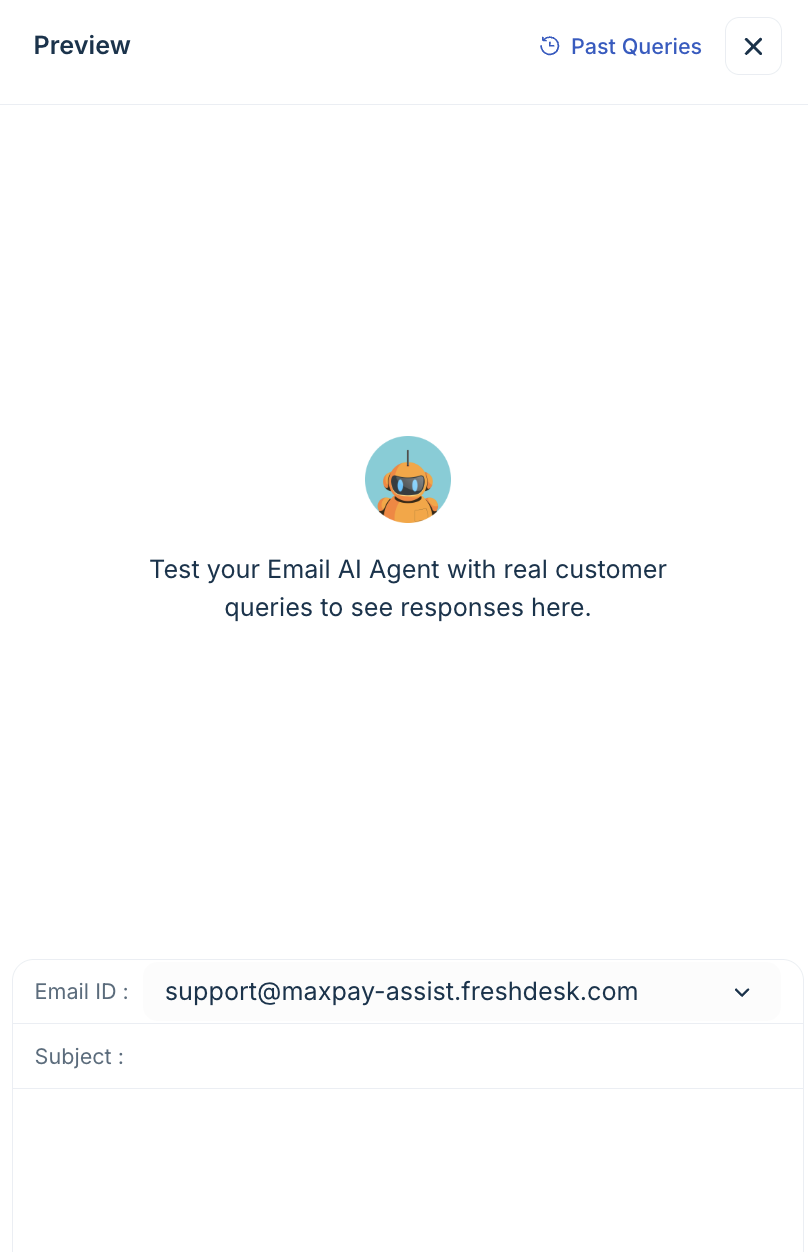
- Enter a subject and body that represents a realistic customer query.
- Review the full response — including the main answer, citations, feedback button placement, and signature block.
- If the response is incorrect or off-tone, update your Instructions or Knowledge and re-test.
- Use multi-turn testing to verify context handling — submit follow-up emails in the same thread to check whether the agent maintains context across replies.
Note: The preview uses the current draft configuration. It does not affect live conversations or consume message limits.
Evaluate — bulk query testing
- Select Test > Add queries.
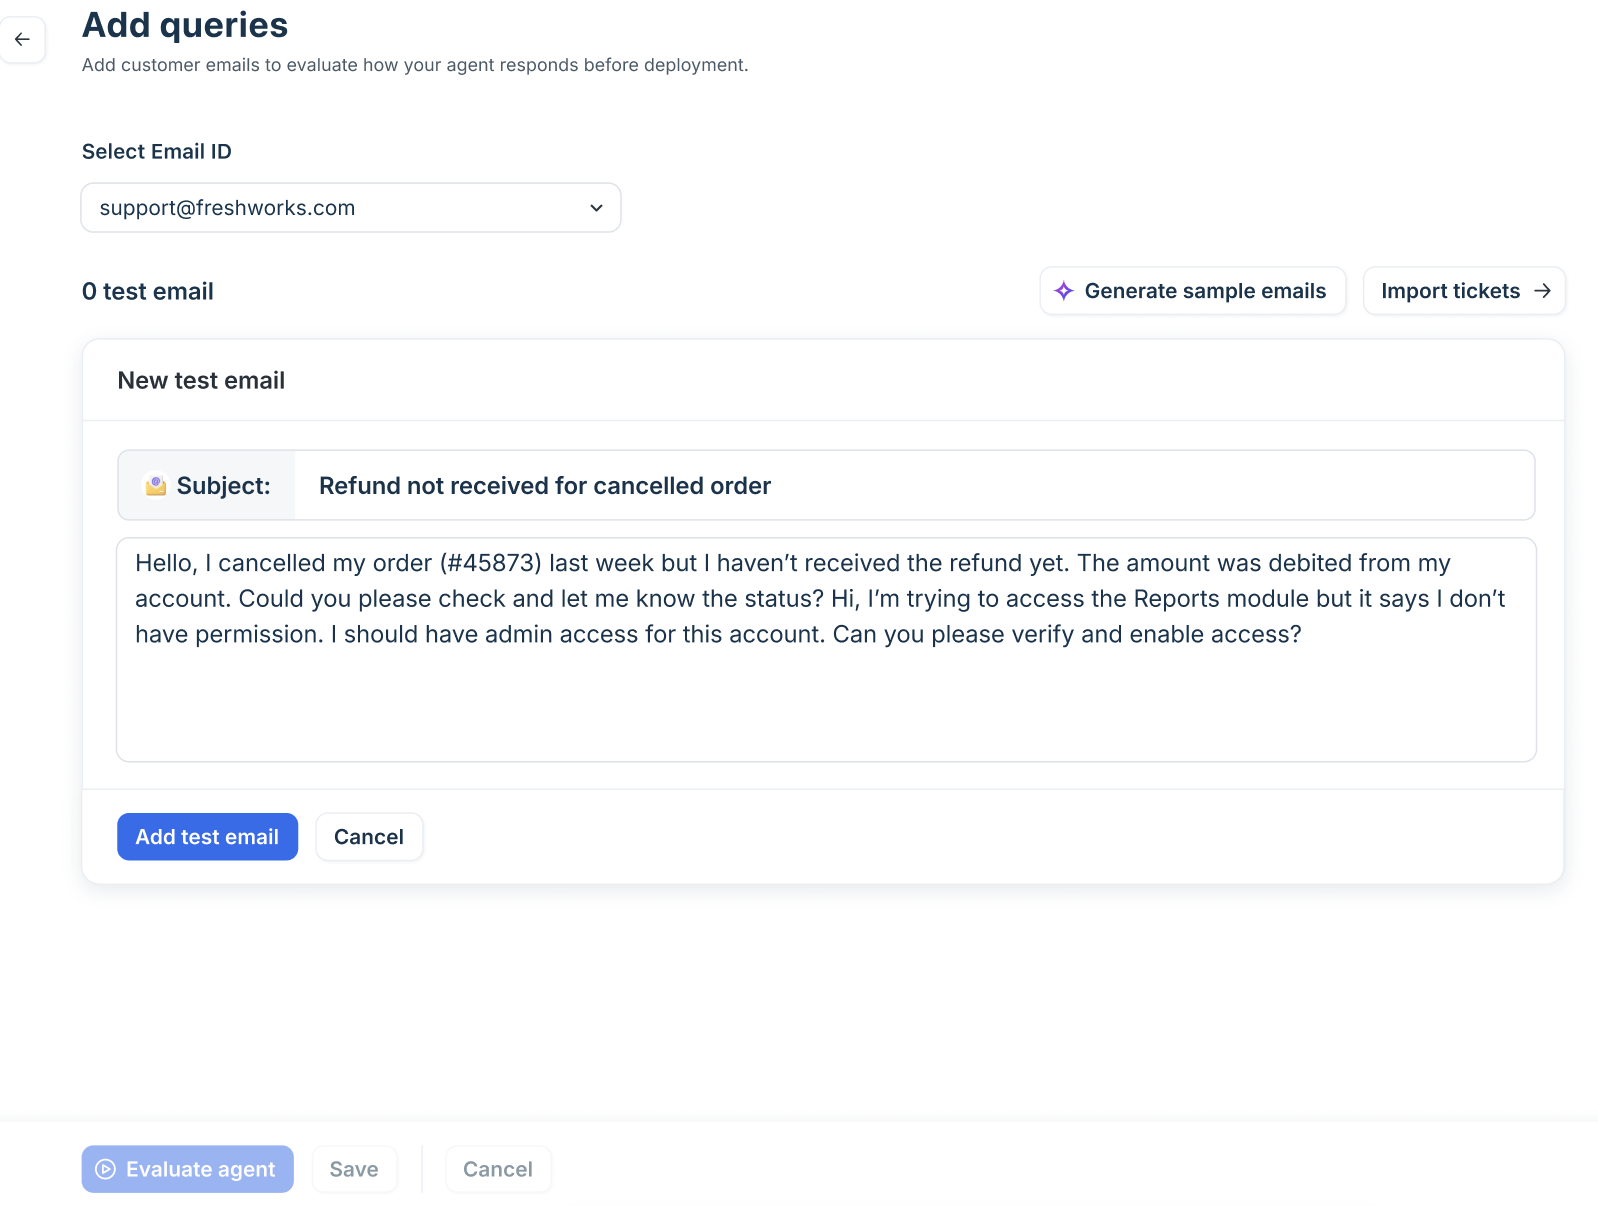
- Build your test set. You can add queries manually in email format, use Generate sample emails to create AI-generated test cases aligned to your business context, or Import tickets to use solved historical tickets.
- A maximum of 50 queries per evaluation run is supported.
- Select Run evaluation. Results show Answered, Unanswered, or Error status per query.
- Select any row to inspect the full response, citations, and workflow triggers for that query.
- For queries the agent could not answer, select Add Q&A to create a knowledge entry directly from the result.
- Select Export to download evaluation results for stakeholder review.
Best practice: Run an evaluation with at least 20 representative queries before deploying. Include edge cases — multi-part questions, queries outside the agent's scope, and queries in non-primary languages if multilingual support is enabled.
Deploy the Email AI Agent
Navigate to Deploy in the left navigation. The Deploy page has two sections: Choose ticket sources and Select your deployment strategy.
Choose ticket sources
Select the ticket sources the agent will respond to. Each source type has a Manage drawer where you select specific targets.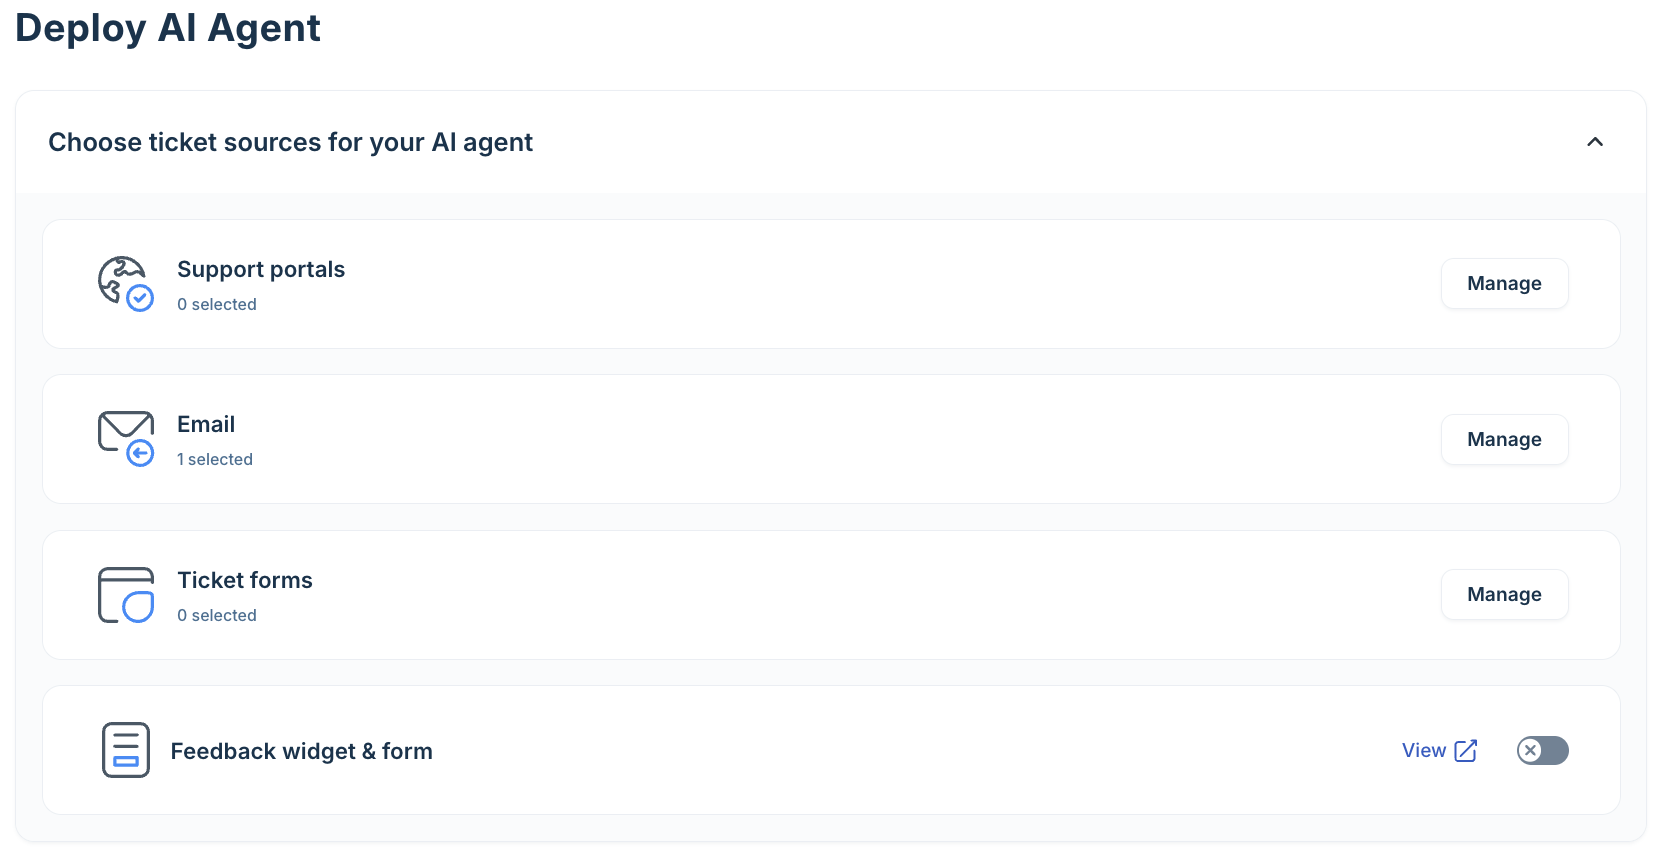
- Support portals: The agent responds to tickets created through selected portals. Select Manage > choose portals > Done. Portals where another AI Agent is already active are marked — only one active agent per portal is allowed.
- Email: The agent responds to tickets arriving at selected mailboxes. Select Manage > choose mailboxes > Done. Mailboxes with an active agent are greyed out.
- Web forms: The agent responds to tickets submitted through selected ticket forms. Select Manage > choose forms > Done.
- Feedback widget & form: Toggle on/off using the switch on the card.
Important: Each ticket source (portal, mailbox, or form) can have only one active AI Agent at a time. If you try to assign a source that already has an active agent, the UI flags it. You must deactivate the existing agent on that source before mapping a new one.
Select a deployment strategy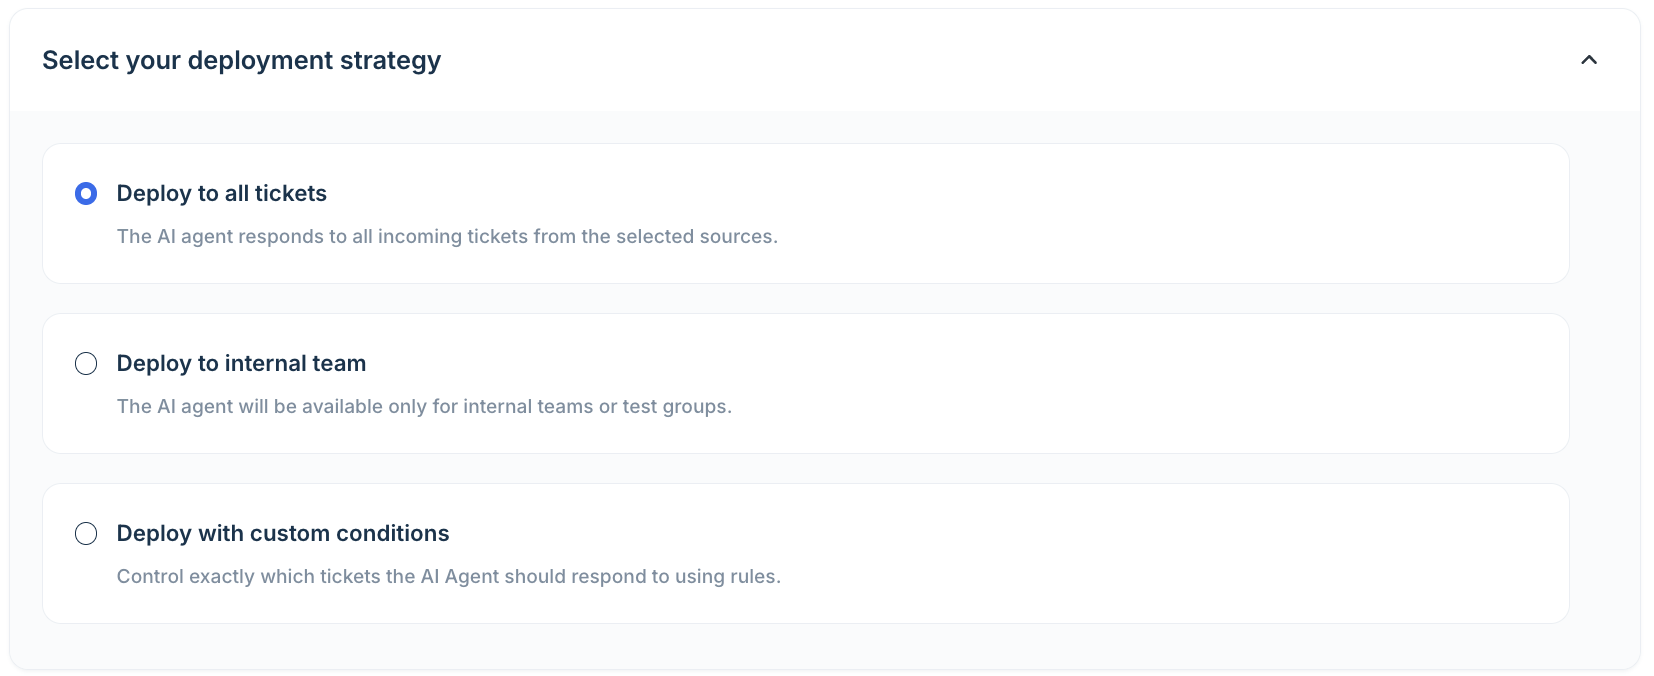
- Deploy to all tickets: The agent responds to every incoming ticket from the configured sources. Use this for a full production rollout after successful evaluation.
- Deploy to internal teams: The agent is active only for tickets assigned to selected internal users. Use this for a safe pilot rollout to validate agent quality before exposing to all customers.
- Deploy with custom rules: The agent responds only to tickets matching defined conditions. Use this for targeted deployment by ticket type, priority, source, or requester segment.
The conditions builder supports up to five levels of nested logic using AND/OR operators, giving you precise control over which tickets the agent handles. The Source condition is available, letting you scope the agent to tickets arriving from a specific channel such as email, portal, or web form. For example, a condition set might read: Free tier OR (VIP AND issue type is L1) OR (Form is Refund AND location is India) OR (Widget priority is Low)
Deploy and confirm
- Select Deploy. A confirmation dialog summarises the sources and strategy you have configured.
- Confirm. The agent moves from Draft to Active state. Incoming tickets on the configured sources are now handled by the AI Agent.
Note: Deployment is immediate. Tickets that arrived before deployment are not retroactively answered. Only new tickets created after the deployment is active are handled.
Email AI Agent — key differences from chat
Since the Email AI Agent works via email rather than live chat, several behaviors differ from those of the chat agent.
- Session metering: For Chat AI Agents, all interactions between the end-user and AI Agent within 24 hours from session initiation are counted as one session. For Email AI Agents, a session is defined as a 72-hour window starting from the customer’s first email. All AI responses within that window count as a single session, regardless of the number of replies.
- Asynchronous conversation model: Email AI Agent handles incoming email queries through back-and-forth replies asynchronously, whereas Chat AI Agent handles real-time conversations across messaging channels.
- Deployment targets: Email mailboxes, support portals, and web forms — not chat widgets or messaging integrations.
- Agent name is internal only: Unlike the Chat AI Agent, the name you give the Email AI agent is not visible to customers. The sender identity customers see is controlled by the mailbox and agent identity settings.
- Reply structure: All Email AI Agent replies follow a fixed content order: greeting → main response → citations (if enabled) → brand signature → feedback buttons (resolution replies only) → legal & compliance footer. Chat AI Agent replies do not conform to a fixed reply structure.
- Feedback mechanism: Feedback buttons are embedded in the AI-generated email reply itself, not in a widget. They appear only on resolution-type responses — not on clarification questions.
For more detailed information, refer to Understand email safeguards and threading behavior.