
 Community
 Video Library
 Agent Training
 Freshservice
 Freshdesk
 Freshchat
 Freshcaller
 Freshsales
 Freshteam
 Freshworks Neo
 Freshsurvey
 Estate Omnichannel
 Forest Omnichannel
TABLE OF CONTENTS
- Prerequisites
- Overview of Auto Triage
- See Auto Triage in action
- Configure and set up Auto Triage
- View Auto Triage suggestions
- Manage Auto Triage suggestions
- Admin notifications
- Keep automation rules working alongside Auto Triage
Auto Triage leverages Freddy AI in Freshdesk to optimize ticket handling by intelligently prepopulating ticket fields based on historical patterns and contextual signals.
Auto Triage can predict values for three default ticket fields(Priority, Group, and Type), custom dropdowns, and dependent (nested) fields. When enabled, it automatically manages Priority, Group, and Type, which are set to Manual by default. This feature reduces manual data entry, improves field consistency, and helps teams maintain clean, organized ticket data.
In this article, we’ll discuss how to set up and manage Auto Triage suggestions for default and custom drop-down ticket fields.
Prerequisites
Before configuring Auto Triage, ensure that:
- You have Administrator privileges.
- You are on the Freshdesk Pro/Enterprise or Freshdesk Omni Pro/Enterprise plan.
- You have sufficient historical ticket data (recommended minimum of 2,000 tickets) for optimal accuracy.
- Your automation rules are clearly defined and intentional.
Note:  Automation Rules always take precedence over AI suggestions. If an Automation Rule and Auto Triage both attempt to update the same field, the Automation Rule will always take precedence.
For example, if your Automation rule states: “All emails from VIP customers must be marked as High Priority,”
That rule will apply even if Auto Triage predicts a different priority.
For further details see section Keep automation rules working alongside Auto Triage
Overview of Auto Triage
Auto Triage acts as a digital analyst, evaluating incoming tickets via Email and Portals.
It analyses:
- Ticket subject and description
- Customer intent and sentiment
- Historical ticket patterns
- Contextual signals
Based on this analysis, Freddy AI suggests or automatically updates configured ticket fields to ensure accurate classification and routing.
Supported ticket fields
Auto Triage supports the following three default ticket fields:
- Priority
- Group
- Type
Note: Other default system fields are not supported for Auto Triage.
You can enable Auto Triage for custom dropdown and dependent (nested) fields (e.g., Category > Sub-category).
Triage types
You have granular control over how much autonomy you grant the AI for each specific ticket field:
- Manual (Standard Control): Freddy provides a suggestion, but the agent must click Apply manually. This is ideal for sensitive fields where human context is paramount, such as Customer Sentiment or Complexity.
- Automatic (High Efficiency): Freddy applies the value in the backend immediately upon ticket creation. The field appears pre-filled when the agent opens the ticket. This is the recommended setting for high-volume routing fields, such as Assignee Group or Priority, to ensure tickets are routed to the right team instantly
Note: To ensure business-critical logic remains intact, Automation Rules always take precedence over Auto Triage suggestions, even for Automatic Triage types.
See Auto Triage in action
When a ticket is created:
- Freddy analyses the ticket content and context.
- It predicts values for configured fields.
- Based on the update type:
- It displays suggestions (Manual mode), or
- It automatically applies the values (Automatic mode).
- Automation Rules are evaluated and override AI suggestions if conflicts exist.
Configure and set up Auto Triage
To enable and configure Auto Triage, follow the steps below:
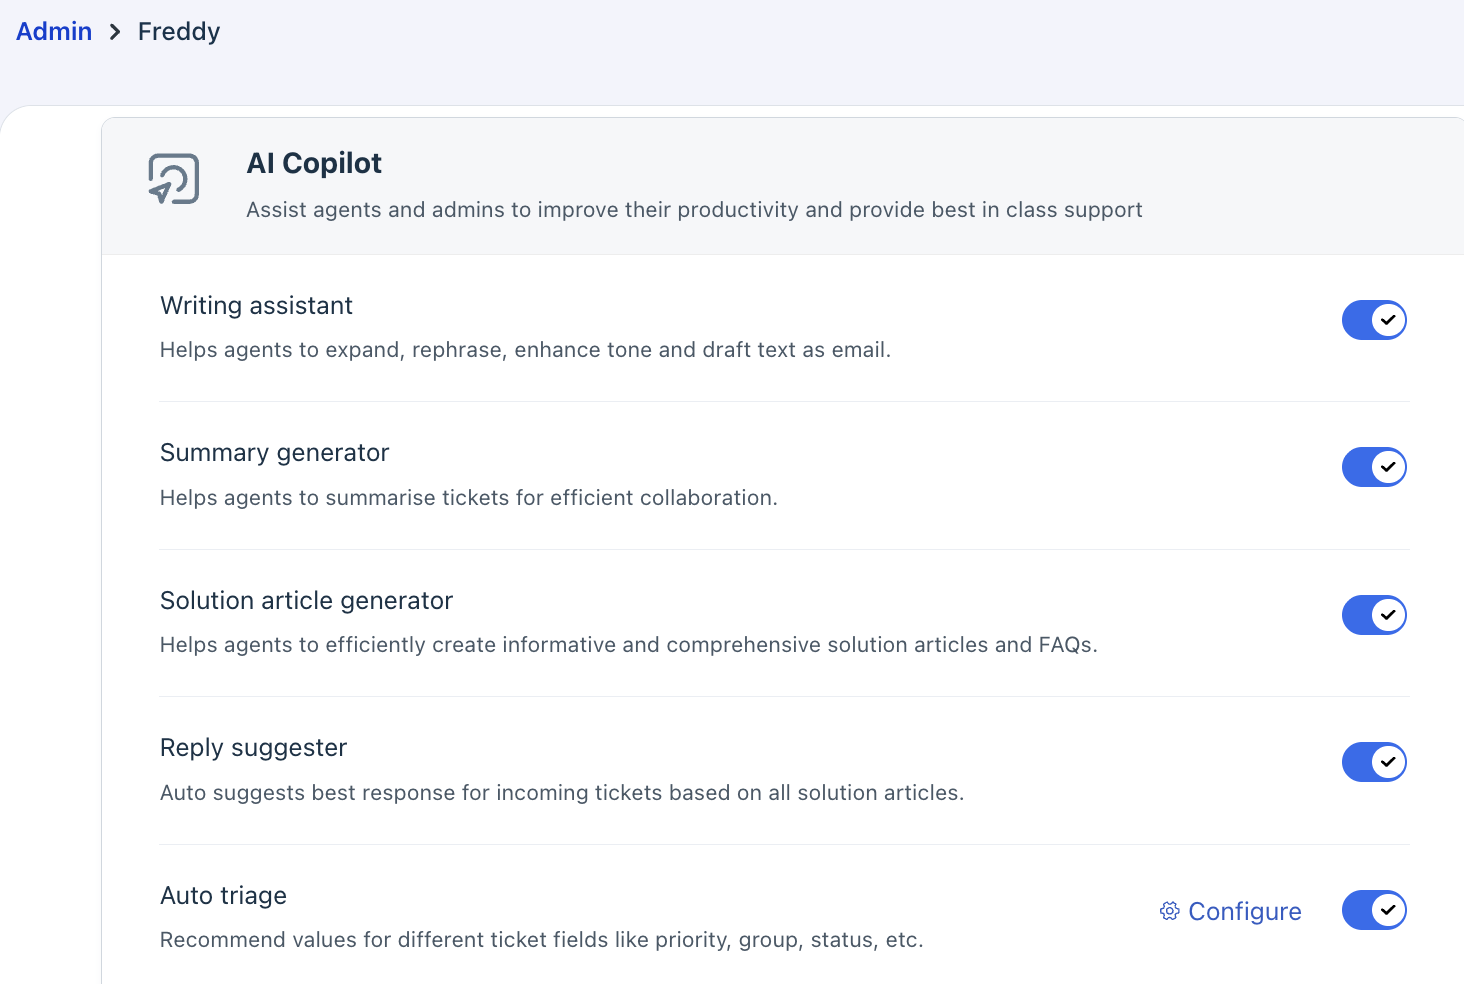
- Log in to your Freshdesk, go to Admin > Freddy > AI Copilot > Auto triage, and toggle it ON.
- Click Configure.
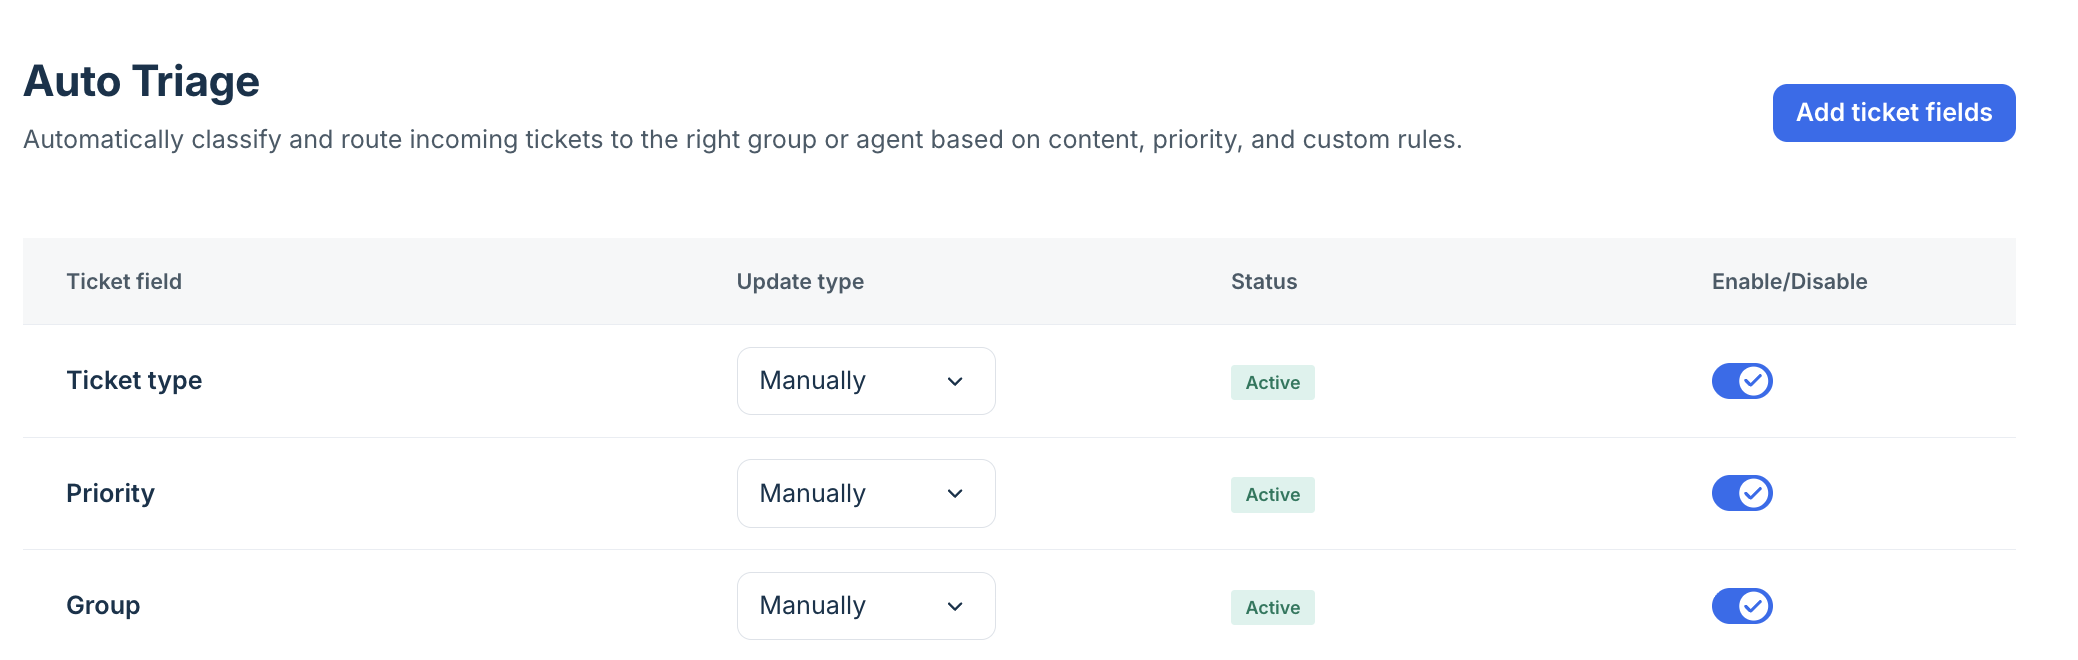
- Review the list of active fields and their statuses.
- Click Add ticket fields to open the side-slider and choose from standard dropdowns or custom fields, then click Add fields.
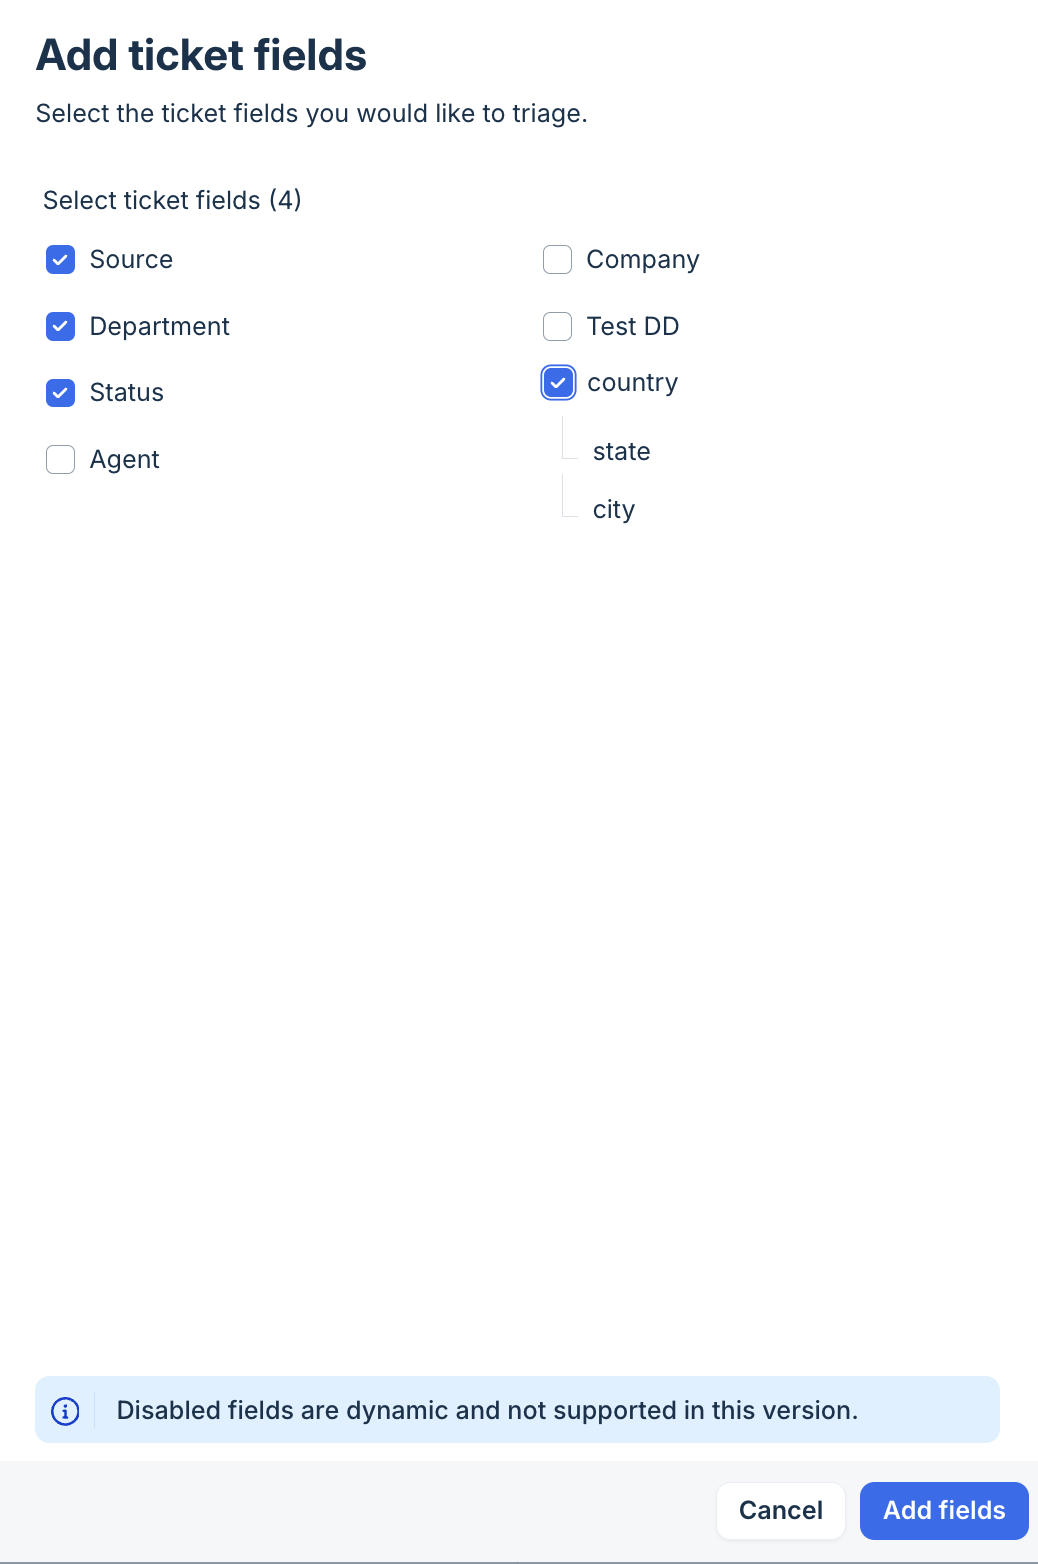
Note: Disabled fields are dynamic and not supported in this version.
- If selecting a dependent child field, the system automatically selects the parent fields to ensure the AI understands the full context.
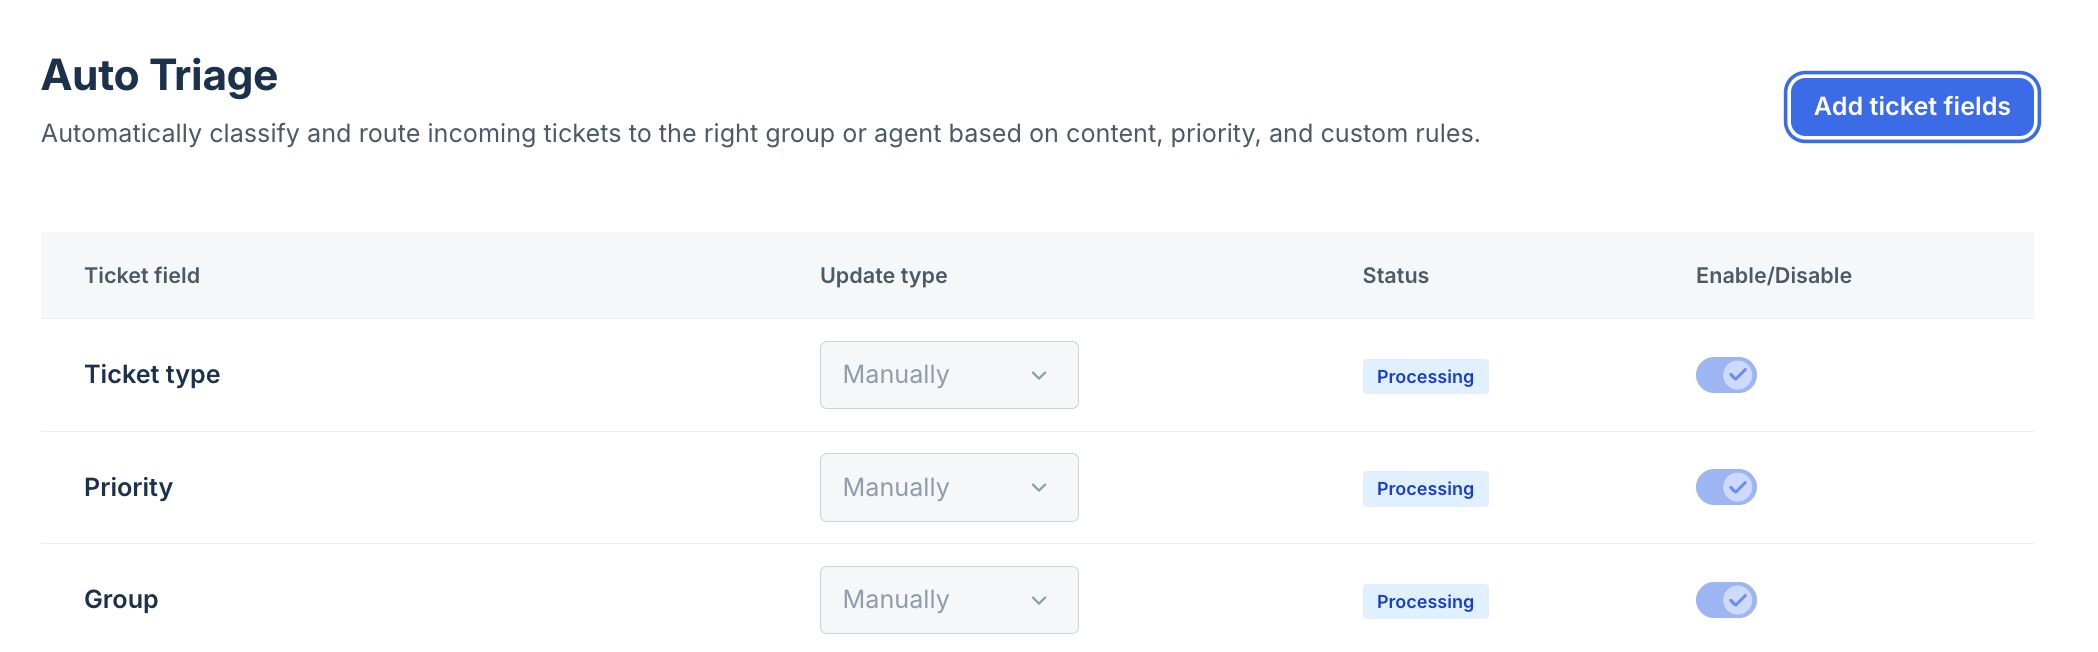
- Choose the Update Type as Manual or Automatic for each field. While Manual is the system default to ensure accuracy, switching to Automatic is the best path for mature workflows.
- The enablement process is now automated and typically completes within 2 days.
- Track the ticket field readiness and monitor its status in the Auto Triage dashboard.
Status Description Action required Processing AI is analysing historical ticket data No action required Active Field is live and visible to agents Monitor performance Inactive Suggestions are paused Reactivate if needed Insufficient Data Not enough historical data available System will auto-check every 2 days Partially Insufficient Parent field has enough data; child field does not Wait for additional training data
- You can set a field to Inactiveif:
- Predictions are inaccurate.
- The field is no longer relevant.
- Business workflows have changed.
A feedback pop-up appears when a field is disabled. This helps improve AI performance tracking.
- If a field is in Processing or Insufficient Data state, you can't remove it from Auto Triage directly.
You can archive the ticket field and re-add it later if needed.
View Auto Triage suggestions
To view Freddy AI suggestions displayed for fields where Auto Triage is enabled,
- Log in to Freshdesk as an Agent.
- Go to the Tickets tab and open a ticket.
- On the ticket details page, under Properties, you will see suggestions generated by Freddy AI.
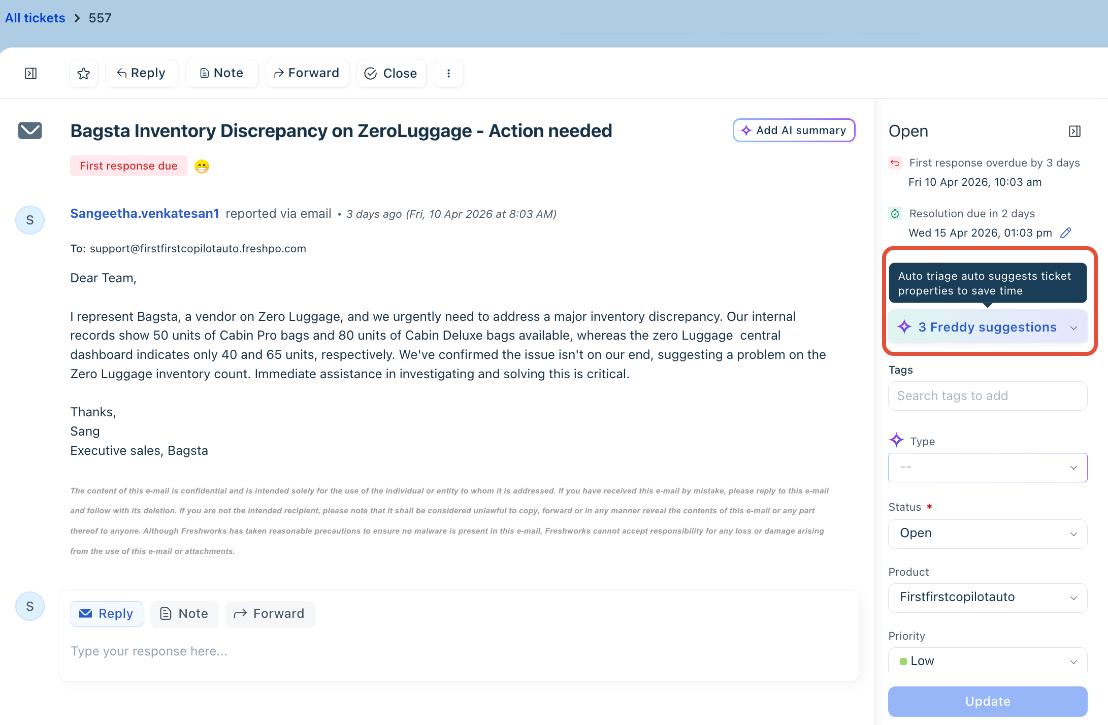
- You can also view the total number of available suggestions.
- Click the drop-down to view suggestions for each enabled ticket field.
- For example, suggestions may be available for:
- Type
- Priority
- Group
- Custom Category fields
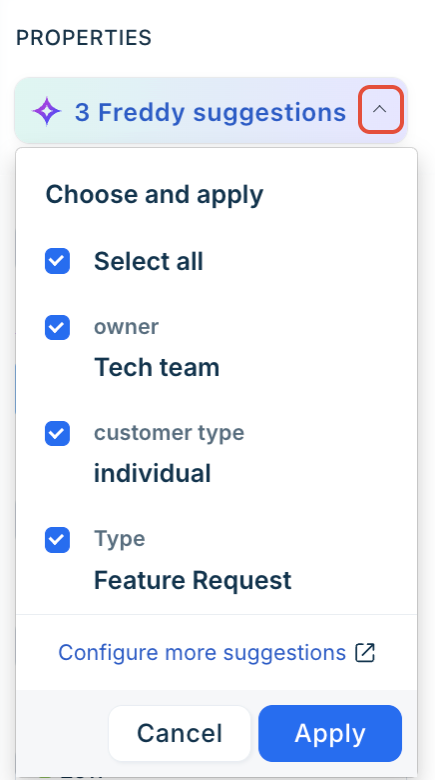
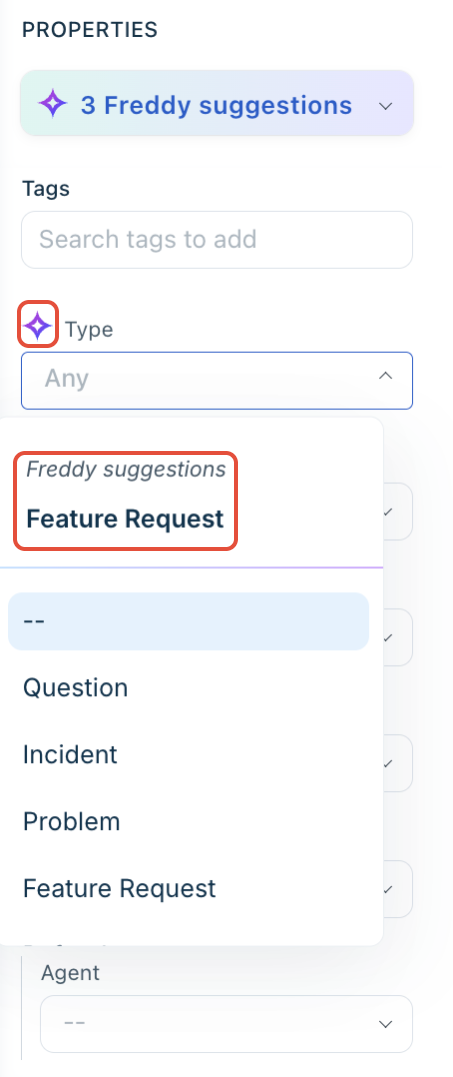
- The suggested value appears:
- At the bottom of the field drop-down list, or
- At the top of the field list with a Freddy icon indicator
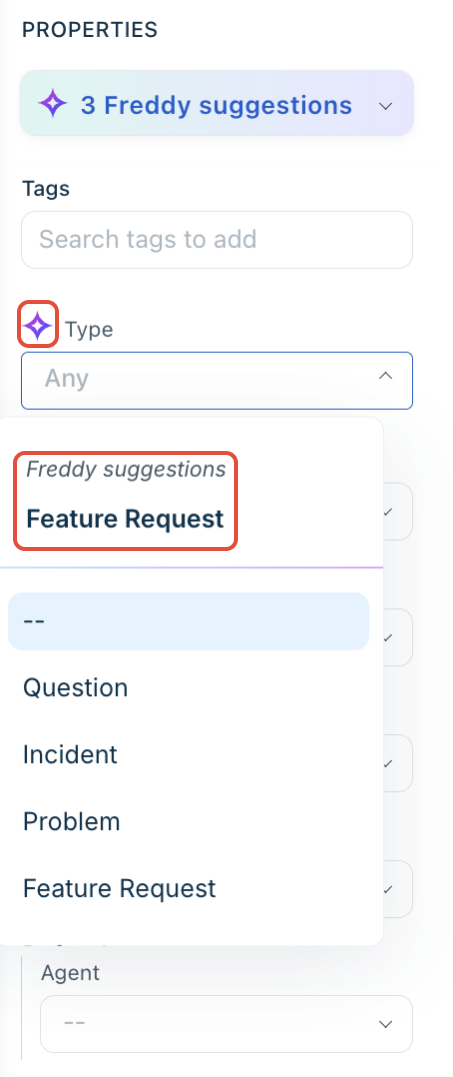
- If a suggestion is available, you will see the Freddy icon next to the field. Click the field to view the suggestion.
Manage Auto Triage suggestions
You can choose to accept, ignore, or reject suggestions.
Accept suggestions
When you accept a suggestion, you approve the value predicted by Freddy AI and update the ticket field. To accept suggestions from the Freddy suggestions panel:
- Under Properties, open the Freddy suggestions drop-down menu.
- By default, all suggestions are selected.
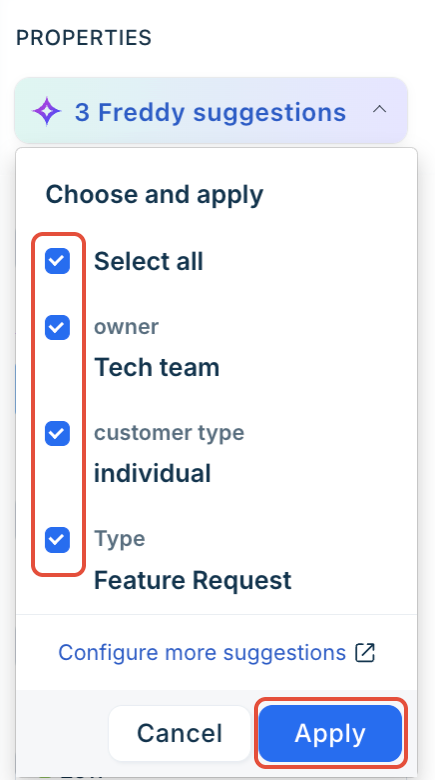
- To choose specific fields, uncheck the Select all option, and then check the boxes next to each desired field.
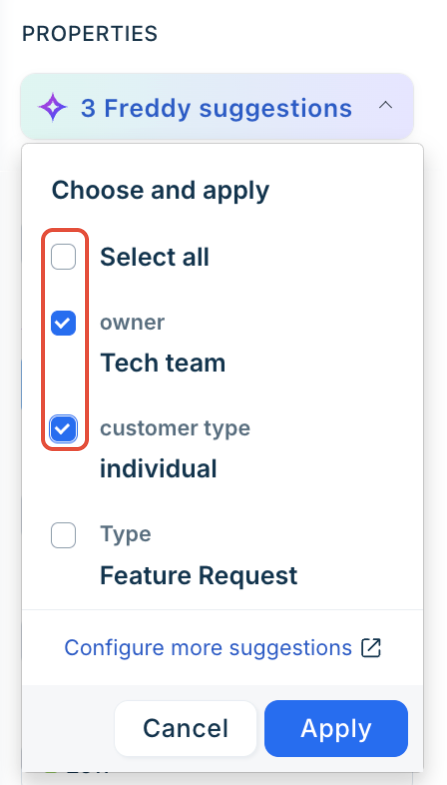
- Click Apply to confirm.
- Click Update to save your changes.
To accept a suggestion from an individual field:
- Click the ticket field.
- Select the Freddy suggestions shown at the top of the list.
- Click Update.
Ignore suggestions
When you ignore a suggestion, you take no action. Other agents accessing the same ticket will continue to see the suggestions and can choose to accept, reject, or ignore them.
To ignore suggestions:
- Under Properties, open the Freddy suggestions.
- Uncheck the suggestions you do not want to apply.
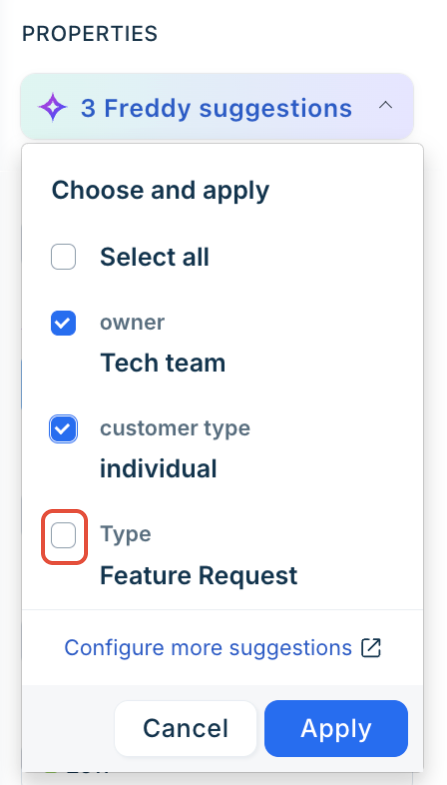
- Click Apply and Update.
Note: Updating the ticket will only modify checked fields. Unchecked fields remain unchanged.
Reject a suggestion
Rejecting a suggestion means you overwrite the AI-predicted value with another value.
For example:
If Freddy suggests Type = Order Issues, but the correct value is Payment Issues, you can select the appropriate value instead.
To reject:
- Click the ticket field.
- View the Freddy suggestion at the top.
- Scroll and select a different value.
- Click Update.
Once rejected, other agents will still see the original Freddy suggestion with the updated field value. Rejected suggestions are monitored and help shape future feature improvements.
Configure more suggestions
As an Admin, you can expand Auto Triage coverage to additional eligible fields when you are confident in the accuracy of Freddy’s predictions or want broader automation support.
For example:
If Auto Triage is currently enabled only for Priority, and you would like a custom drop-down field, such as Product Category, you can configure those fields from the Auto Triage settings page.
To configure more suggestions,
- Open any ticket.
- Under Freddy Suggestions in the Properties panel, click Configure more suggestions.
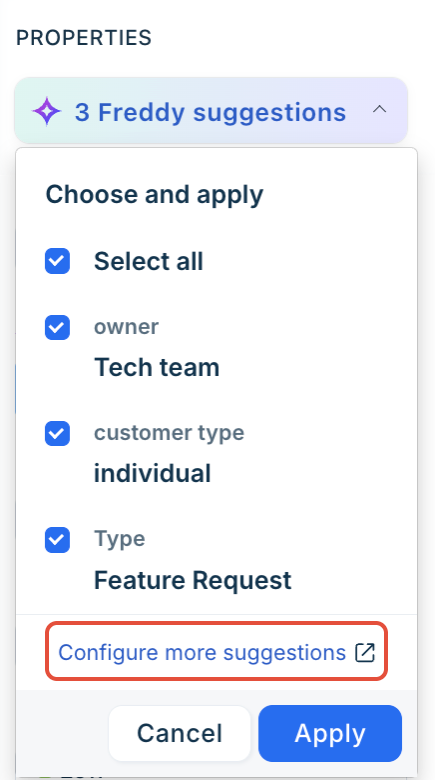
- You will be redirected to the Auto Triage configuration page.
- Select the eligible default or custom drop-down fields you want to enable.
- Save your changes.
Once configured, Freddy AI will begin generating suggestions for the newly enabled fields (subject to data eligibility requirements).
Admin notifications
Stay informed with admin notifications when:
- A field moves from Processing to Active.
- Auto Triage becomes visible to agents.
Example:
“Triage for Order ID is now active. Status changed from Processing to Active. Triage is now visible to agents.”
Keep automation rules working alongside Auto Triage
Auto Triage evaluates a ticket only after all ticket creation automation rules have run, regardless of whether Execute First Matching or Execute All Matching is selected. Because automation rules execute first, they always act on the ticket's original data, not on values suggested by Auto Triage.
If an automation rule and Auto Triage are configured to update the same field, the automation rule takes precedence. Auto Triage will not suggest or apply a value for that field. This applies to both Manual and Automatic triage types.
The following table describes the resulting behavior by scenario.
Scenario | Behavior when Auto Triage is active |
An automation rule sets a value for a field also configured in Auto Triage (for example, "VIP customers → Set Priority as High") | The automation-set value stands. Auto Triage does not generate a suggestion or apply a value for that field on that ticket. |
An automation rule does not set a value for a field configured in Auto Triage | Auto Triage evaluates the field normally, surfacing a suggestion (Manual) or applying a value (Automatic) as configured. |
An automation rule sets Priority, while Group is configured in Auto Triage and not set by any rule | Priority remains as set by the rule. Group is still evaluated and suggested or applied by Auto Triage independently. Precedence is evaluated per field, not per ticket. |
A field is configured with the Automatic triage type, and no automation rule sets a value for it | Auto Triage applies the value immediately on ticket creation, the same as it would for an unaffected field under the Manual type. |
Note: Precedence is field-by-field, not all-or-nothing. An automation rule that sets one field does not prevent Auto Triage from evaluating other configured fields on the same ticket.
If your automation rules set values broadly across Priority, Group, and Type, review their match conditions before enabling Automatic triage type for those fields.