
 Community
 Video Library
 Agent Training
 Freshservice
 Freshdesk
 Freshchat
 Freshcaller
 Freshsales
 Freshteam
 Freshworks Neo
 Freshsurvey
 Growth
TABLE OF CONTENTS
- Prerequisites
- Create a chat AI agent
- Test the agent before deploying
- Deploy the chat AI agent
- Session consumption in chat
The chat AI agent handles live customer conversations in real time — on your web widget, WhatsApp, and other connected messaging channels. It responds instantly, executes workflows, and escalates to a human agent when needed, all without requiring a customer to send an email or open a ticket.
This article covers how to create a chat AI agent, connect knowledge sources, configure instructions and agent identity, test the agent, and map it to your channels. For handover settings, auto-resolve, outside business hours, and feedback configuration, see Configure chat handling rules and live handoff.
Prerequisites
- Freshdesk Omni plan with AI Agent Studio enabled
- Ensure you have Administrator access to AI Agent Studio.
- At least one widget must be configured before mapping the AI Agent to a channel.
- At least one knowledge source must be added before testing or deploying workflows.
Create a chat AI agent
Create a Chat AI Agent in 5 easy steps:
- Access AI Agent Studio
- Add knowledge
- Add workflows
- Write instructions
- Set Configurations
Access AI Agent studio
- As an admin, navigate to AI Agent Studio from the left navigation.
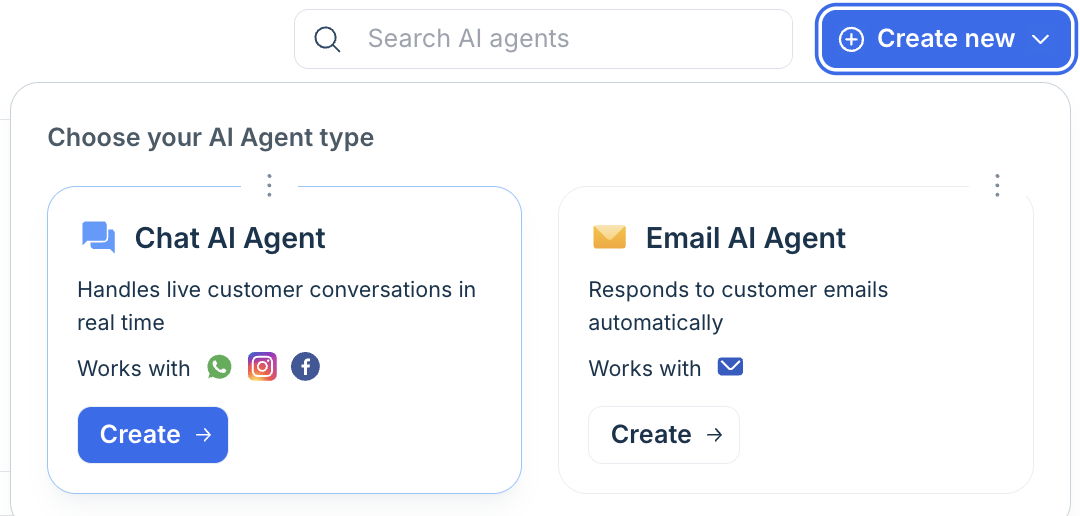
- On the AI agents list page, select Create new.
- In the agent type picker, select Chat AI Agent. The Chat AI agent handles live customer conversations in real time and works with WhatsApp, Instagram, Messenger, and other Freshchat channels.
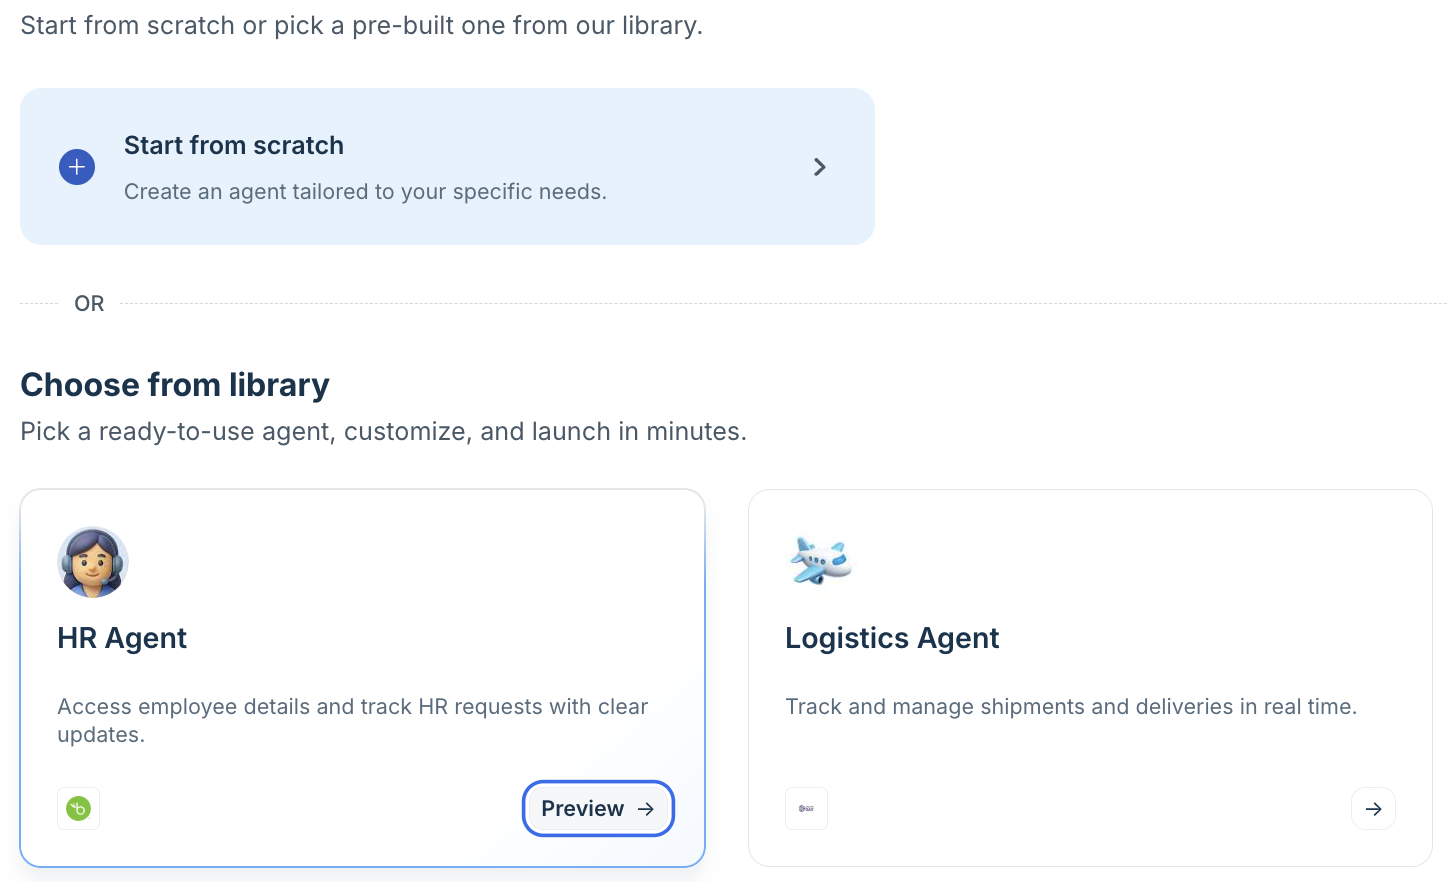
- You can either build the Chat AI agent from scratch or select a pre-built chat AI agent from the AI agent library.
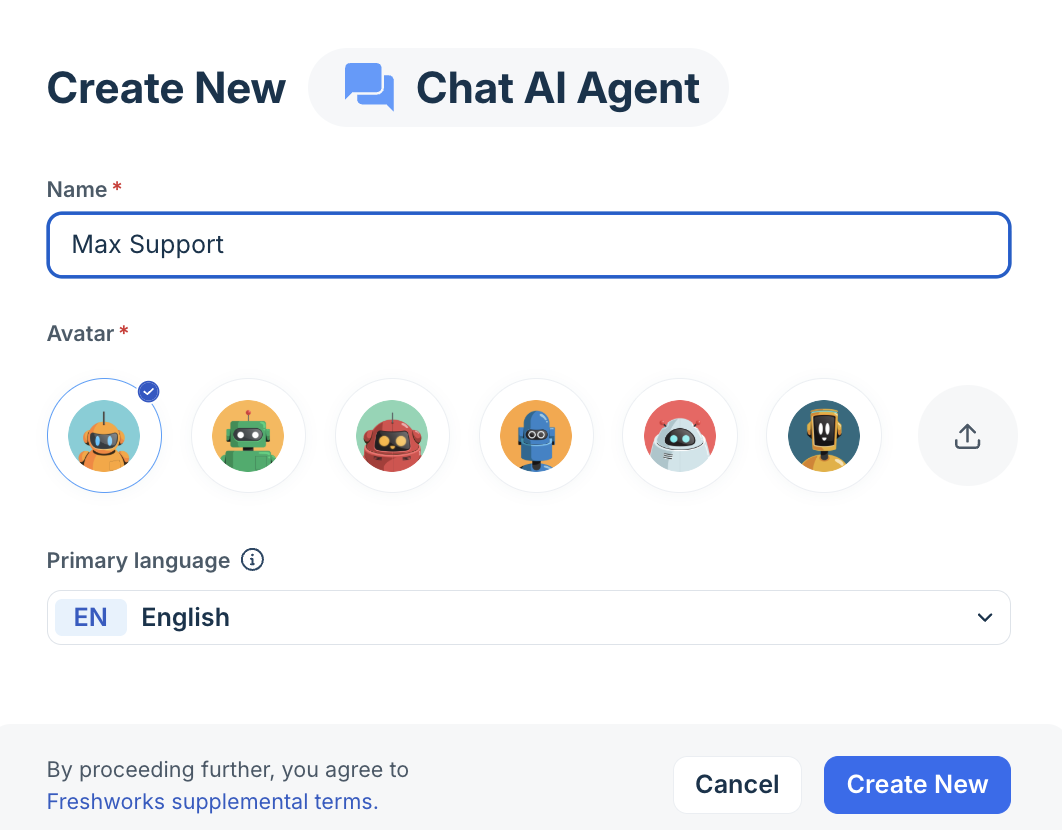
- In the Create New dialog, enter a name and select an avatar. The name is visible to customers in the chat widget. Select your primary language and select Create New. The agent is created in Draft state.
Note: The 50-agent combined limit applies across chat and email. The Create new button is disabled when the limit is reached. Archive or delete an existing agent to free a slot.
Add knowledge
Navigate to Build > Knowledge. The chat AI agent supports the same knowledge source types as the email agent:
Source type | Notes for chat deployment |
Solution articles | Enable portal filtering if you run multiple brands. For chat, queries are matched to the portal associated with the widget the conversation originated from. |
Uploaded files | Toggle citation visibility per file. Citations in chat appear as inline links in the widget response bubble. |
URLs | Crawled URLs are indexed and available to the chat agent. Sync status is shown per URL. |
Q&A | Manual question-answer pairs for queries not covered by other sources. Useful for chat-specific FAQs that are not in your help center. |
For detailed configuration of each source type, see Build and curate knowledge for AI agents
Add workflows
Workflows extend your AI Agent’s ability to think, reason, and act—automating complex workflows like order cancellations or subscription updates. You can create and manage Workflows using:
- Workflow builder - giving you complete control to build workflows from scratch
- Workflow library - enabling you to integrate pre-existing templates easily
Learn more about Workflows for AI agents.
Write instructions
Navigate to Build > Instructions. Instructions define how the agent understands your business and how it communicates in the chat widget.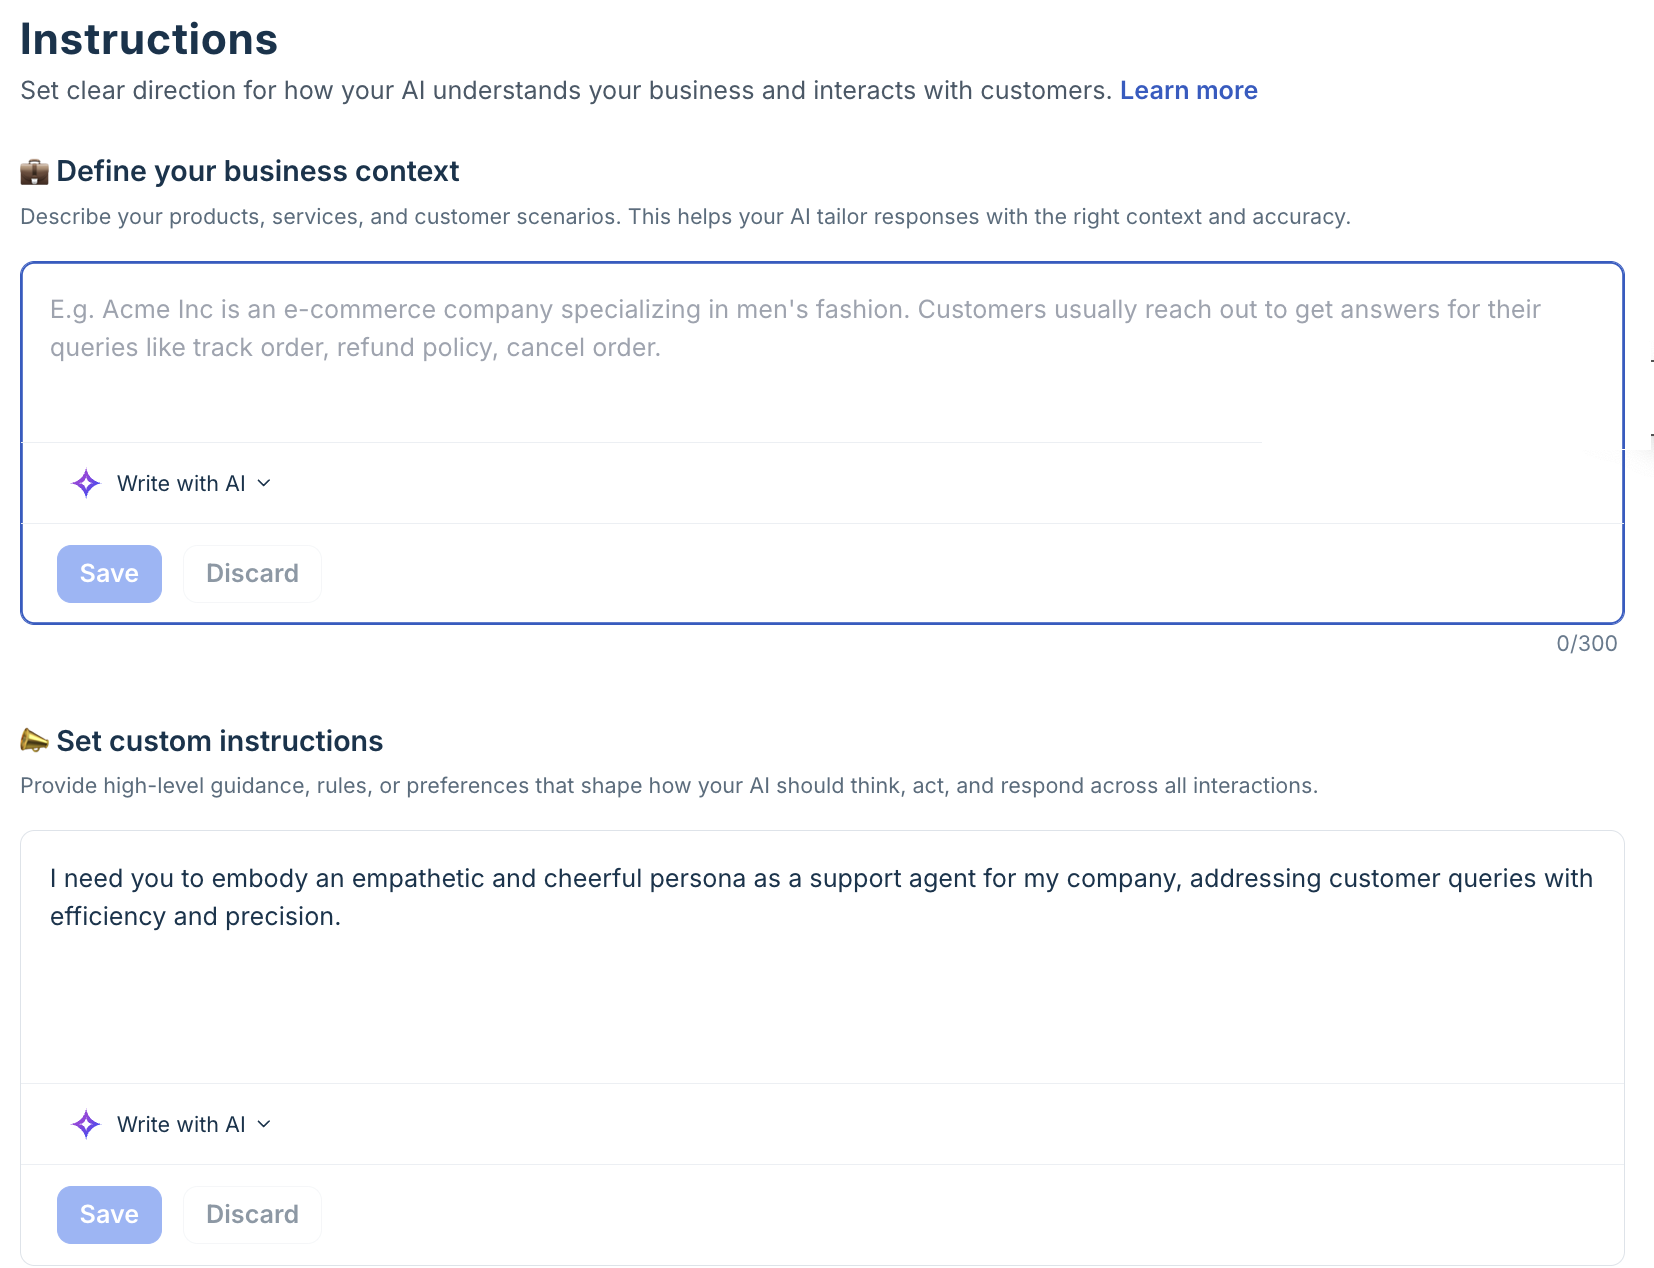
Define your business context: Describe your company, products or services, and the scope of what the chat agent should help with. Be explicit about topics it should not handle — for example, off-topic requests, pricing negotiations, or topics reserved for human specialists.
Example: "UrbanCart is a D2C fashion e-commerce brand. This chat agent handles live post-purchase queries: order status, returns, exchanges, and delivery updates. Do not assist with pre-sales queries, product recommendations, or pricing — direct those to the sales team."Set custom instructions: Chat responses should be shorter and more conversational than email responses. Define tone, response length expectations, and any brand-specific language rules.
Example: "Respond in a friendly, helpful tone. Keep responses under 80 words. Use contractions. Never use jargon — always use plain language. If you cannot resolve the issue within three turns, offer to connect the customer with a live agent."
Best practice: Chat customers expect instant responses. Short, direct answers perform better in chat than comprehensive explanations. Save detailed instructions for edge cases and escalation triggers rather than using them as default response templates.
For the full instructions configuration guide, see Configure agent identity and instructions.
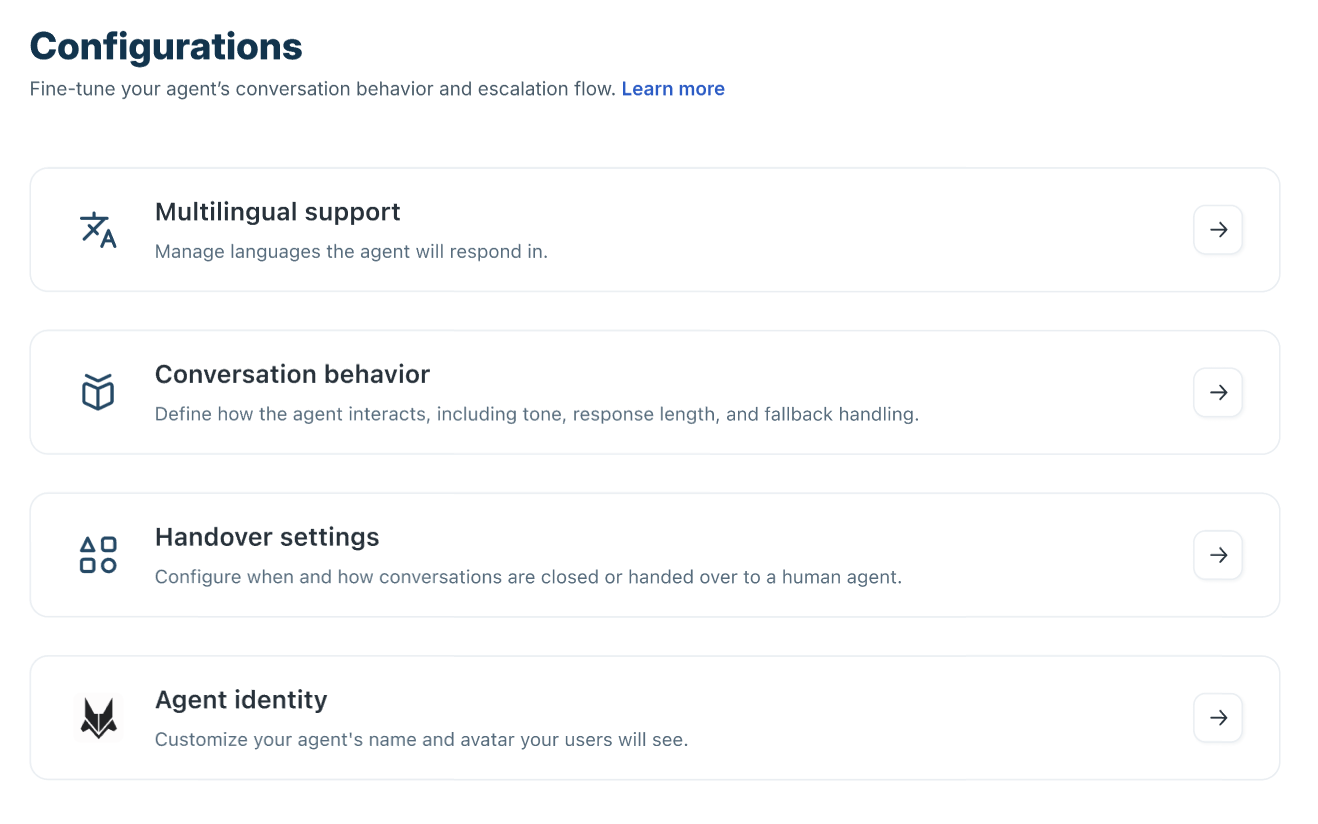
Set configurations
Navigate to Build > Configurations and configure the following settings:
- Multilingual support: Manage the languages the agent responds in.
- Conversation behaviour: Define how the agent interacts, including tone, response length, and fallback handling.
- Handover settings: Configure when and how conversations are closed or transferred to a human agent.
- Agent identity: Personalize the agent’s name and avatar visible to users.
- Multilingual support: Multilingual support enables the AI Agent to reply in various languages depending on user input. Choose from the pre-configured list of supported languages—click the 'See supported languages' link to see them. This feature guarantees a consistent user experience across different regions and customer groups.
With multilingual support,- The agent automatically detects the user’s language.
- Responses are generated in the detected language.
- If the language is unsupported, fallback handling is applied.
- Handover rules still apply regardless of language.
- Conversation behavior: Conversation behaviour settings help you standardize greetings, handle unanswered queries, collect structured information, and manage conversation closure or escalation. You can,
- Send introductory message
- Send fallback messages
- Collect feedback
- Collect user details
- Handover settings: Handover settings determine when conversations are transferred to a human agent or automatically closed, ensuring a smooth escalation without disrupting the customer experience.
You can,- Transfer to a human agent
- Auto-resolve conversations
- Transfer outside business hours
- Agent identity. For the chat agent, agent identity controls the name and avatar that appear in the chat widget.
- Enter the display name customers see in the widget — for example, "Aria" or "FreshCart AI".
- Upload an avatar image. This appears next to each AI message bubble in the chat widget.
- Save.
For full configuration of handover settings, auto-resolve, outside business hours, and feedback — see Configure chat handling rules and live handoff.
Test the agent before deploying
Navigate to Test in the left navigation. Testing your chat agent before mapping it to a live channel is strongly recommended.
Preview — single-query testing
- Select Preview AI agent from the bottom of the left navigation or from the top right of the agent view.
- A preview widget opens — identical to the live chat widget customers see. Type a query to test the agent's response.
- Test the complete conversation flow: greetings, knowledge-based responses, workflow triggers, and escalation behavior.
- Use multi-turn testing to verify context handling — submit follow-up messages in the same thread to check whether the agent maintains context correctly.
Evaluate — bulk query testing
- Select Test in the left navigation, then select Evaluate agent.
- Build a test query set by adding queries manually, generating sample queries aligned to your business context, or importing solved historical conversations.
- A maximum of 50 queries per evaluation run is supported.
- Select Run evaluation. Results show Answered, Unanswered, or Error status per query.
- Select any row to inspect the full response, citations, and workflow triggers for that query.
- For queries the agent could not answer, select Add Q&A to create a knowledge entry directly from the result.
Best practice: Run an evaluation with at least 20 queries before going live — including edge cases, multi-intent questions, and queries in non-primary languages if multilingual support is enabled.
Deploy the chat AI agent
To deploy the AI Agent onto channels:
- On the AI Agent Studio page, click Deploy.
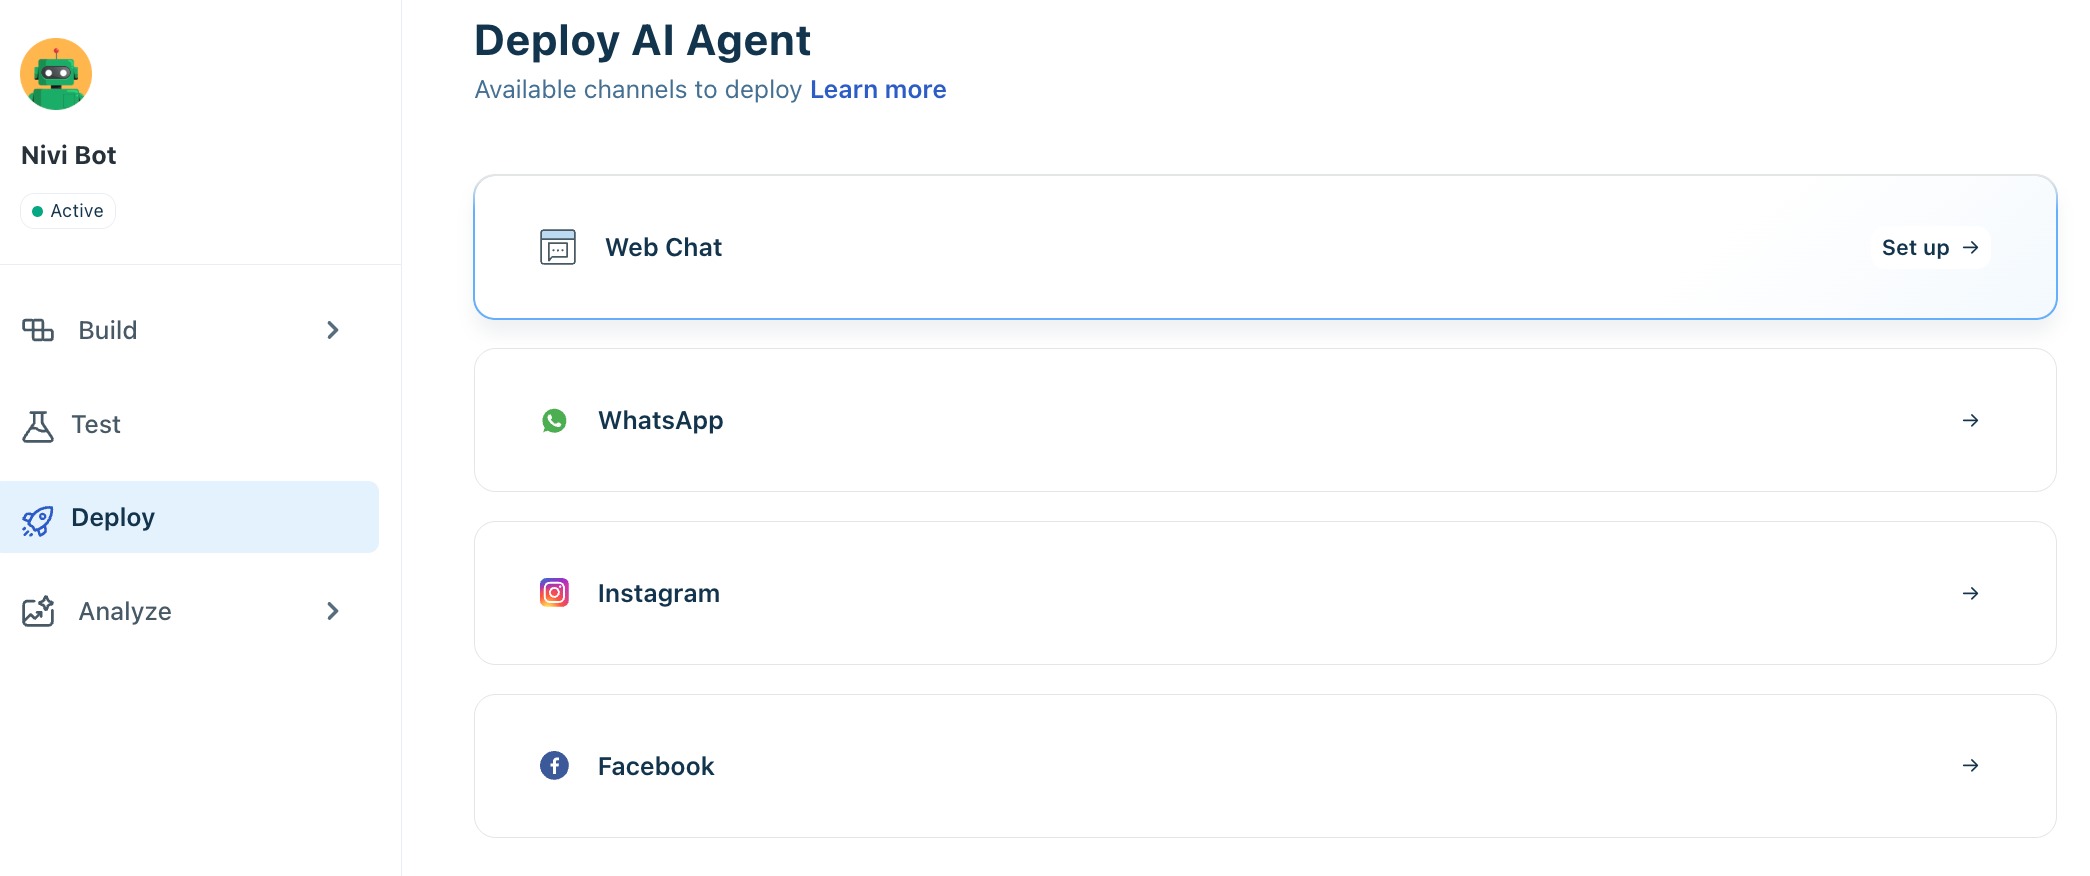
- Select the channel where you want to deploy the AI Agent, then click Set up. You will be redirected to the respective channel configuration page for the selected channel.
For example, if you choose Web Chat, you will be redirected to the Web Chat Topic Configuration page.
- Choose the Web Chat topic on which you want to deploy the AI Agent.
- Click Configure and enable Start with AI Agent.
- Choose the AI Agent to map.
- Click Publish.
The AI Agent will now be linked to the Web Chat widget associated with the Web Chat Topic. You can then deploy the widget on your website or product portal. For more details, see Create Web Chat Topics.
Note: One active agent per channel- Each Freshchat widget or messaging channel can have only one active chat AI agent at a time. If a channel already has an active agent, you must deactivate that agent before mapping a new one.
Session consumption in chat
Chat AI agents use a session-based metering model. Understanding how sessions are counted helps you plan capacity and avoid unexpected interruptions.
Scenario | Session consumed? |
Customer sends the first message — agent responds | Yes — one session consumed |
Conversation initiation workflow fires (welcome message sent before customer types) | Yes — session consumed when the welcome message is sent, regardless of whether the customer replies |
Customer opens the widget but does not send a message | No — no session consumed |
Auto-resolve fires after inactivity | No additional session — the session was already consumed at conversation start |
Session limit reached — agent stops responding | New conversations are not handled by AI. Existing in-progress conversations complete. A banner appears in AI Agent Studio when the limit is reached. |
Session exhaustion: When your account's session limit is exhausted, all deployed chat AI agents stop accepting new queries immediately. A prominent banner appears at the top of AI Agent Studio. In-progress conversations complete without interruption. Contact your account manager or select Buy more sessions to increase the limit.