
 Community
 Video Library
 Agent Training
 Freshservice
 Freshdesk
 Freshchat
 Freshcaller
 Freshsales
 Freshteam
 Freshworks Neo
 Freshsurvey
 Growth
TABLE OF CONTENTS
- Overview of chatbots
- Create a chatbot
- Create flows
- Set up conditions
- Trigger actions
- Add rich media to the bot
- Preview the chatbot
- Publish and deploy the chatbot
- Manage chatbots
- Unpublish the chatbot
This article provides details on building chatbots and the steps to configure, deploy, and manage your first chatbot assistant.
Prerequisites
- Ensure you have admin privileges to access AI Agent Studio and set up chatbots.
Overview of chatbots
A chatbot enables you to automate customer conversations by responding to common queries, collecting information, performing backend actions, and transferring conversations to a live agent when required.
A chatbot consists of one or more flows. Each flow contains a series of connected dialogs that define how the conversation progresses. You can enhance conversations by adding conditions to control different conversation paths and actions to perform backend operations such as calling APIs, updating user properties, or transferring conversations.
Together, these components enable a chatbot to handle multiple customer scenarios instead of following a single fixed conversation.
Create a chatbot
You can either build a chatbot from scratch or copy an existing configuration.
Tip: You can also create chatbots using pre-built templates. The chatbot template library includes templates for industries such as healthcare, airlines, and more. For more information, see Use chatbot templates.
Follow these steps to set up your first chatbot:
- Log in to your account and from the left nav bar, go to AI Agent Studio > Chatbots.
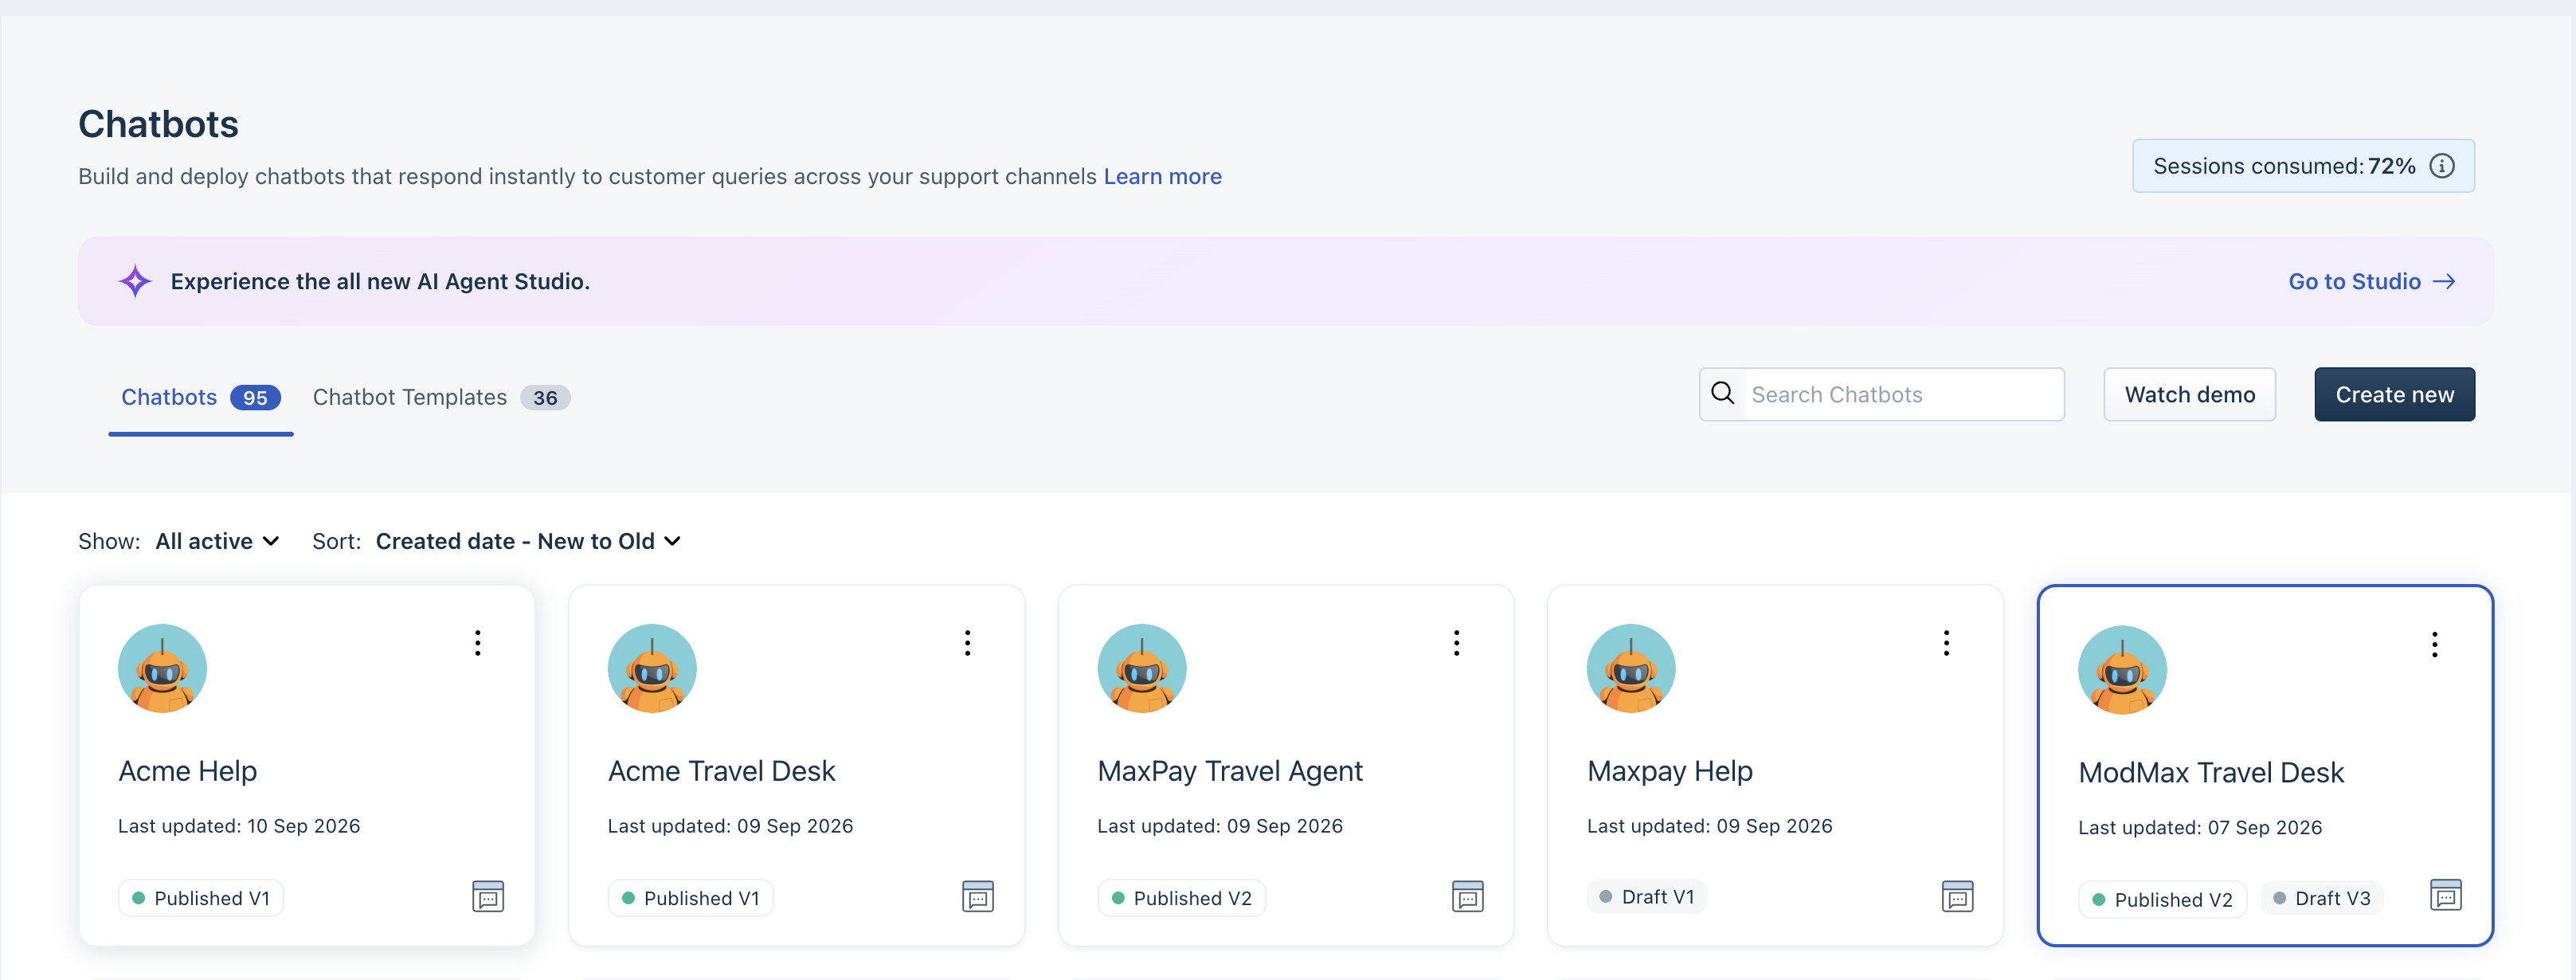
- Click Create new.
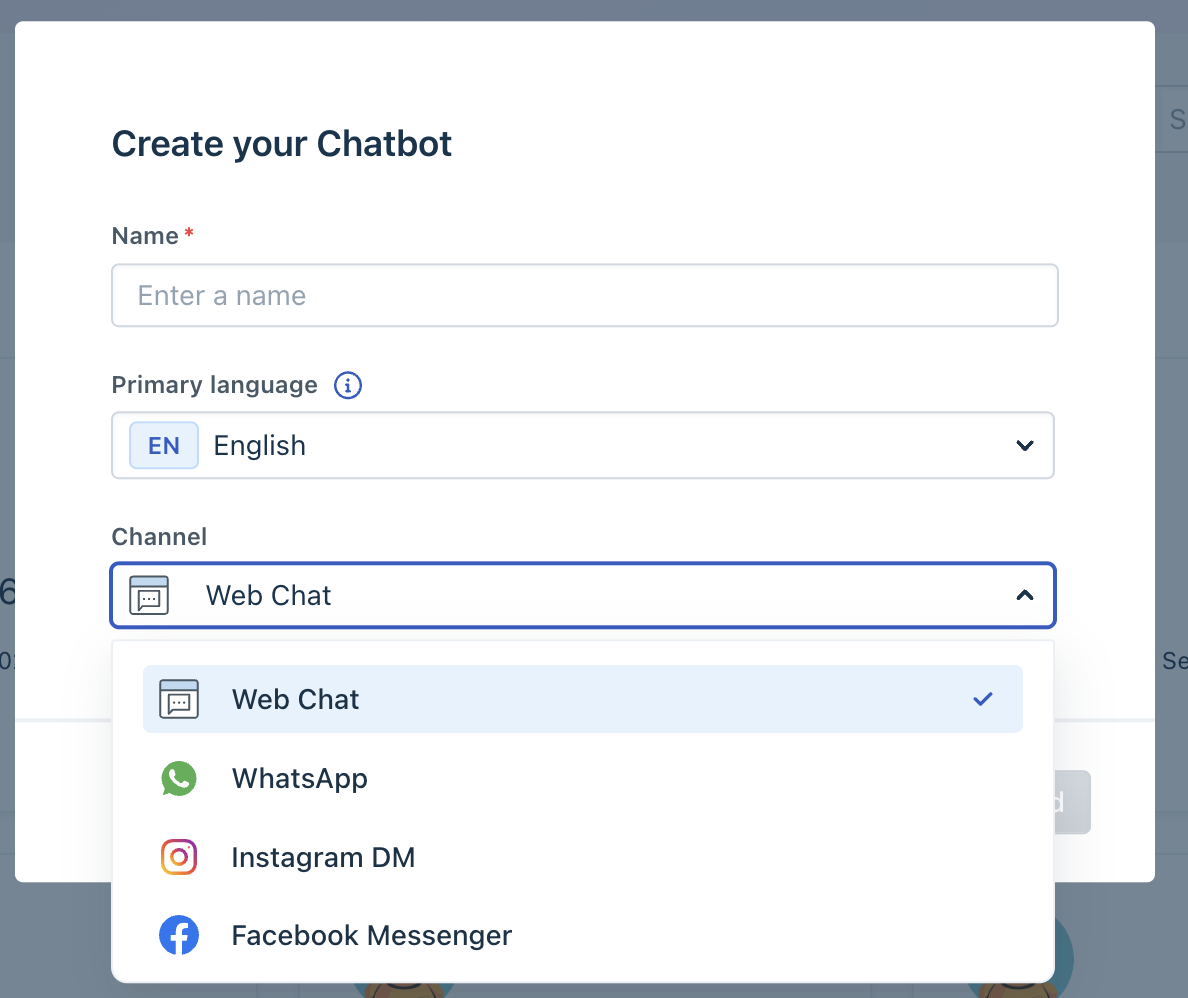
- Enter the Name.
- Select the Primary language and your preferred Channel.
- Click Proceed.
- Turn on Learn from FAQs.
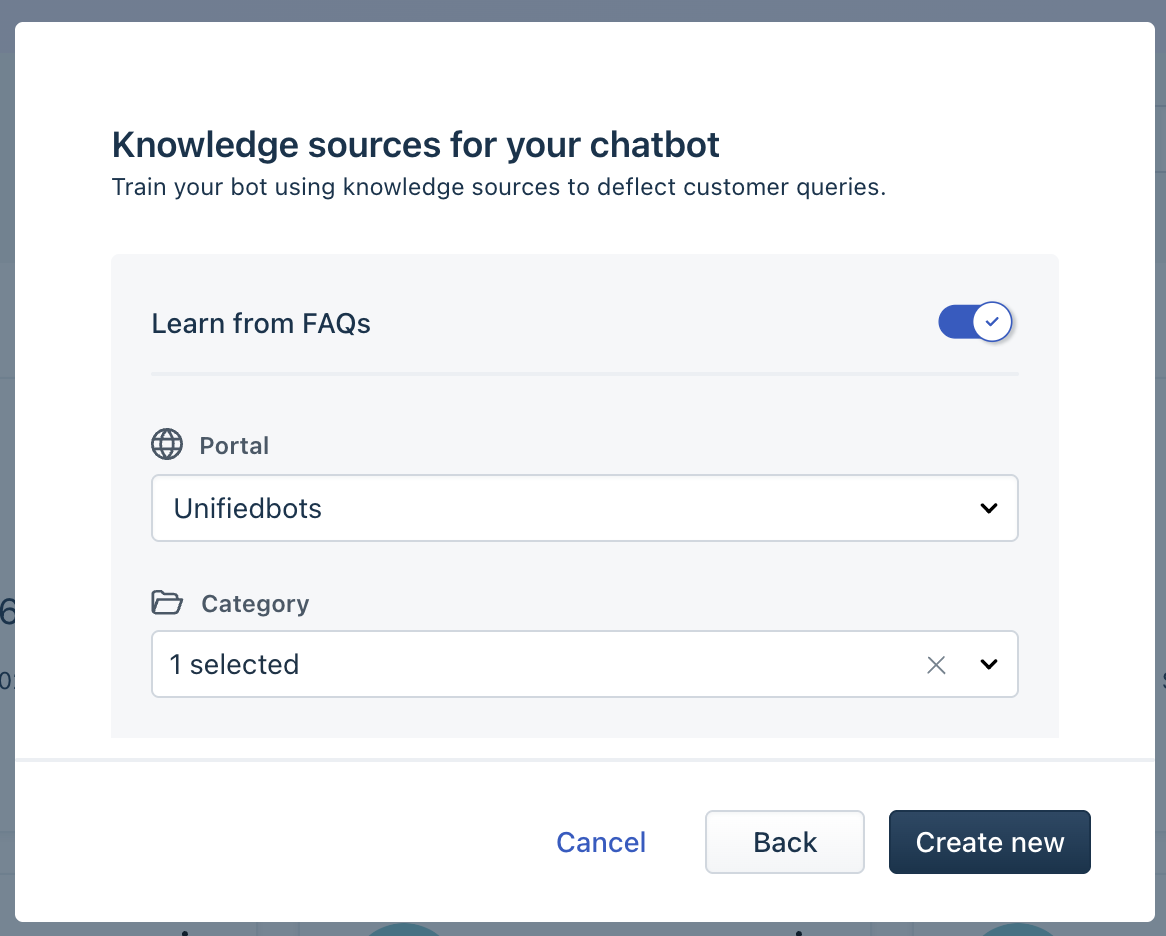 Note: This step is optional. You can enable or disable Learn from FAQs later from Natural Language Settings.
 - Select the portal and the associated categories from which you want to add the knowledge sources.
- Click Create new.
You will be automatically redirected to the Flows tab, where you can start building your chatbot's conversations. Once the chatbot is created, you are redirected to the Flows tab, where you can begin building conversations.
Clone an existing chatbot
Alternatively, you can create a new chatbot by duplicating a previously published version:
- Go to AI Agent Studio > Chatbots.
- Click on the three dots icon next to the chatbot name.
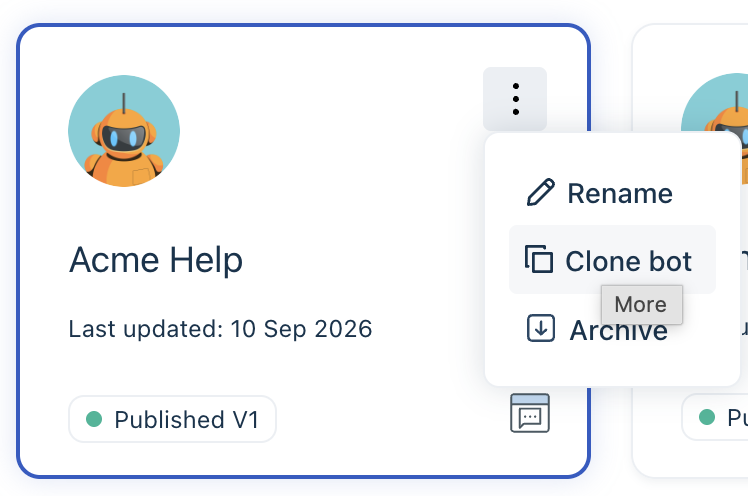
- Click Clone.
Create flows
A flow is a series of connected dialogs that form a chatbot. You can implement any number of flows within a single chatbot to handle distinct scenarios. These flows execute sequentially when the chatbot is triggered.
When you create a new chatbot, you will be automatically redirected to the Flows tab, where you can see pre-configured sample flows designed to help you get started.
To build and manage your conversational paths, follow these steps:
- In the Flows tab, navigate to the workspace canvas.
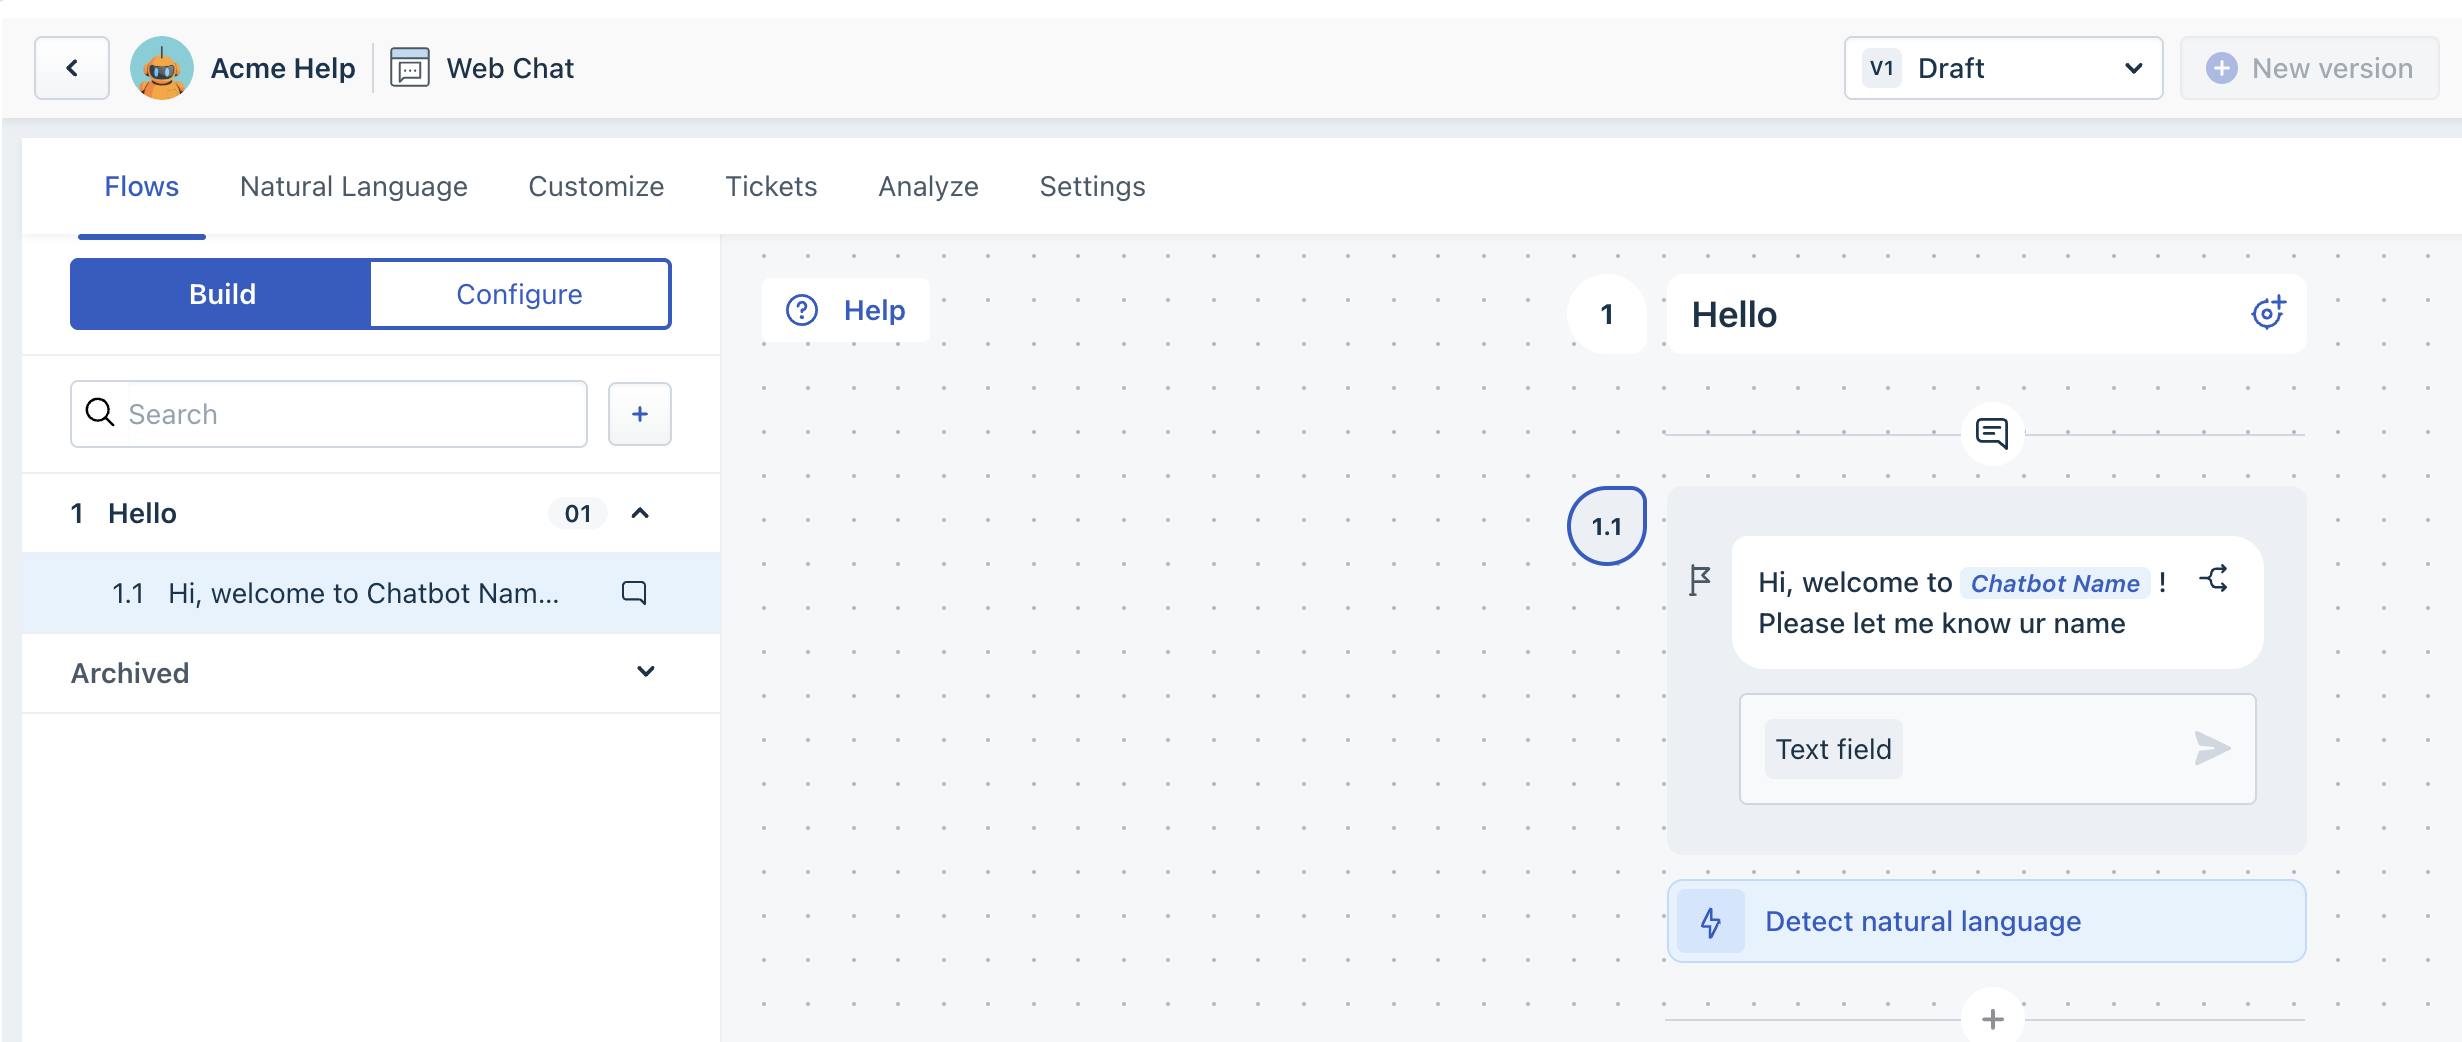 Tip: You can also create a new flow by cloning an existing one. To clone a flow, hover over the specific flow and select Clone.
 - Your first dialog will be automatically added. You can start adding more dialogs to the flow.
- For each dialog, insert either a message or an action. For more details, see Create and manage dialogs in bot flows.
Note: You can delete an individual dialog block if it is no longer required. However, you can only archive an entire flow; flows cannot be permanently deleted.
Tip: You can move dialog boxes within a flow, adjust the structural order of flows, and rearrange custom buttons and dropdown choices to refine the user experience after building them.
Set up conditions
By default, all created dialog boxes execute in sequence unless a specific condition redirects the customer to a different path or breaks the flow. If you use input elements, such as buttons or carousels, you can trigger specific paths corresponding to the selected responses.
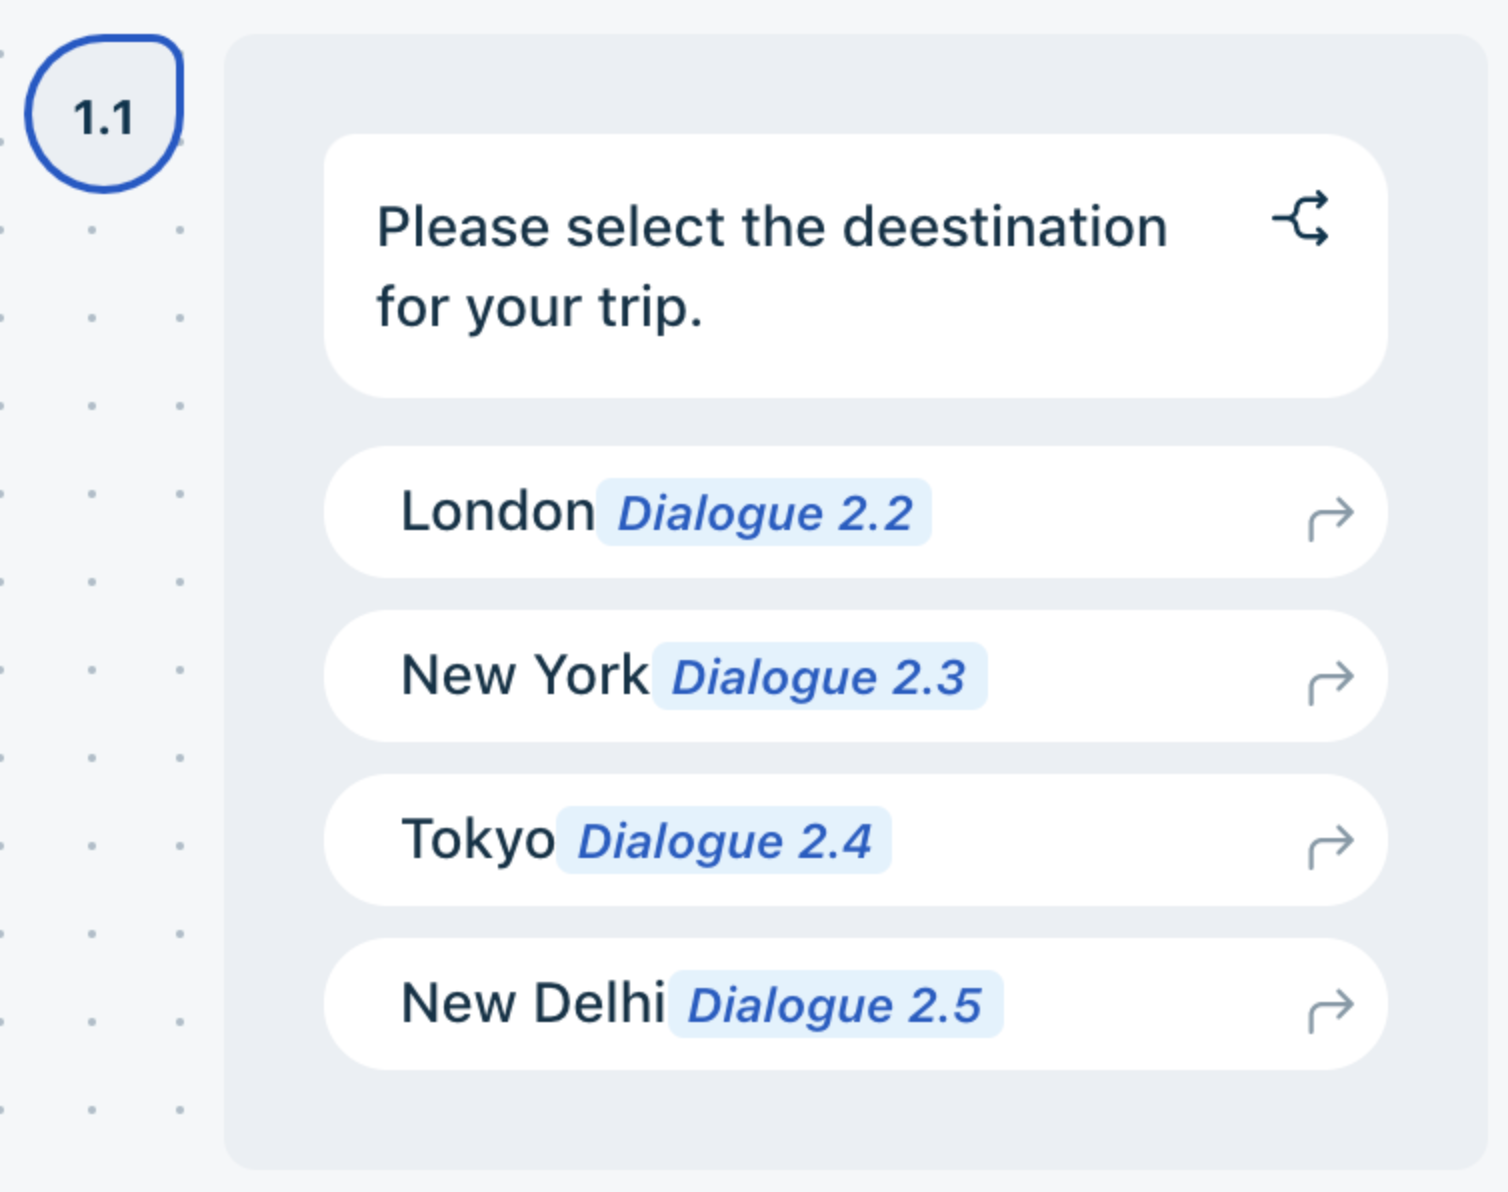
Similarly, you can redirect customers to a particular dialog in a completely different flow based on their choices. You can also add nested AND/OR operators for advanced logical evaluations.
The following table provides examples of how conditional rules can be applied to handle customer inquiries:
Use case | Evaluation/conditions | Resulting action or flow |
|---|---|---|
Travel agency | The customer selects a specific vacation destination type or region preference. | Displays filtered destination choices and customized planning tips. |
Banking | Customer inputs or confirms their current age value. | Evaluates chronological brackets to display matching product interest rates. |
Trigger actions
You can execute backend system events or widget adjustments natively within a conversation. The Actions feature allows your chatbot to execute automated tasks based on your operational requirements.
For example, you can trigger an API as part of a dialog to create a ticket in Freshdesk and store the generated ticket ID within your API parameters. Using the Trigger API action, you can fetch that ticket ID and show it directly to the customer during their live interaction.
To add an action to a conversation block, follow these steps:
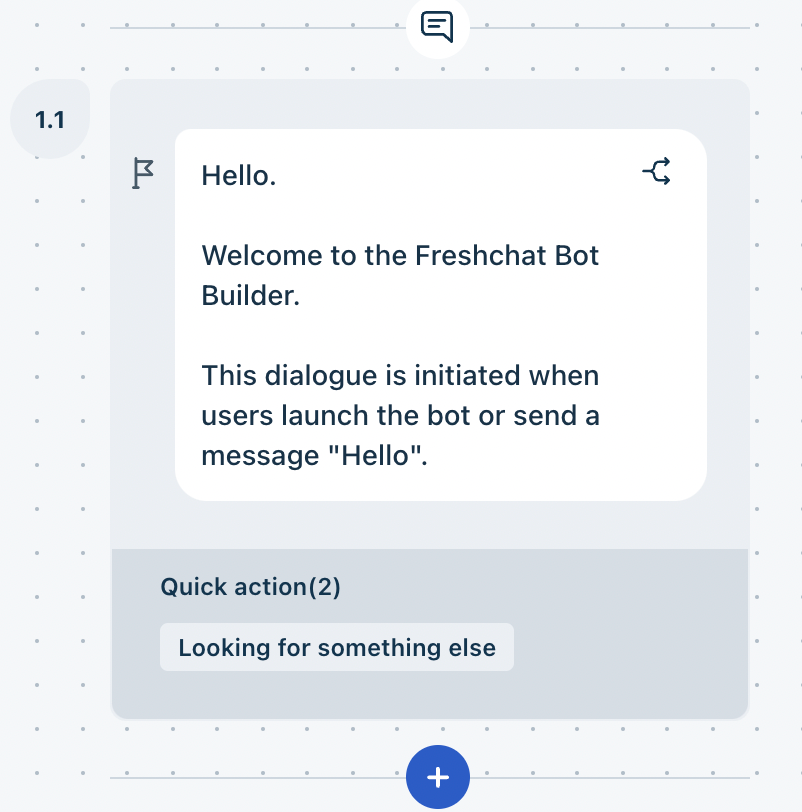
- Open the flow builder and select any dialog.
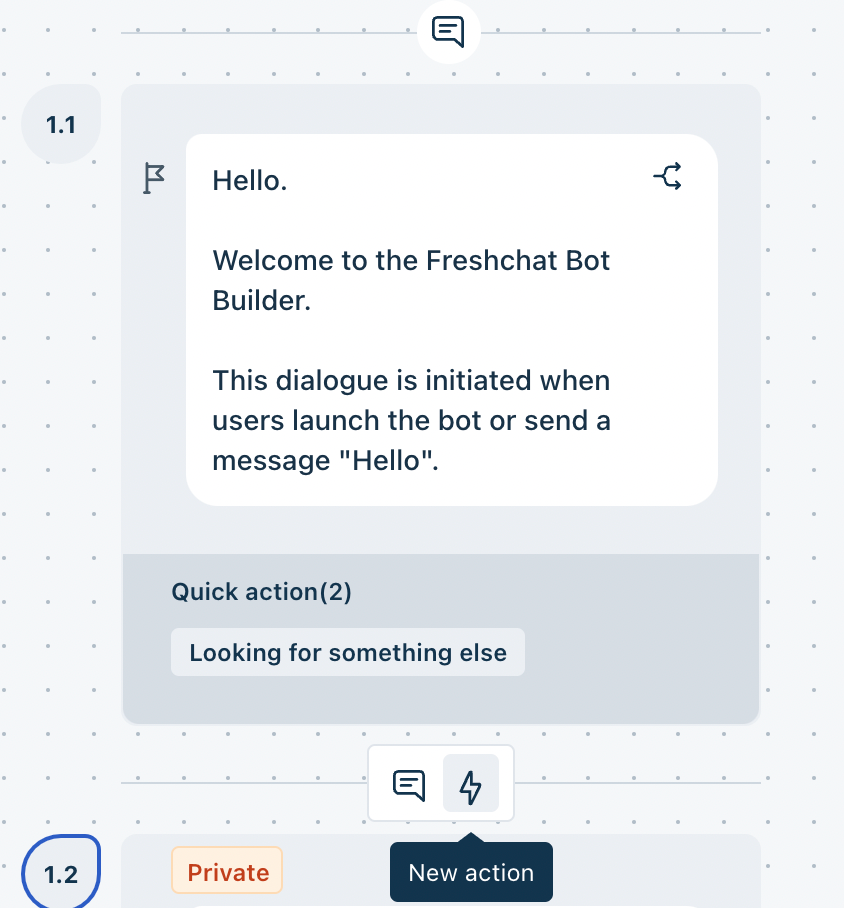
- Click on the plus (+) icon within a dialog.
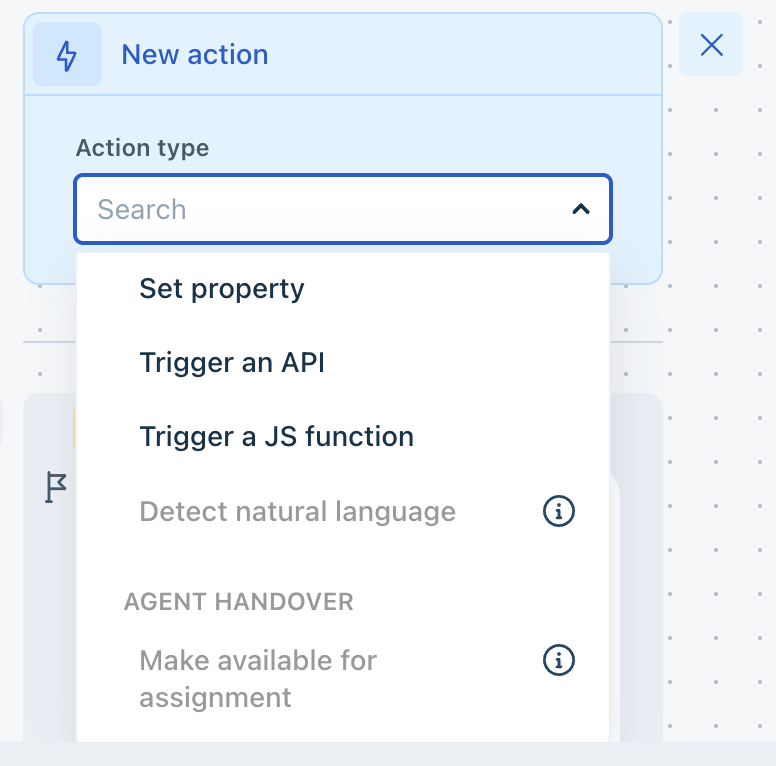
- Click New Action.
- Select your preferred action type. The different action types you can add are:
- Dynamic actions: Trigger APIs, set user properties, or transfer conversations to Answers.
- Agent handover: Transfer the interaction to a live support agent.
- Ticket actions: Initiate, suspend, or resolve support tickets.
- Widget actions: Execute web widget events, such as auto-triggering actions on opening.
 |  |  |
For more details on triggering actions, see Configure actions in the bot builder.
Add rich media to the bot
Your bot can send and receive rich media, such as images, files, and videos, to help customers understand information or share details with your business. Rich media can be useful when information is easier to explain visually or when customers need to provide supporting documents or images.
For example, an e-commerce bot can send a product image or ask a customer to upload a photo of a damaged item to initiate a refund. You can also use rich media to share video tutorials, demonstration videos, invoices, or product catalogs.
To add rich media to a bot flow:
- Navigate to the Bots module and open your bot.
- Open the dialog where you want to add the rich media.
Hover over the Upload icon and attach an image, file, or video to the bot flow.

You can upload images from your local drive or use a publicly hosted URL. Publicly hosted URLs are supported for images and files.
Supported rich media
| Type | Size limit | Supported formats or vendors |
|---|---|---|
| Image | 25 MB | JPG, PNG, GIF, JPEG |
| Video | No file upload limit | YouTube, Vimeo, Vidyard, Loom, Wistia |
| File | 25 MB | CSV, DOC, DOCX, ODT, PDF, PPS, PPSX, PPT, PPTX, TXT, XLS, XLSX, XML, MOV, MP4, MP3 |
Preview the chatbot
After completing the chatbot configuration, ensure that you validate the end-to-end conversation flows before making them live.
- Click the Preview button in the top-right corner of the builder interface.
- To visualize the global connections and transitions between your different flows, click the Holistic view button on the bottom left.
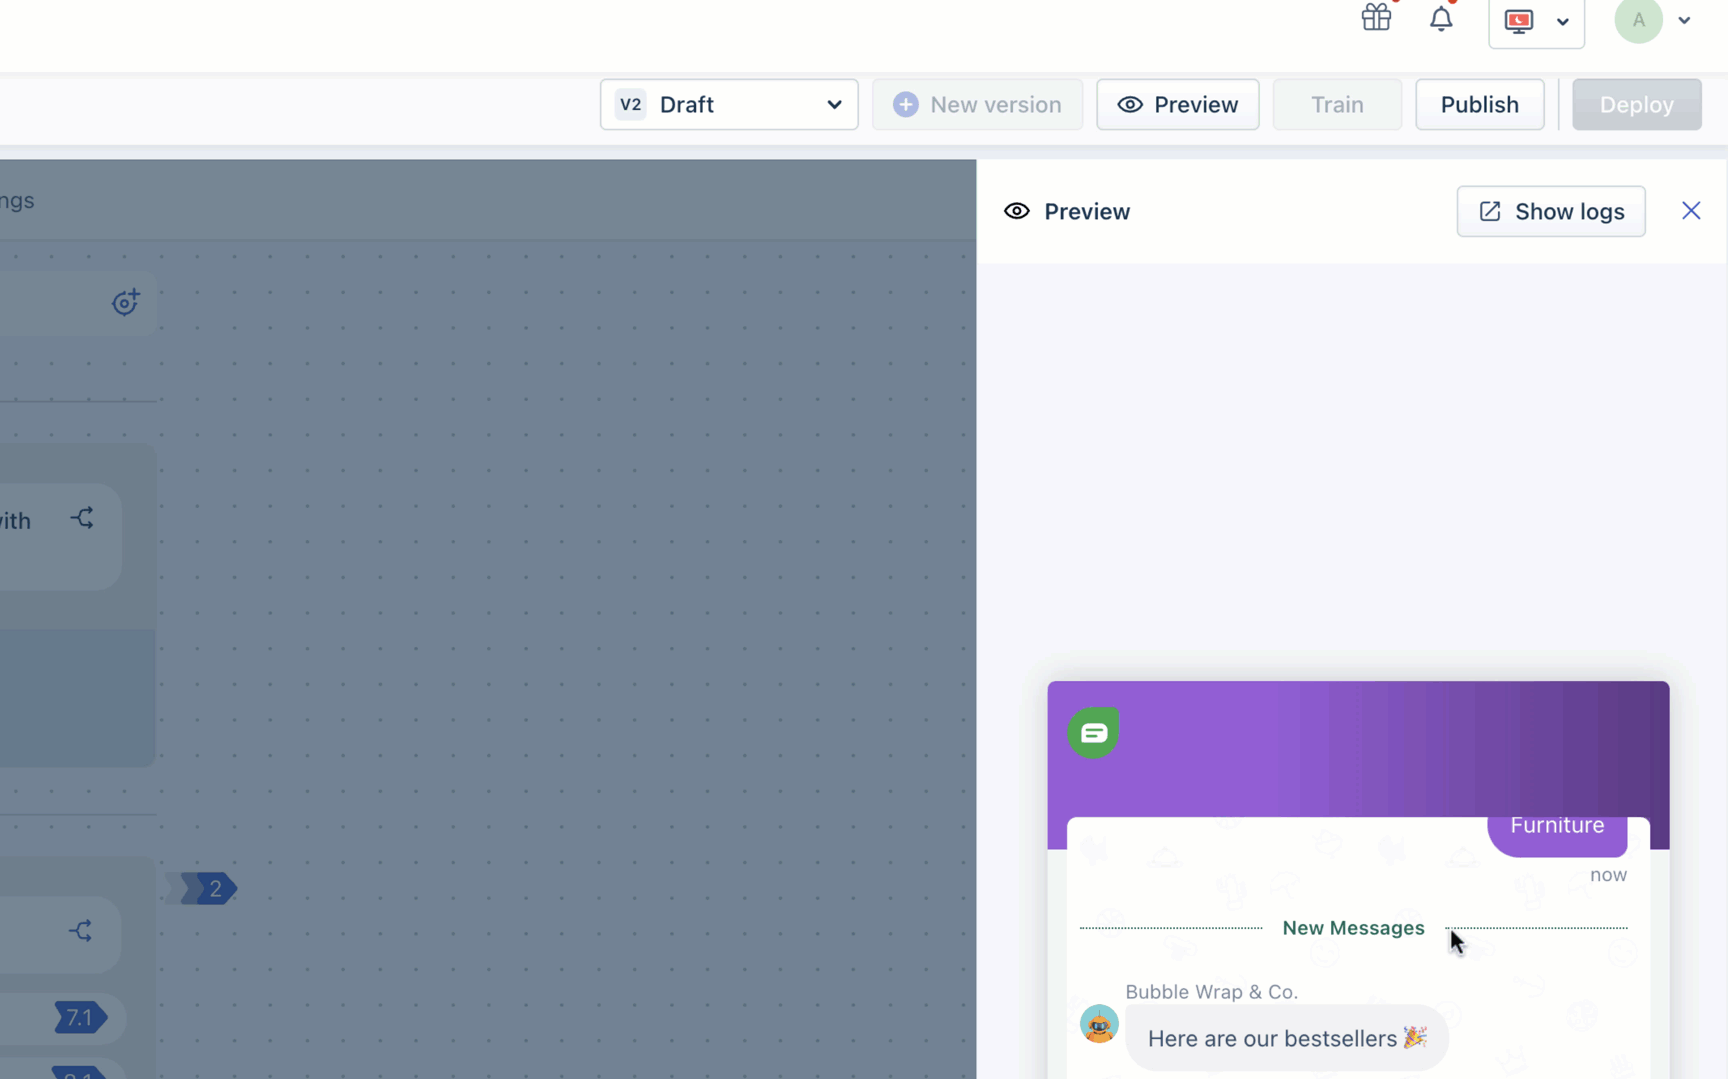
Note: When you preview a chatbot, you can use the show logs button to switch to the Tickets tab. This helps you debug your conversations by displaying the ticket ID, active API calls, and the exact locations where a flow breaks.
Publish and deploy the chatbot
Once you complete the configuration, you can publish and deploy the chatbot to the channel selected during the initial setup phase. For example, if you choose Web chat as your channel, you are automatically redirected to the corresponding widget deployment page.
- Open your completed chatbot draft and click Publish. You will be automatically redirected to the associated channel deployment page.
- Choose the specific topic on which you want to deploy your bot.
To learn more about mapping your chatbot to the various channels, see Map your chatbots to various supported channels.
Manage chatbots
From the Chatbots page, you can rename, clone, archive, sort, and search your chatbots without opening the flow builder.
You can perform the following tasks on your chatbots:
- Search: Use the Search Chatbots to find specific chatbots.
- Sort: Organize your list of chatbots using the Sort dropdown. You can sort chatbots by Created date, Bot name, or Version count.
- Clone: Duplicate a chatbot configuration to create a new bot. Click the three dots icon on a chatbot card and select Clone bot.
- Rename: Change the title of an existing chatbot. Click the three dots icon on a chatbot card and select Rename.
- Archive: Move inactive chatbots out of the main directory. Click the three dots icon on a chatbot card and select Archive.
Unpublish the chatbot
If you want to temporarily deactivate a live chatbot, you can take it offline instantly.
- Locate the active chatbot in the dashboard.
- Click Unpublish.
 Note: Unpublishing a live chatbot version does not make its flows immediately editable. You must create a new version and ensure the chatbot is in a Draft version status to modify its flows.
Next steps
Once your flows are built, the bot builder offers several features for configuring the chatbot:
- Natural Language: Train the bot to understand customer intent. For more details, see Configure natural language for chatbots.
- Customize: Adjust the chatbot's appearance and widget behavior.
- Tickets: Manage ticket-related behavior for the chatbot. For more details, see Monitor ticket logs.
- Analyze: Review dialog-level performance and troubleshoot errors. For more details, see Analyze chatbot behavior.
- Settings: Configure bot-level options, including Ticket settings, Trusted URLs, Language settings, Chatbot error fallback, Preview configuration, Authentication, and Post agent resolution action. For more details, see Configure additional settings for bots