For example, when your agent is on a call with customers back to back, they don't have to fill up all the details and type out the description of the ticket/email after every call. They can quickly apply a template, create a ticket/email and move on to the next call.
Creating a ticket template
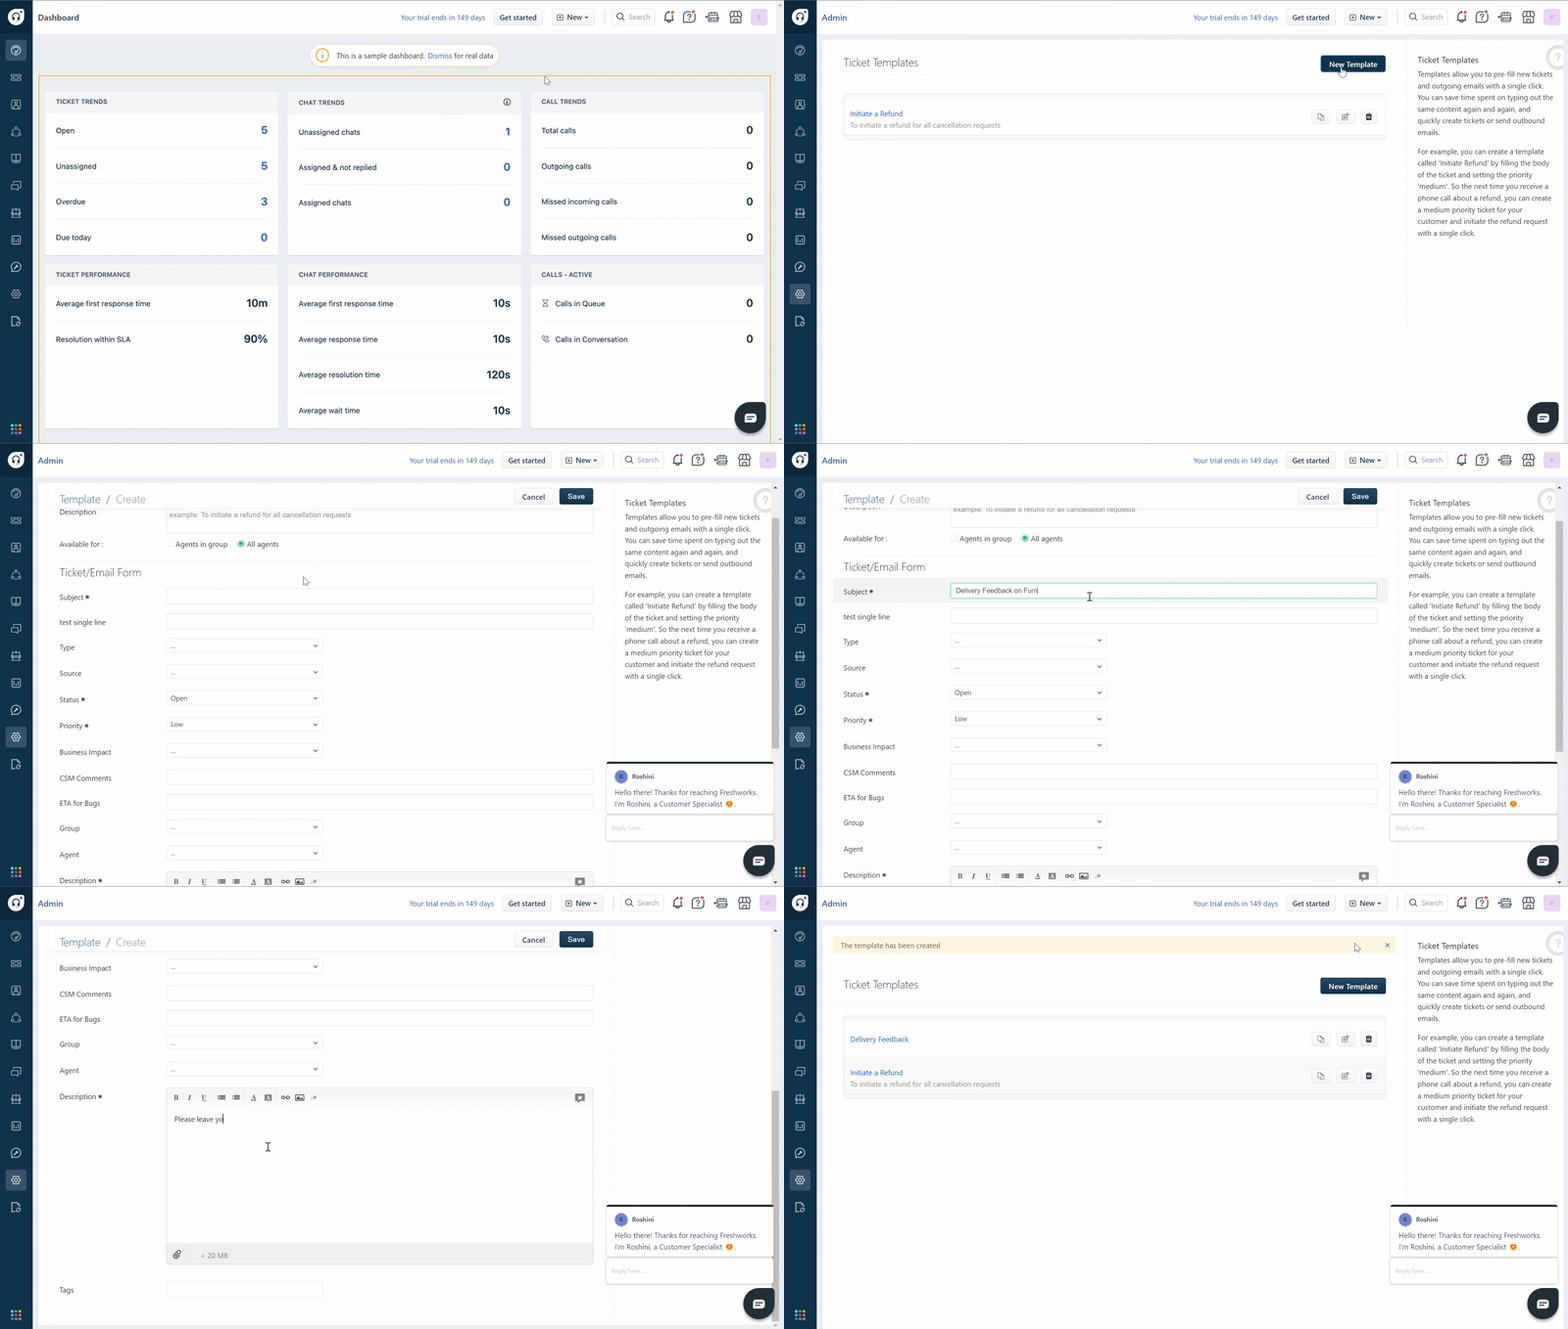
- Go to Admin > Agent Productivity >Ticket Templates
- Click on the New Template button to create a new template
- Give an understandable name for your template as it will be used by agents in a hurry
- After giving a description to your template, you can choose if this template can be seen by all agents or only by agents in particular groups.
- This is to make sure that the template doesn't clutter the view of those agents who will find no use of it
- The 'Ticket/Email form' section has all the default and custom fields that are visible to the agents except the requester and source fields. You can create a template by filling in as many fields as you want.
- In addition to the default ticket fields, you can pre-fill tags and attach documents in templates.
Note: Please refrain from adding signatures to the email/ticket using the ticket templates. You can create your own signature under profile settings section and that would automatically get populated in the ticket form when you're trying to create a ticket/an outbound email. - Once you fill in all the details you need, click on the Save button.

Using canned responses in ticket template description
You can also use canned responses you have already created within the template. This way, the responses you created for agent replies to tickets can also be used in new tickets and emails.
To insert a canned response, click on the star icon in the description box.

Applying templates in new ticket and new email forms
When a template is applied to a new ticket/email, all the field values will be overwritten by the template field values. For example, if your agent sets priority as 'High' and then applies the template in which the priority is set as 'Low', then the resulting ticket form will have priority set as 'Low'. So if there are some fields that your agents need to fill out manually, it needs to be done after the template is applied.
Your agents can insert ticket templates in their new ticket form by clicking on the New Ticket button and choosing a template from the list of available templates on the right.

Similarly, to apply a template to an outbound email, click on the New Email button and click on the required template from the list of available templates on the right. It is advisable to clearly differentiate the templates while naming them because unlike ticket descriptions, email subjects need to have salutations and signatures.

After the template is applied, agents can edit the field they want or just create the ticket/email after filling the requester field.
Enroll in the Freshdesk Academy for free to get access to interactive product tutorials.
